Creamy Vegan Mac and Cheese
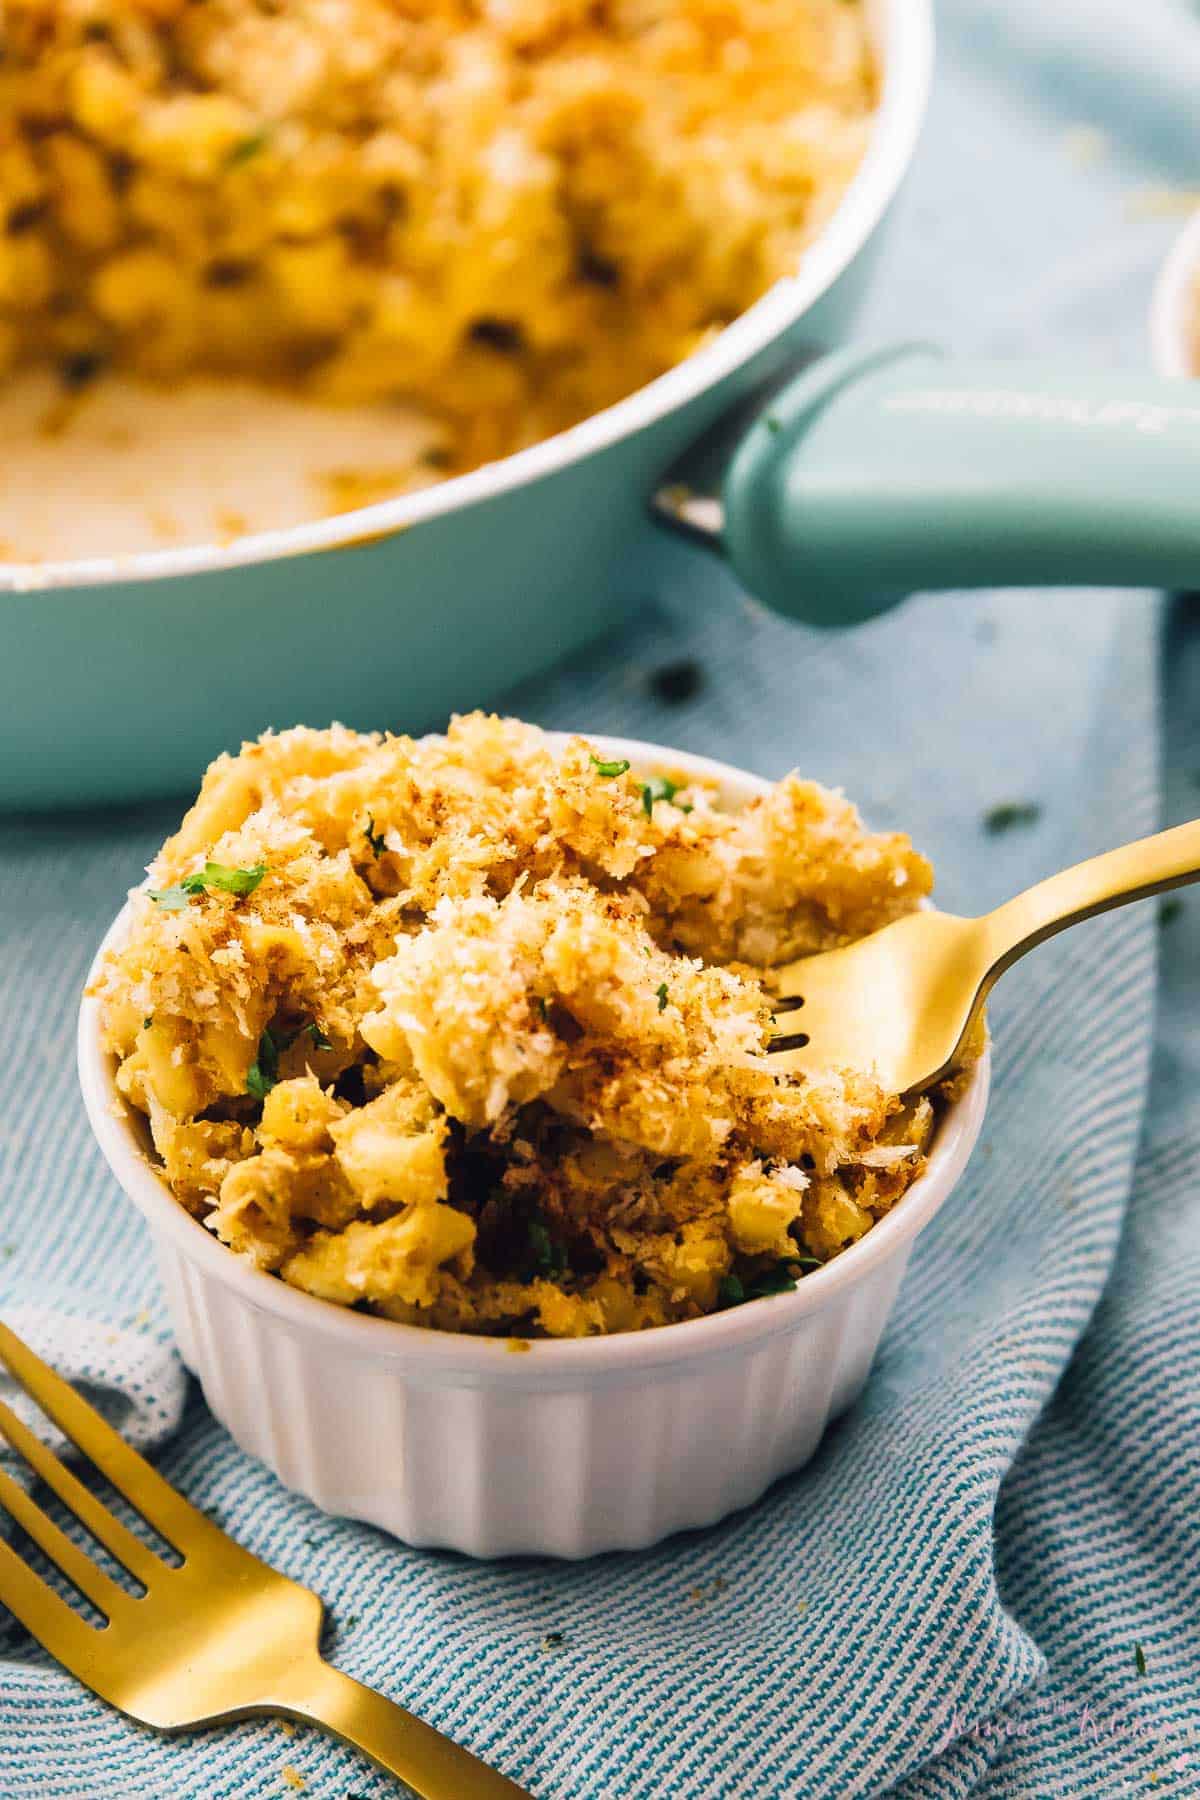
This Creamy Baked Vegan Mac and Cheese is undeniably divine! Made with an amazing, cashew based ‘cheese’ sauce, it’s the perfect addition to any meal!
Hey friends! In my kitchen, aka Jessica’s kitchen, I’ve made many dishes. Everything from tacos to no bake chocolate pudding to ice cream to even cauliflower buffalo wings. I’ve even made vegan mac and cheese before, but it was very seasonal using squash and pumpkin. After ENDLESS requests, finally, I have an everyday, weeknight vegan mac and cheese that will satisfy your cheese cravings (truly).
Oh my, friends – you will LOVE this. It’s the closest you’ll get to the real thing, and the cheese sauce is OUT of this world. Friends, this Baked Vegan Mac and Cheese is on POINT.
First of all, how am I just making this?! You may be asking. I’ve stayed away from vegan mac and cheese for a long while, because I knew that I would want to ABSOLUTELY perfect it. I wanted to make a vegan mac and cheese that had an explosive cheese taste that would make you want to share it with everyone.
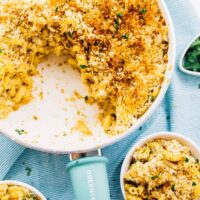
I’m teaming back up with GreenLife Cookware, a healthy ceramic non-stick coating cookware company for this post and I couldn’t be more excited. If you saw my Thai Green Curry Recipe post, you know I fell in love immediately with this GreenLife Cookware because of these gorgeous turquoise pans, and also because its lead and cadmium free, and manufactured without PFAS and PFOA.
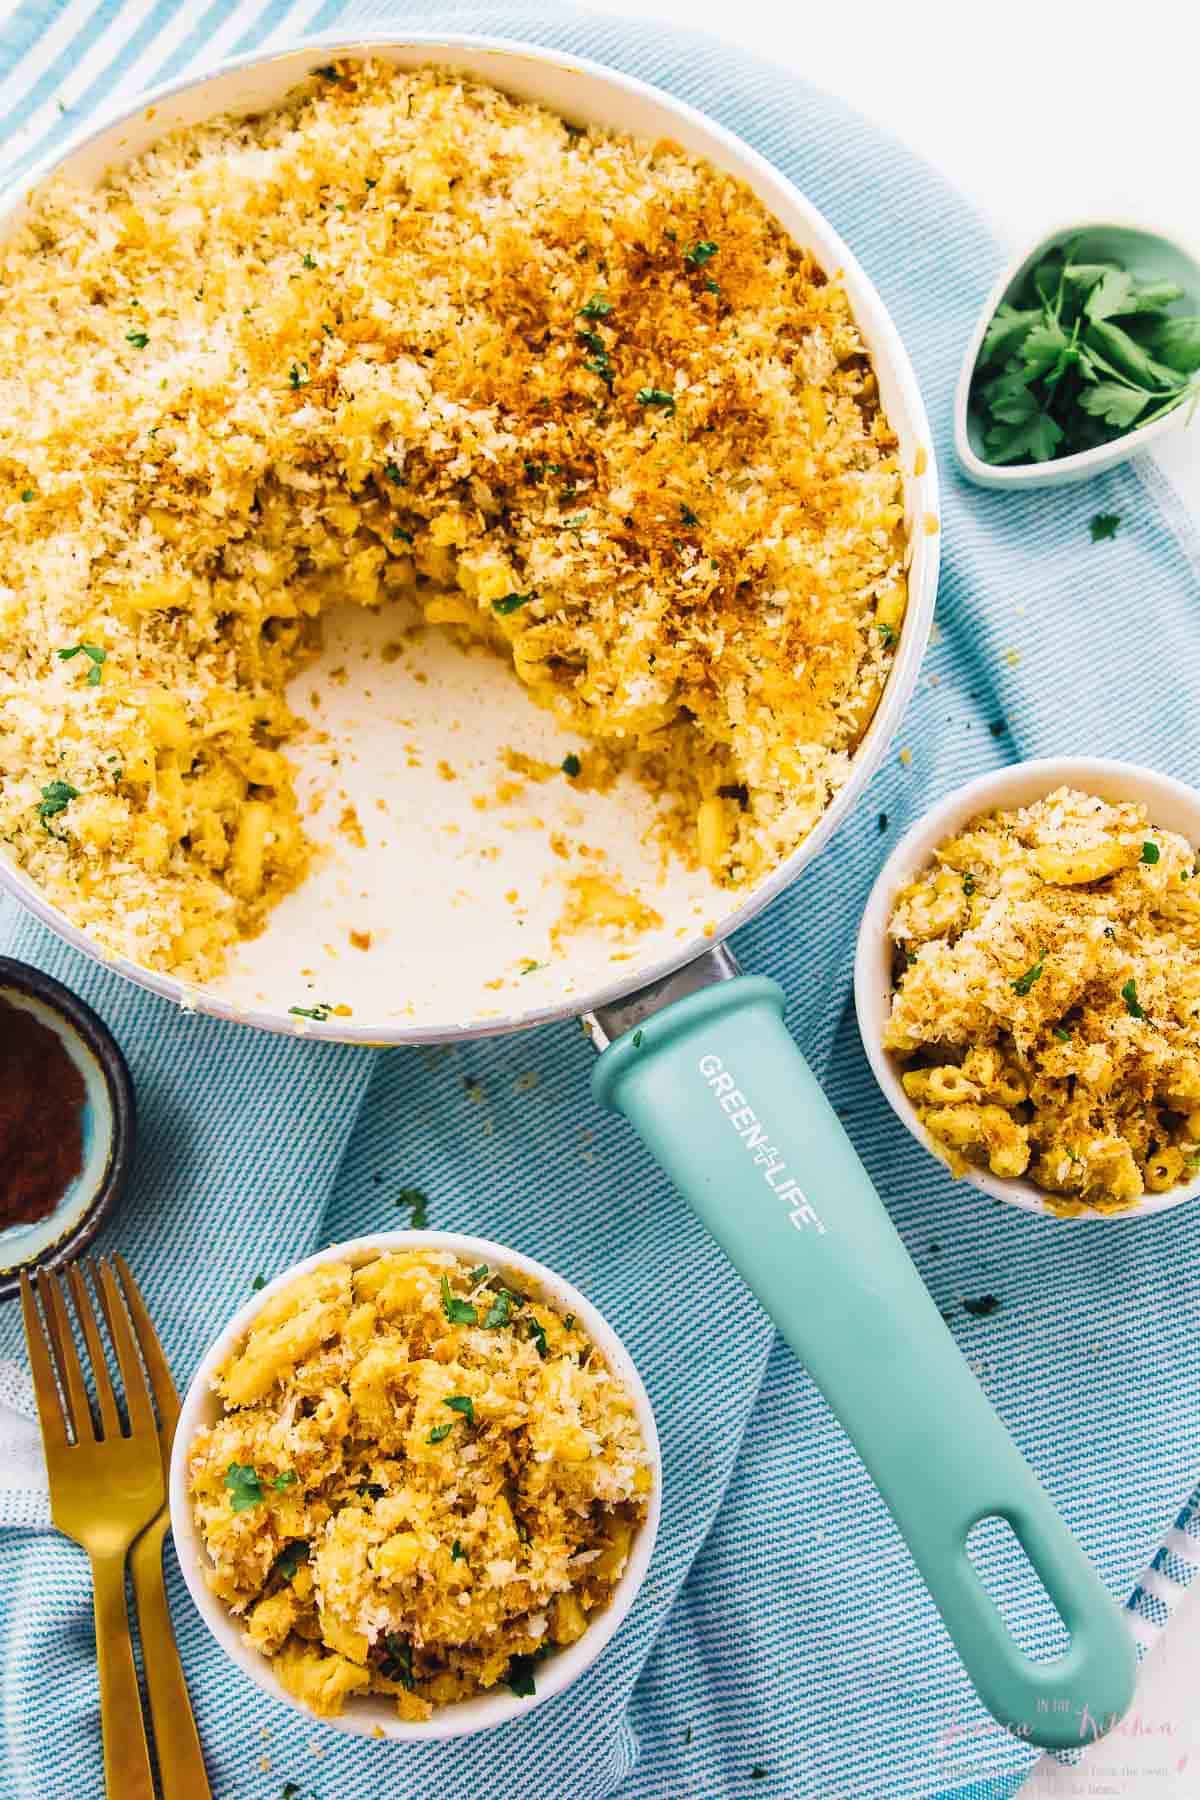
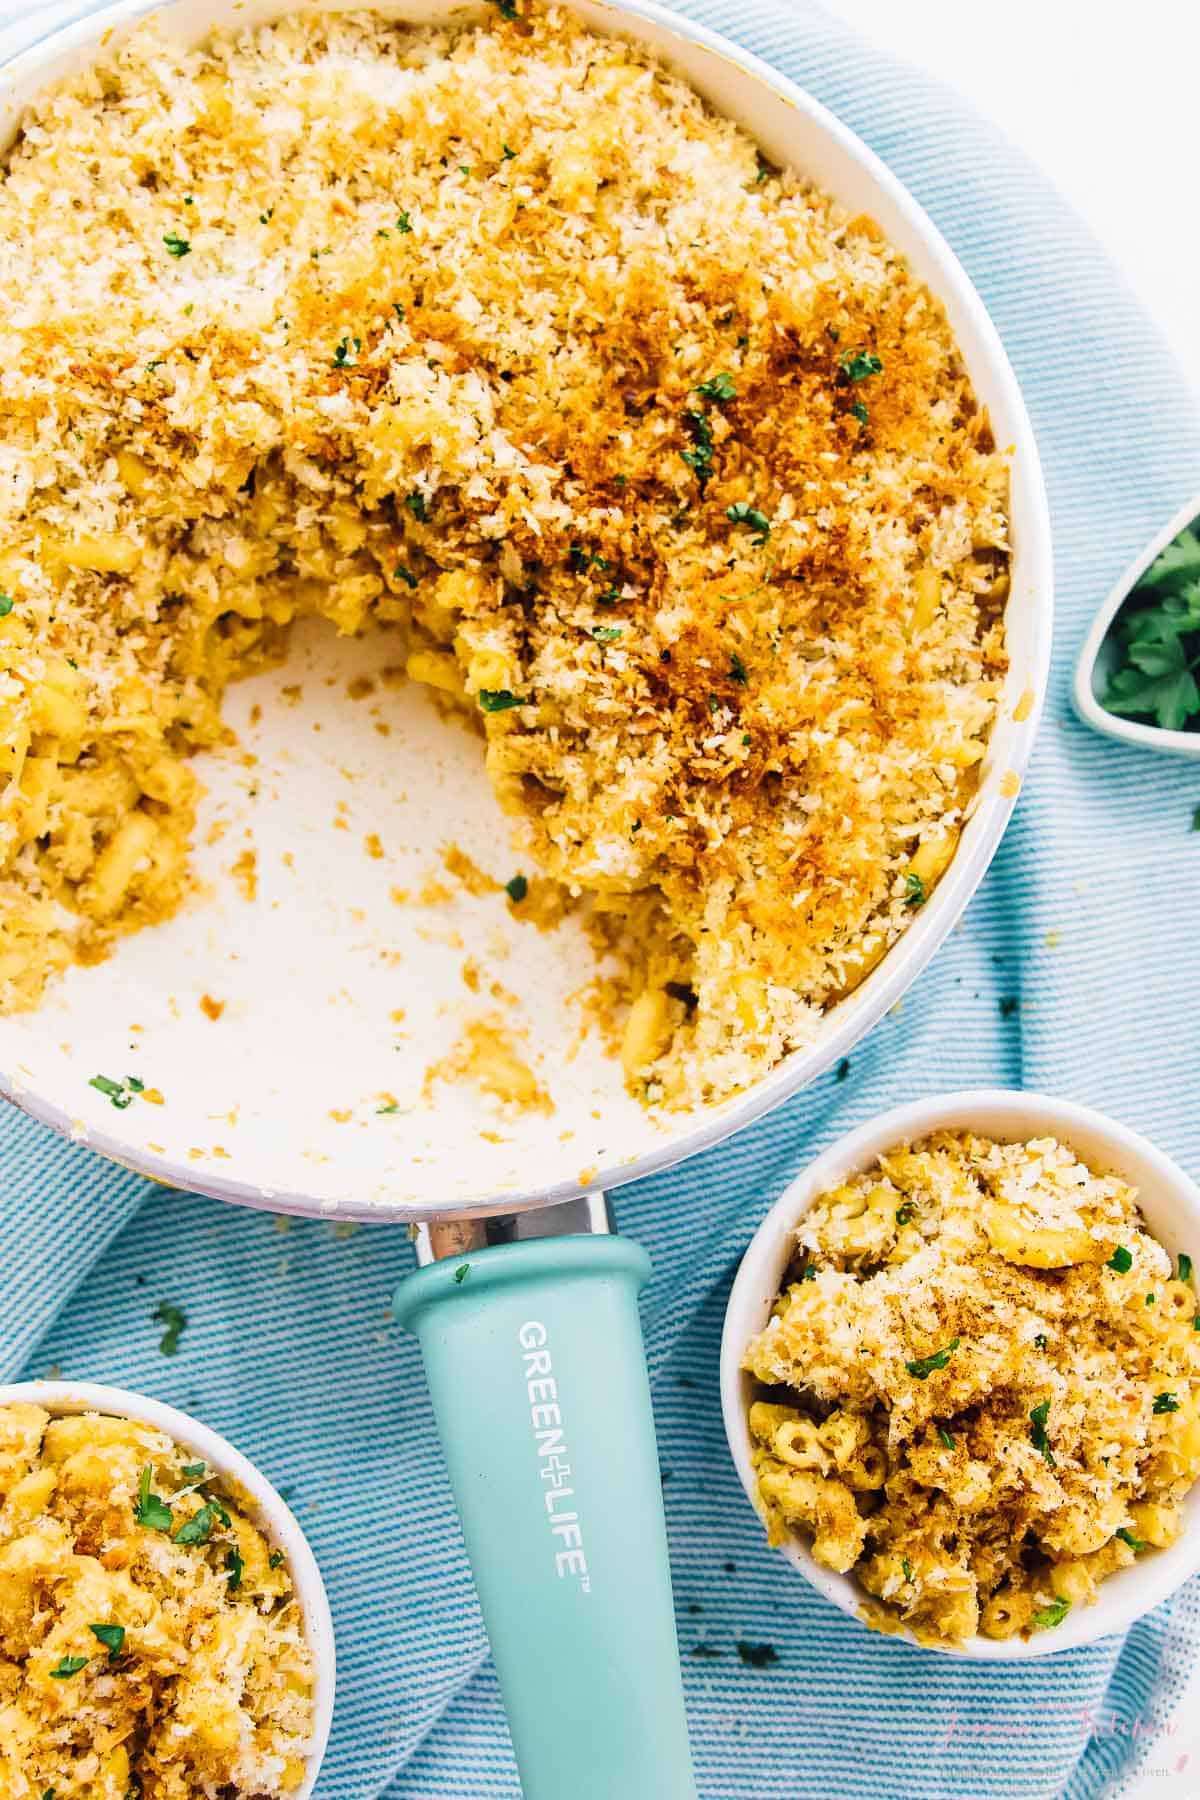
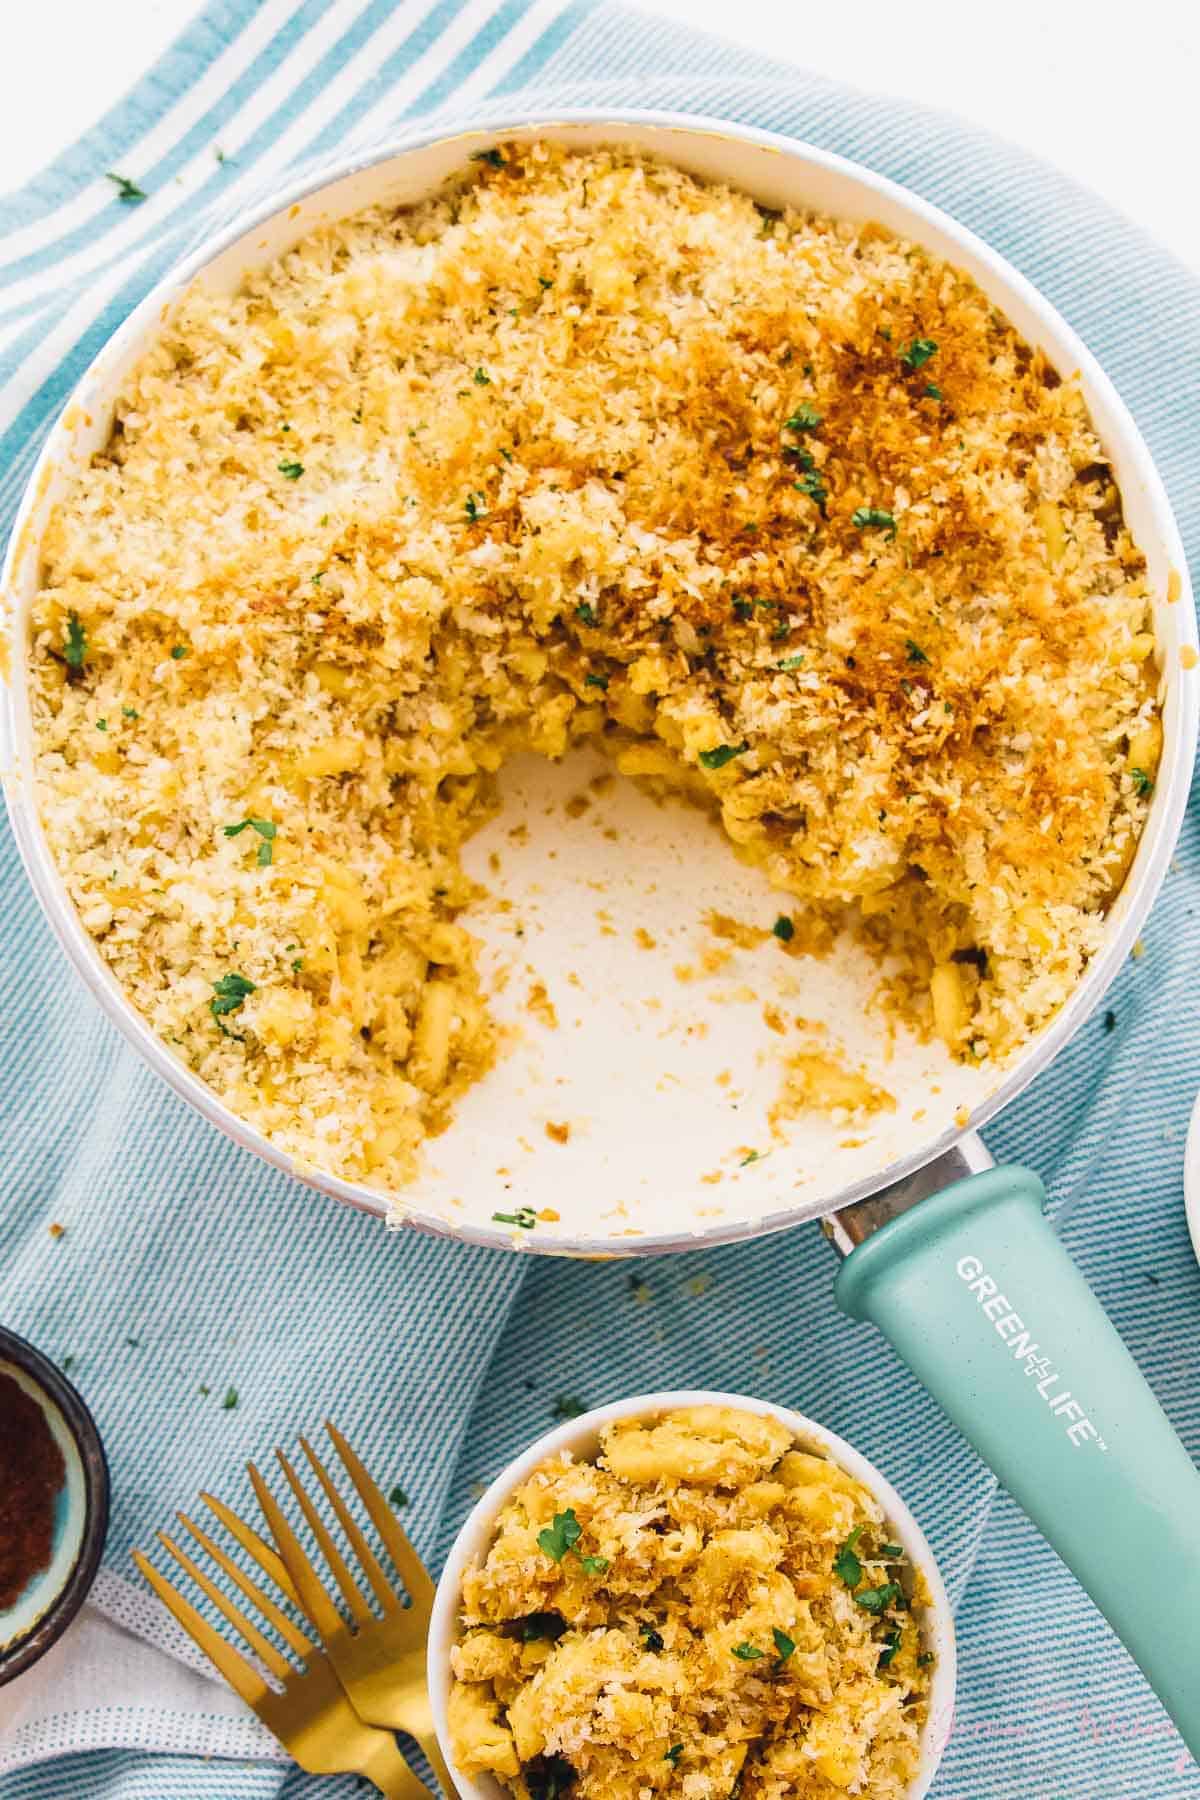
Making this vegan mac and cheese in the skillet also means you can just use the same skillet you cook in to bake it in = less dishes too friends! It also means cleanup is a complete breeze because the GreenLife Cookware pots and pan are really non-stick. If you’ve made mac and cheese before, it usually STICKS like crazy for cleanup – not here though. I am not exaggerating when I say that one quick swipe cleaned these right up.
Creamy Vegan Mac & Cheese (Gluten Free)
Ingredients
Creamy Vegan Mac & Cheese
- 3 cups elbow macaroni, gluten free if needed, 12 oz/340g
- 1 tablespoon olive oil, or coconut oil, 12.5g
- 1 large carrot, chopped, 112g
- 1 small yellow onion, halved and chopped, 72g,
- 3 garlic cloves, minced
- 1 cup raw cashews, soaked in water overnight, rinsed and drained OR just easily boiled for 5 minutes*
- 1 teaspoon sea salt
- 1/2 teaspoon ground black pepper
- 1 teaspoon dry ground mustard
- Juice of one lime, 1 tablespoon
- 1/2 tablespoon tamari sauce, or liquid aminos
- 1/2 cup nutritional yeast
- 2 teaspoons paprika
- 1/2 teaspoon ground nutmeg
- 1 1/2 cups coconut milk
Breadcrumb Topping
- 1 cup gluten free breadcrumbs
- salt & pepper to taste, for breadcrumbs
- 3 tablespoons vegan butter, or coconut oil
Instructions
Creamy Vegan Mac & Cheese (Gluten Free)
- Preheat oven to 350 F degrees.
- Prepare elbow pasta according to package directions. You can do this while the carrots are being cooked. Drain and pour into a pan (You can use the same pan as below - just leave the pasta in a colander, then after carrot mixture has been made, add to pan).
- In a pan over medium heat heat the oil add in the carrots, onions and the garlic, stirring to combine. Cover with lid and allow to steam/roast until carrots are tender, about 10 minutes.
- Remove from heat and allow to cool slightly.
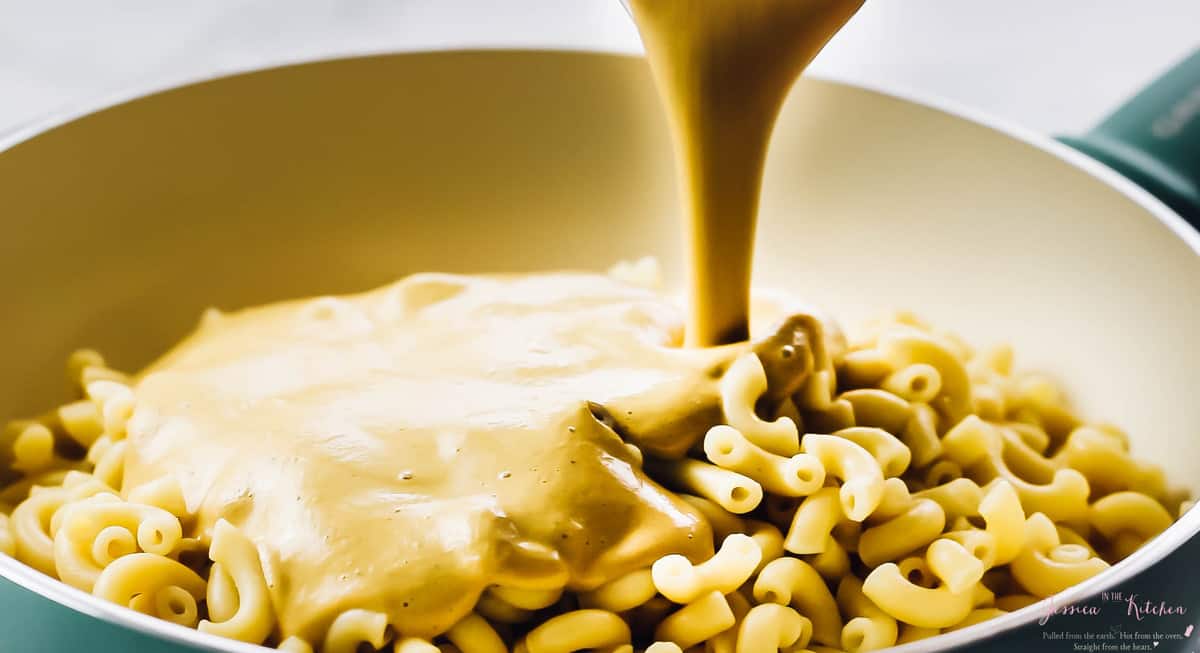
- Blend together for about 1 minute on a strong speed, until sauce is completely smooth and incorporate. Taste and add more salt if necessary.
- Pour the sauce over the Mac and cheese in a skillet. Stir to combine.
- Mix breadcrumbs, salt and pepper to taste and vegan butter in a small dish with a small whisk or fork until combined. Sprinkle over the top of the Mac and cheese, covering completely.
- Bake for 15 minutes until Mac and cheese is set, then broil for a few minutes until top is golden brown.
- Remove from oven, allow to cool slightly then serve and enjoy!
Notes
To make this soy free, you can use coconut aminos instead of tamari or liquid aminos, and soy-free vegan butter. Prep time doesn’t include soaking the cashews overnight. If you try this Baked Vegan Mac and Cheese please let me know in the comment section below, or tag me on instagram with the hashtag #jessicainthekitchen! For more exclusive recipes follow me on Instagram AND on Snapchat: jessinkitchen. This post is sponsored by GreenLife Cookware. All opinions and text are my own. Thank you for supporting the brands that support Jessica in the Kitchen.
Disclaimer: Although jessicainthekitchen.com attempts to provide accurate nutritional information, kindly note that these are only estimates. Nutritional information may be affected based on the product type, the brand that was purchased, and in other unforeseeable ways. Jessicainthekitchen.com will not be held liable for any loss or damage resulting for your reliance on nutritional information. If you need to follow a specific caloric regimen, please consult your doctor first.


Hi! I am in LOVE with your site. I stumbled upon it this week while searching for Vegan and GF recipes. I am on a 30 day detox plan and need healthy, low sodium, sugar free, vegan, GF dishes (geesh1). I tried your mushroom soup and it was DELISH. So, now I plan to try this. My question is, can I substitute the mustard powder with actual mustard? I do not have any on dry mustard in my pantry today.
Hi LeeAnn,
Aww thank you so much!! I’m so happy to hear that my website has been helping so much with your detox plan!! So glad you enjoyed my mushroom soup too!! Yes – you can use about 1 tablespoon of actual mustard in place. I hope that helps and that you enjoy!!
Hi, Jessica!
If I were to cool it in a baking pan in the fridge, and then take it to a family member’s house before putting the topping on and baking it, how long should it cook in the over for?
Thanks,
Michelle
Hi Michelle,
I would bring it to room temperature, then bring it over, and then just proceed as according to the recipe – so the same steps and 15 minutes as according to the recipe. I hope that helps and that you enjoy!!
Hi again! I made this recipe and I found the almond milk flavor to overpower it a bit… I want to try again but I’m thinking I’ll try cashew milk. Do you have have suggestions besides that swap?
Hey LeeAnn!
Did you use regular almond milk by chance, and not unsweetened? We did that once with the “original” and found it overpowering too, which is why I always use the one that say “Unsweetened”in savoury recipes. If you used unsweetened and still had a problem, I would recommend cashew milk! I hope that helps!!
Jessica – That must have been the problem. I decided to try with cashew milk and it was soooo good. I recall I also did some wonky things with your recipe the first time like I tried vegan shredded cheese on top and maybe put too much nutritional yeast. I followed to the tee for the most part this time and I am so glad that I tried it again. This will be my vegan comfort food go-to! Thanks for the response.
Thank you for this recipe! It was a perfect addition to my BBQ jackfruit! It’s creamy and doesn’t skimp on flavor.
Hi Rachel! First of all BBQ jackfruit sounds so delicious! We’re glad our recipe paired well with yours! Thanks for your kind words!
Hey Jessica!
Do you have to soak the cashews overnight ? Or is a few hours good enough ?
Thanks!
Meg
Hey Meg,
I usually soak my cashews for 4 hours in boiling water! The water of course cools down, but I start with boiling water. Hope that helps!
hi! i can’t wait to try out this recipe, i’ve been looking for a good homemade vegan mac and cheese recipe for a while now!!!
how long will this stay good for? i was hoping i could make it on a sunday night for lunches at work during the week.
Hi Tori! We just made this recipe for the thousandth time 4 days ago. It will definitely last in your fridge up to a week and a half. I hope this helps!
Great recipe! Will definitely be making again.
Awesome Melissa! We’re so happy that you enjoyed it! Thanks so much for not only reading but trying it!
I’m thinking of making this to do vegan cheesy fries. Can the cheese once made be put into a squeezy container without setting? Also after squirting it on the fries would it need to be reheated or would it be good to go?
Hi David this is an amazing idea. It can be put directly into a squeezy container no reheating necessary. I hope you enjoy!
This is delicious! We had it with some roasted broccoli and avocado. It came together really quickly.
We’re so happy that you enjoyed this recipe Megan! Thank you so much for reading and leaving such a nice comment!
Do I need to do anything special to make this into waffles? Or just grease a waffle iron and slap the mac-n-cheese on? 🙂
haha Ashley we got your back we actually did a recipe on mac and cheese waffles. I hope this helps!
https://jessicainthekitchen.com/crispy-mac-and-cheeze-waffles/