Pizza Dough Recipe
This pizza dough recipe is my absolute favourite for making homemade pizza! It’s vegan, it yields a thick, chewy crust, and it makes enough for two pizzas.

I’ve been making homemade vegan pizza for almost 10 years now with this crust. I know what you’re thinking: That’s a long time, Jessica! What makes it so great?! Well, to start, it’s thick and chewy, but also crispy in all the right places. It’s made with pantry staples and the method I use for it—well, it’s definitely the secret to homemade pizza success.
Why This Pizza Dough Recipe Is My Favourite
- The steam method. The steam method isn’t necessary, but it will make your pizza even better. Adding hot water to the oven while it preheats gives you the most beautiful bubbly, crispy crust. (I use this method for no-knead bread too.)
- A homemade dough for time-crunched cooks. This pizza dough recipe takes only takes 1 hour to rise, and I’ve even been known to let it rise for just 15 minutes when I’m in a hurry. It can also be made in advance and frozen for later.
- Easy to make. If the thought of working with yeast makes you nervous, fear not! Pizza crust is truly one of the easiest things you can make with yeast. Master this and soon you’ll be on your way to recipes like vegan cinnamon rolls.

Notes on Ingredients
Here’s a quick look at what you’ll need along with some notes. Scroll down to the recipe card for a printable ingredients list.
- Instant yeast – I like to use SAF Instant Yeast.
- Warm water – Not hot; just warm to the touch. If it’s too hot, you’ll kill the yeast.
- All-purpose flour
- Sweetener – Granulated sugar, maple syrup or agave.
- Sea salt
- Garlic powder – You can buy “pizza flavorings” for homemade dough, but really, garlic powder is all you need!
- Olive oil
How to Make Homemade Pizza Dough
Alright are you ready to make pizza dough? Let’s do this!


- Combine the dry ingredients. Whisk them all in a large mixing bowl.
- Add the wet ingredients. Create a well in the dry ingredients and pour in the warm water and olive oil. Mix to incorporate.


- Knead. Turn out the dough onto a clean floured surface and use floured hands to knead the dough for 8 to 10 minutes. If it remains sticky after 5 minutes or so, add more flour. (In humid climates, it’s common to have to add more flour.)
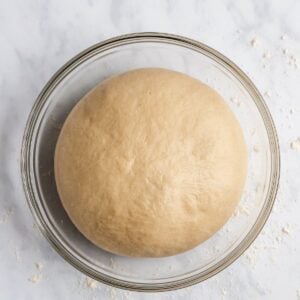
- Let the dough rise. Grease the ball of dough, return it to the bowl, and cover. Rest for at least 1 hour in a warm area free of drafts, until the dough doubles in size.


- Form the crust. Lightly punch down the dough to release the air and divide it into two balls. Roll them out into 10-inch circles.
- Use. Follow the instructions for your favourite pizza recipe for baking or use the steam method described in the recipe card below.
Tips for Making Homemade Pizza Crust
- Use fresh yeast. Ensure your yeast is fresh! I always run a quick test before starting, so I don’t end up wasting time and ingredients.
- Set a timer to knead your dough. Consider it your arm workout of the day because it will improve the texture of your crust. You want it to look smooth and pretty like in the photos. At the same time, you don’t want to over-knead it because this can make your crust tough.
- Don’t be afraid to add more flour. The amount I list should work perfectly, but I live in a humid climate; if yours is more humid than mine or less humid, you may need a little bit more of less flour. Go by feel. You want your dough to feel supple and easy to use. It shouldn’t feel wet or bone dry.

My Favourite Ways to Use This Dough
I use this crust to make recipes like:
- Birria Pizza
- Vegan Spicy BBQ Chickpea Pizza
- Vegan Breakfast Pizza
- Grilled Peach, Basil and Vegan “Goat” Cheese Pizza
- Kale Pesto Pizza (Garlicky & Ridiculously Delicious)
Or top your pizza with marinara sauce, vegan cheese, and come up with your own topping ideas!
How to Store
Since this recipe makes two balls of dough, you can use both or store one for later.
- Refrigerator: Wrap the dough in plastic or place it in a freezer bag. Refrigerate it for up to 3 days.
- Freezer: Freeze this pizza dough recipe for up to 3 months in a freezer bag. Thaw it in the refrigerator before using, then set it out at room temperature before rolling it out.

Enjoy friends! If you make this pizza dough recipe, please snap a photo and tag #jessicainthekitchen on Instagram! We’d also love it if you would leave a comment below, and give the recipe a rating! Thanks so much!
Pizza Dough Recipe
Ingredients
- 2 1/4 teaspoons instant yeast, (about 1 packet)
- 1 cup warm water (between 100°F to 120°F) (not hot – warm to touch) , (240mL)
- 2 1/2 cups all purpose flour + extra ⅓ cup while kneading , (300g)
- 2 teaspoons granulated sugar, maple syrup or agave, (8.4g)
- 1 teaspoon sea salt, (5.5g)
- 1 teaspoon garlic powder, (omit if for sweet pizza) (3g)
- 2 tablespoons olive oil, (30mL)
Instructions
- In a bowl, the flour, sugar, yeast, garlic powder and salt. Whisk the ingredients together.
- Create a well in the centre of the flour. Slowly add the warm water and olive oil to the dry ingredients, and then mix together with a spatula until just incorporated. The dough should look shaggy.
- Flour a clean surface, and then pour/add the dough onto the surface. Flour your hands and fold the dough together. Knead the dough for about 8-10 minutes with your hands and knuckles. The dough will be sticky at first, but you add up to 1/3 cup flour while flouring and kneading to make it easier to manage. I usually add that entire extra ⅓ cup amount. You want the end dough ball to be smooth, with slight dimples.
- Lightly grease the ball of dough with some oil and place back into the bowl in a ball. Cover the bowl with a plastic wrap or a kitchen towel and let it sit for at least 1 hour on the counter in a warm area. If your kitchen is too cold, you can place it in your OFF oven with the pilot light on which will provide enough residual heat for it to rise. The dough should rise and double in size. You can allow your dough to rise up to three hours or up to overnight in the fridge.
- Punch down the dough and fold over. Divide the dough into two balls, they make two 10inch pizzas. You can make both or wrap one and place it in the fridge for up to 5 days or freeze it.
- On your floured surface, shape your pizza dough into a circular shape. I use a well floured rolling pin and roll it out in all directions to form a circle. It should measure about 10 inches diameter. Create a crust by lifting the edges to create a sort of heightened rim.
- Use it in your favourite pizza recipe, and enjoy!
Notes
Freezing and Thawing
Remember that this makes two pizzas, so if you want, you can wrap the other and place in the fridge for up to 3 days. Remember it’ll continue to rise in the fridge. You can also freeze it for months instead. Place it in a ball and into a freezer safe bag. To thaw, place in your fridge overnight to thaw. Before using for a pizza, set out on the counter to remove the chill. I like to set it out, then preheat my oven, and let it come back to room temperature (after thawing in the fridge) while the oven is heating.Pizza Stone vs Baking Sheet
If I had to choose, I would I always recommend a pizza stone because it produces the best results. That being said, using the back of your baking sheet works just as well. If you want, you can place the baking sheet in the oven while its preheating and then using a parchment paper, slide your pizza onto it. It’ll begin to cook the pizza instantly, and provide an even better crust. Get a nice heavy duty baking sheet for this since many warp under high heat, but you can certainly use what you have. This is the pizza stone I recommend.The Steam Method
What yeast to use?
I recommend using the yeast that your recipe calls for. For instant, I use SAF Instant Yeast. For active dry yeast, I love Bob’s Red Mill. They are both very affordable, is affordable in large quantities and last very long.Disclaimer: Although jessicainthekitchen.com attempts to provide accurate nutritional information, kindly note that these are only estimates. Nutritional information may be affected based on the product type, the brand that was purchased, and in other unforeseeable ways. Jessicainthekitchen.com will not be held liable for any loss or damage resulting for your reliance on nutritional information. If you need to follow a specific caloric regimen, please consult your doctor first.


Wow, have tried this countless times and it never fails. With a pizza stone at 500 degrees this dough shines! Thank you so much for making our weekly pizza night such a success!
We’re so happy that you enjoyed this recipe Rik! Thank you so much for reading and leaving such a nice comment!
Greetings and thank you much for sharing. I had a question regarding changing the main ingredient and of it would affect the results. If I used Almond Flour for this recipe, how much would it change the outcome? Or would I be able to expect the same results as using all purpose flour?
V/R,
Hi Ty. No prob! Here is the recipe to our almond flour pizza crust. I hope this helps
https://jessicainthekitchen.com/easy-vegan-almond-flour-pizza-crust-gluten-free/
My first ever pizza crust, so easy to make 👍
Can you advise on how to bake it? Oven temperature, time, oven rack… I kind of winged it and I feel like it could have been better. Thank you!
Hi Anne-Marie so happy that you liked this recipe! Here is a recipe we used with this dough. It as all the baking instructions.
https://jessicainthekitchen.com/vegan-pizza-recipe/
I’ve made this recipe a few times now and it always turns out amazing! Sometimes we just make one large pizza instead of splitting the dough in two and it makes a big thick delicious crust. I shared the recipe with my parents and now they make it often as well! 10/10 would recommend!!! Thank you Jessica!
Thanks so much Jessica. We’re really happy that you and your family enjoy it.
My all time fav pizza dough recipe Made it again tonight and its such a hit! Nothing beats fresh dough! Used your marina recipe and your pesto one and had build your own pizza night. Thanks! Delish.
Thanks so much Haviva!
This dough was fantastic! I usually buy my dough at the supermarket and it is OK but tough to roll out and I never get that real ‘pizza’ crust. This dough was soft, easy to flatten out on a piece of parchment paper and absolutely delicious. Thank you! Never buying store prepped dough again
So happy to hear that Tracy! Thanks so much for reading and trying it.
I’ve been trying to find a pizza dough recipe that rivaled good restaurant pizza crust and yours is the hands-down winner! This one rocks, isn’t difficult and doesn’t make a huge mess. After rising, I punched it down and split it in half like the directions said, then just worked the half I was going to use with my hands for a few minutes, stretching it out. I then put in into my cast iron skillet and rolled it out with a small dough roller right in the skillet since I don’t have a lot of counter space. It worked out fine.
I didn’t use the steam method (but look forward to trying it another time!), but the crust came out so deliciously perfect anyway. It was crisp on the outside and fluffy on the inside. I believe I only had the oven set at 450 but that seemed to be just right for baking it in the cast iron skillet. Already looking forward to using the other half of the dough for our second pizza night this week! Thanks for another amazing recipe!
Oh Wow than you so much for such an incredible review Michelle! We’re happy that you like it.
2 pizza doughs? How big are they approximately? Inches please?
Hi Deb,
I made this recipe again yesterday (gluten free this time!) and while I didn’t do circular pizzas (I love rectangular pieces I find the edges get more crispy) I did one pizza and one set of breadsticks out of it. I’ll get a regular tomorrow to measure out the usual size, but I usually stretch one dough over my 10″
Cast iron and it fits perfectly!
Can this be made with whole wheat flour?
Hi Susan – yes but I recommend subbing half the flour for whole wheat and leaving the other half as regular to start since it’ll significantly change the texture!
Will gluten-free 1:1 flour work as well?
Hi Crystal, it won’t sadly – but I have an almond flour pizza crust that will work well for gluten free!
Happy Monday
I’m a bit confused about putting water in the oven while it preheats??? Could you please explain exactly what you mean?
Thanks so much
R✌🏾♥️
Hi R,
Of course! Place the water in a 9×9 or a loaf pan, any container similar to that works. Add in boiling water or even just hot water. Add it into the oven maybe on the rack above or below the pizza. This helps to create excess steam which helps with moisture and also raising the temperature for the best dough texture. Remove your pizza when it’s ready, let your oven cool down, and then eventually remove that pan and discard that water. I hope this helps! Enjoy so much!