How to Test Yeast to see if it’s still Good
How do I test yeast and is it still good or fresh? Find out easily with this quick and simple 10 minute test!
Here’s a question I often ask myself: “Is my yeast still good?!”. Yeast is a living thing, and the bread and buter of your baking recipes so you always want to ensure it’s good before using it, else your recipe won’t work. I’ve been baking for over 10 years, and the truth is that unless you test your yeast, you won’t know. Fortunately, it is very easy to test yeast in just 10 minutes, and will make all your baking projects that much easier. I realised that if I’m asking this, maybe many of you are too. Here’s how to check if your yeast is still good.
What is Yeast?
Yeast is a leavening product that is alive and that you add to your dough to make it rise. In this post, I’ll be referring to instant yeast and active dry yeast. Yeast needs the correct environment to properly grow and multiply, thus helping your dough to expand and create beautiful baked products. This environment (known as a sympathetic environment) refers to the temperature of its surroundings such as your kitchen, the temperature of the liquid it’s in, and the food (sugar or starch) that you add to the dough to make it rise as it bakes.
Active dry yeast is a dormant form of yeast made up of live yeast cells surrounded by dead cells. Its granules are large, and as the name suggests you need to “activate” your dry yeast. When using active dry yeast, the yeast will need to be dissolved in some warm water with sugar (aka, exactly what are doing today) before using it in the recipe. This process is called proofing.
Instant yeast is made up of finer granules and does not need to be proofed before it. You can mix it right into the dry ingredients. It’s also made up of 100% living cells and as such tends to be seen as more powerful than active dry.
What yeast to use?
I recommend using the yeast that your recipe calls for. For instant, I use SAF Instant Yeast. For active dry yeast, I love Bob’s Red Mill. They are both very affordable, is affordable in large quantities and last very long.
How to Test Yeast to see if it is Good
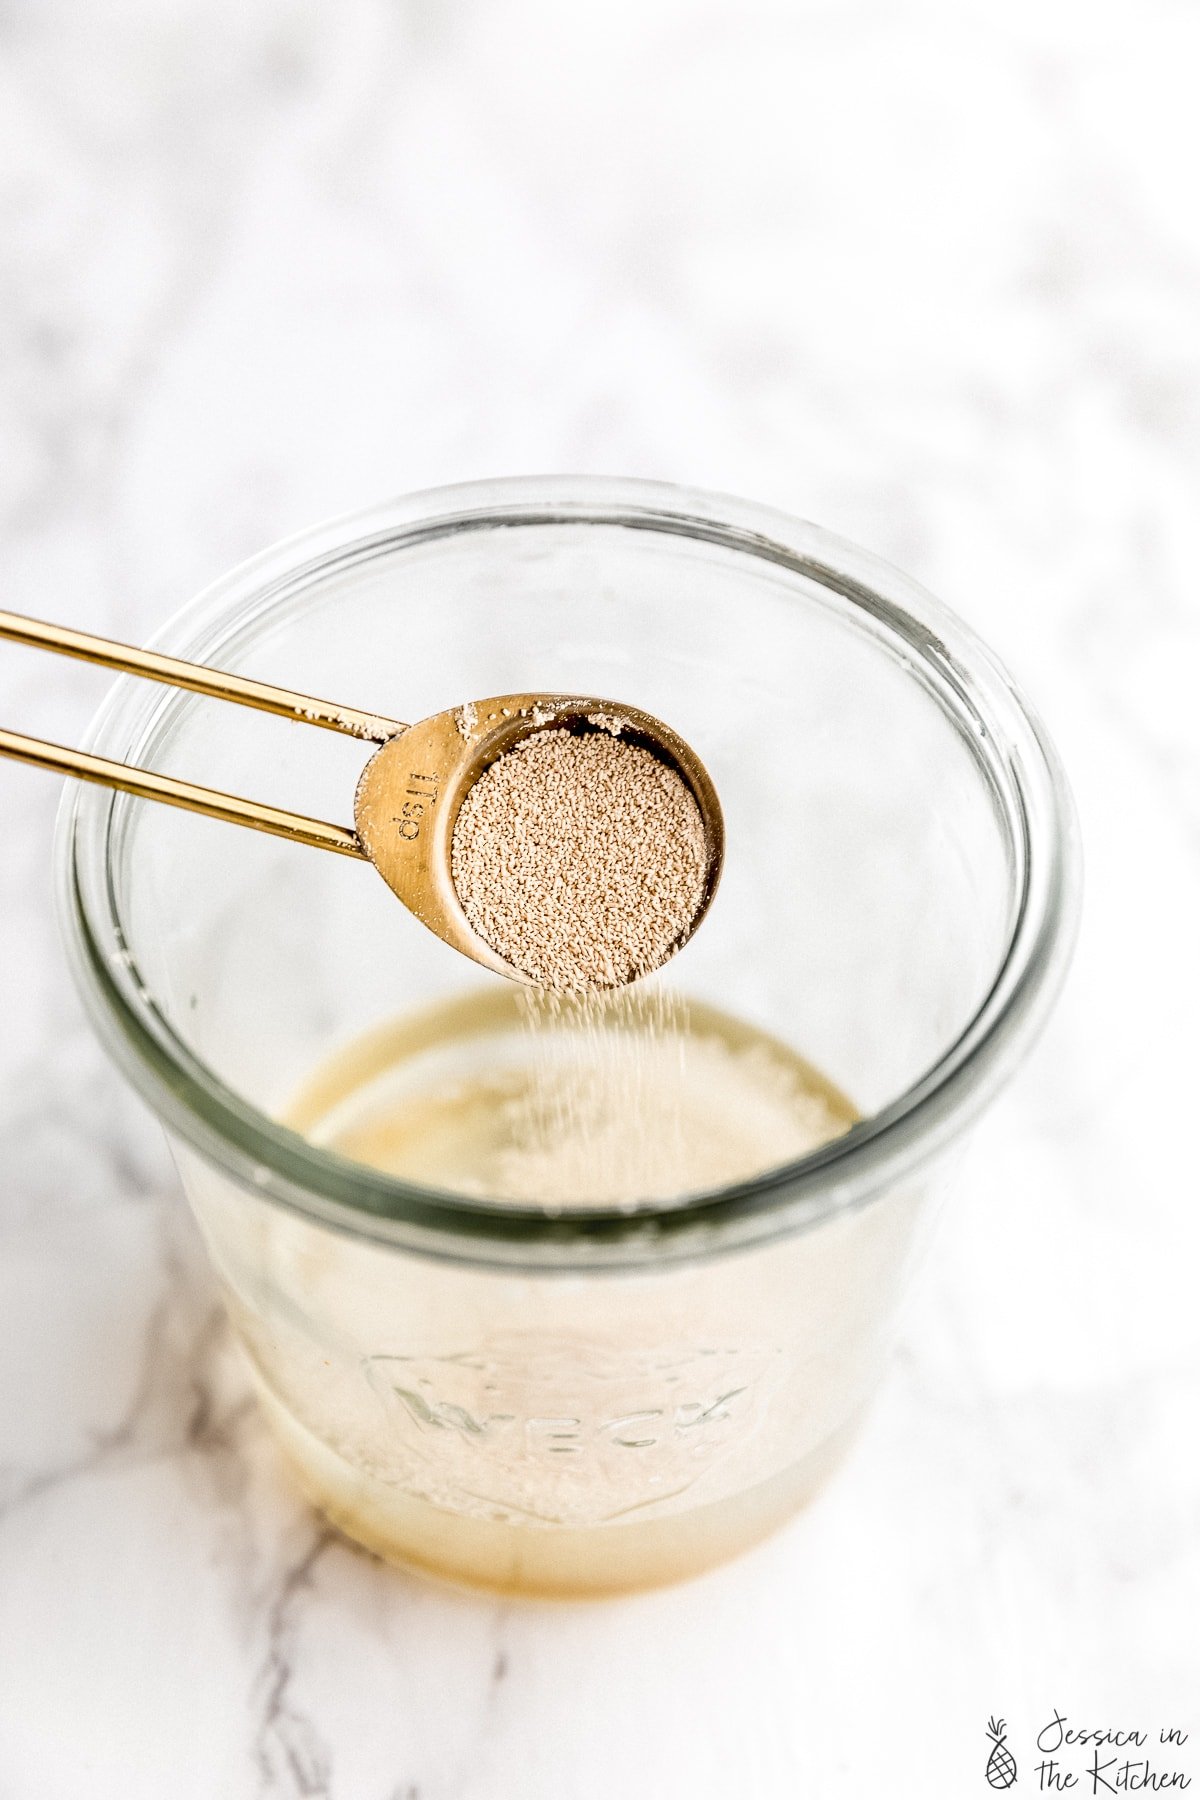
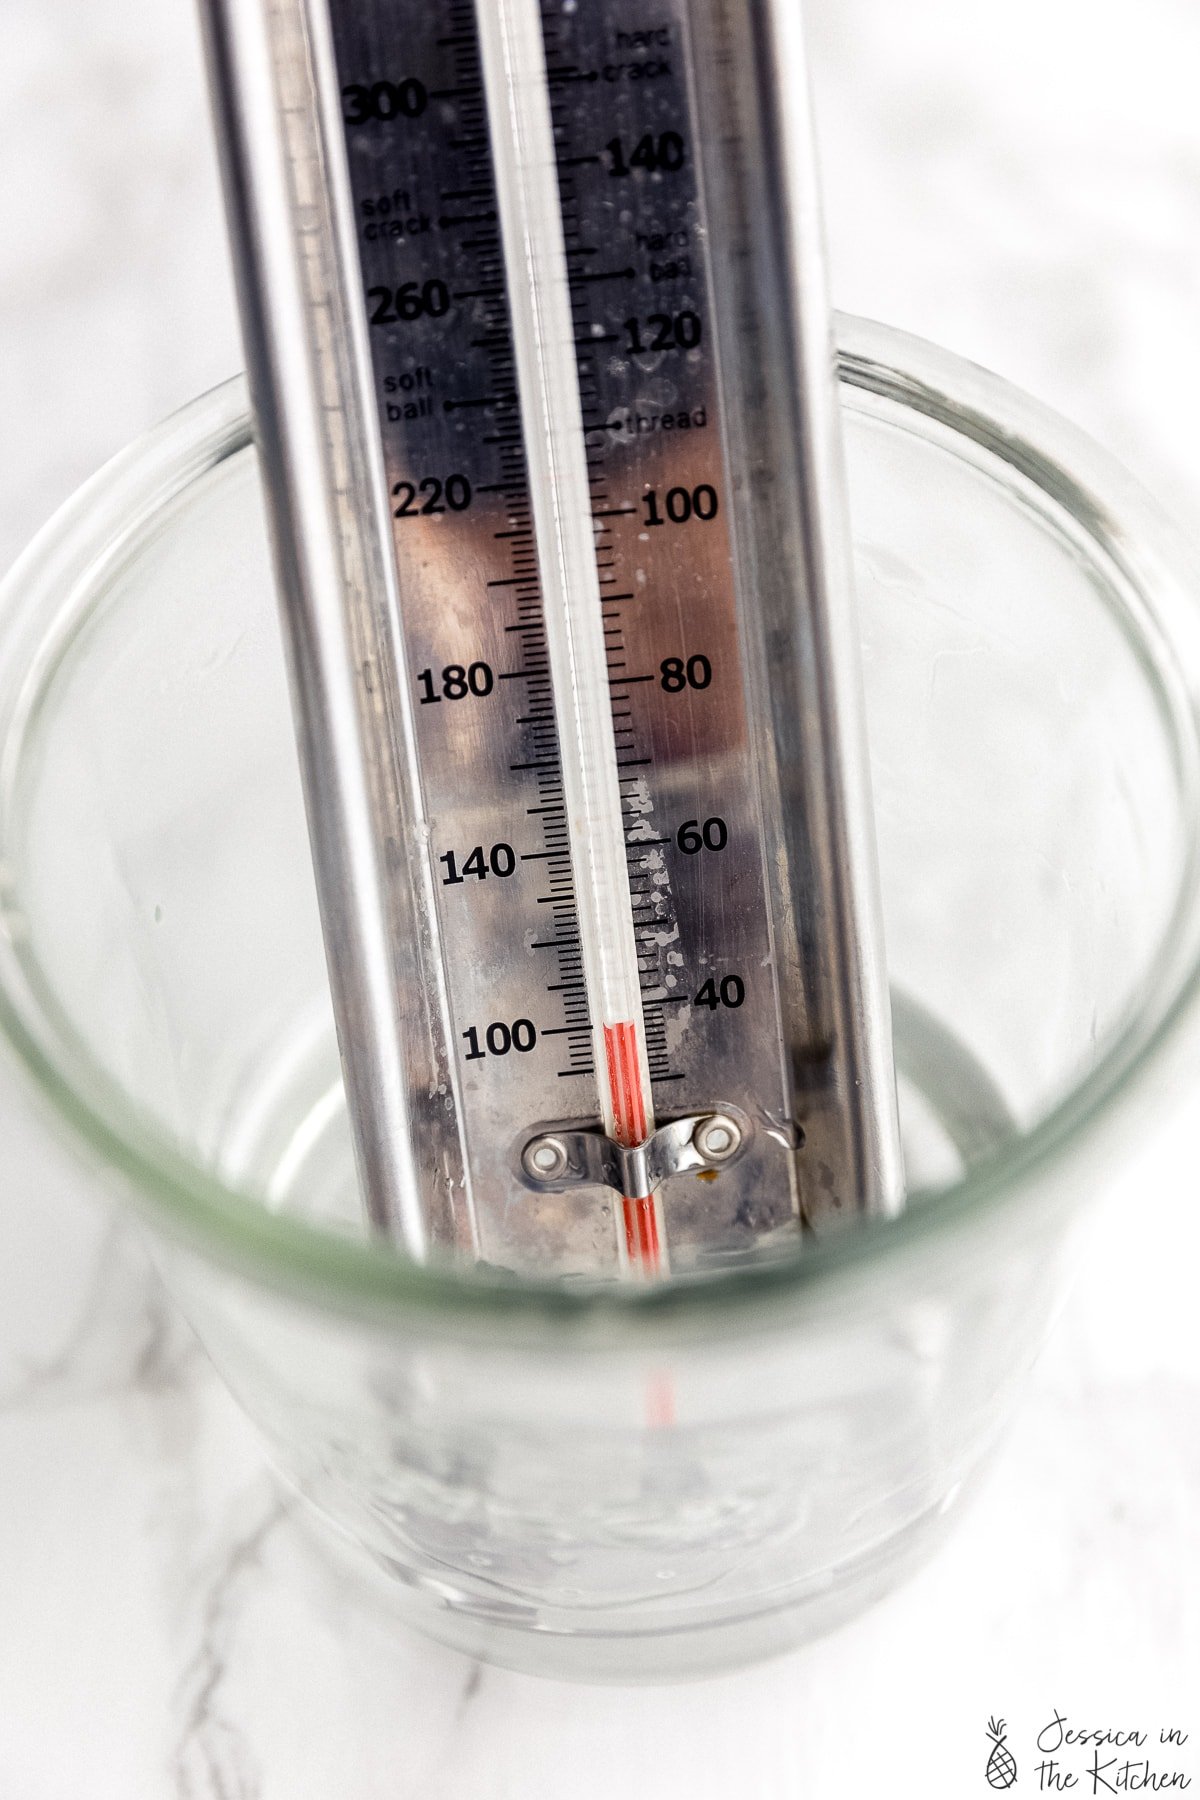
To test yeast, start with 1/2 cup of warm water that is about 100°F. You want your water at this temperature because it’ll be warm enough to activate your yeast, but not hot enough to kill it. To emphasize, you do not want boiling water nor too hot water. I recommend using a food thermometer or a candy thermometer. If you don’t have one, basically you don’t want water that’ll be too hot to touch.
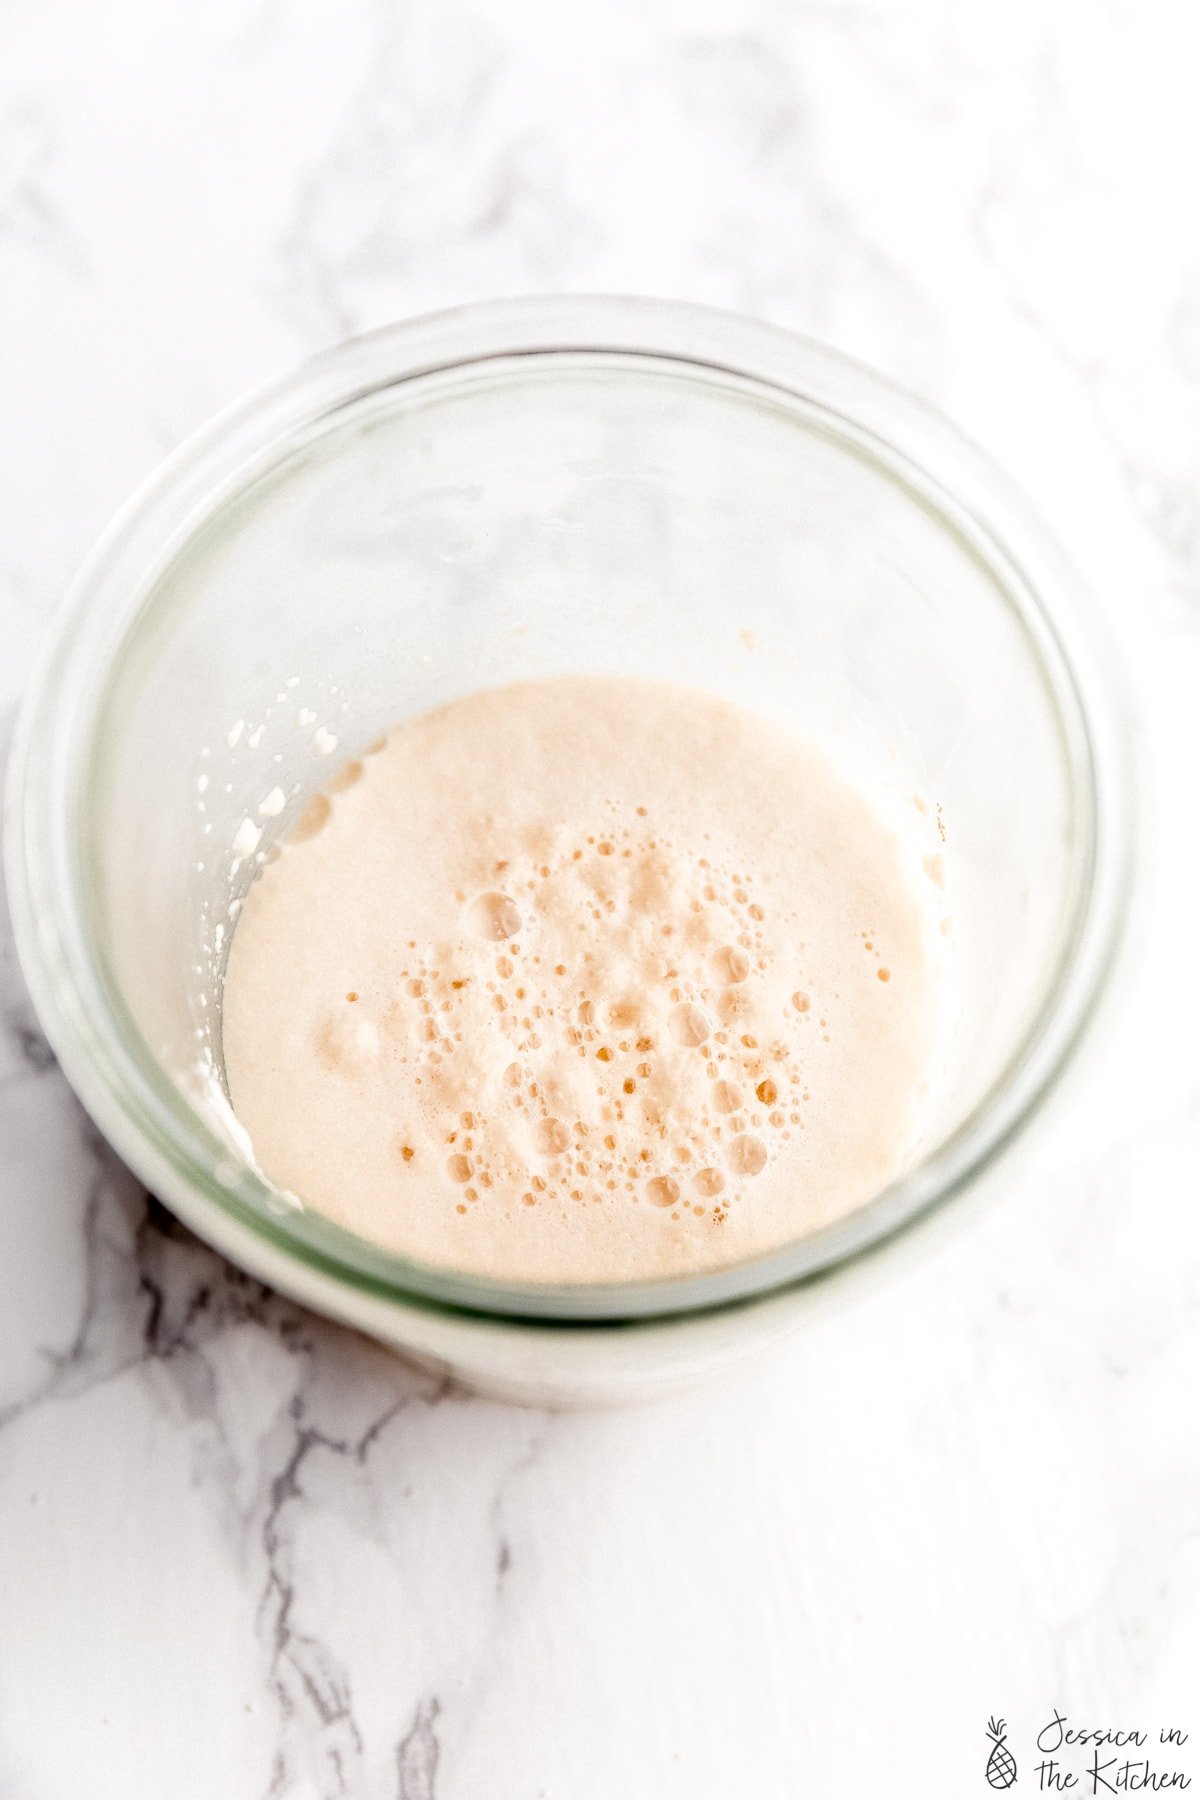
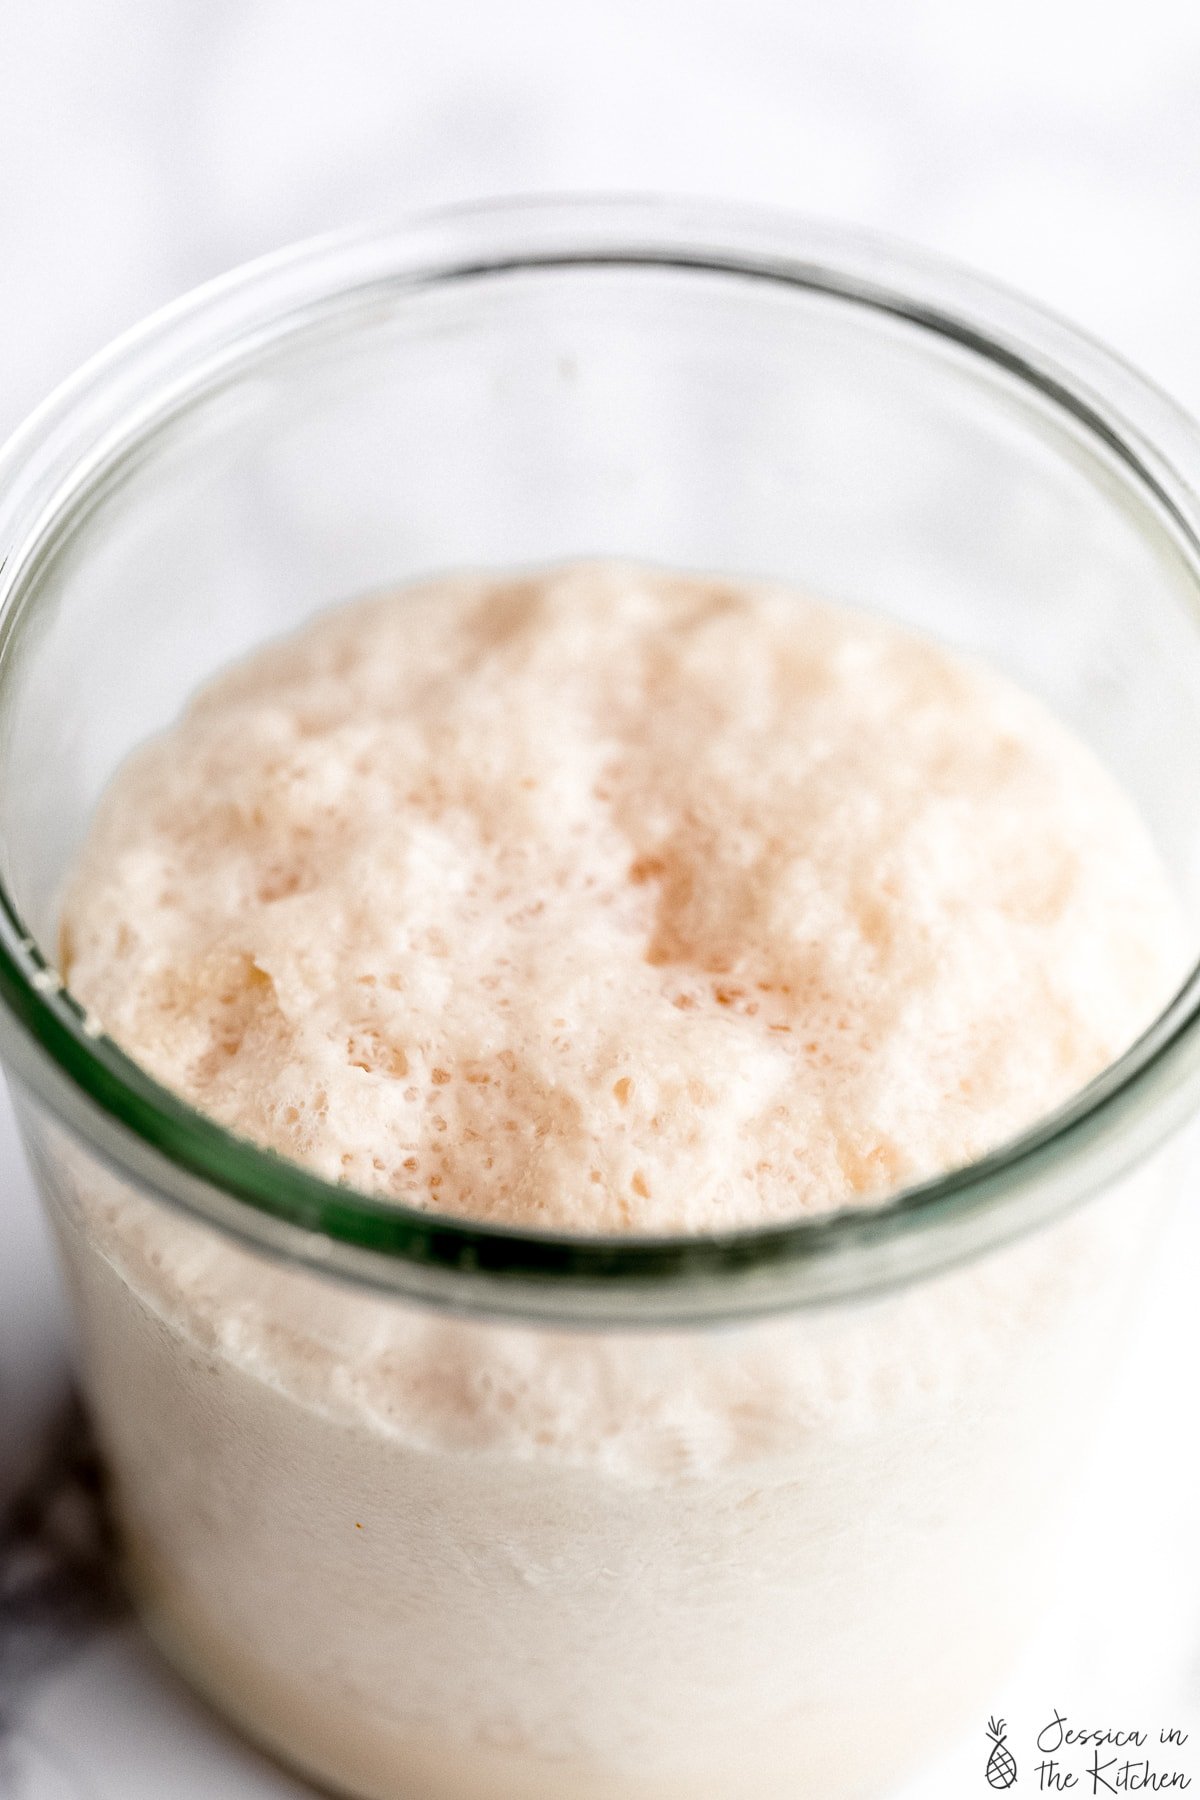
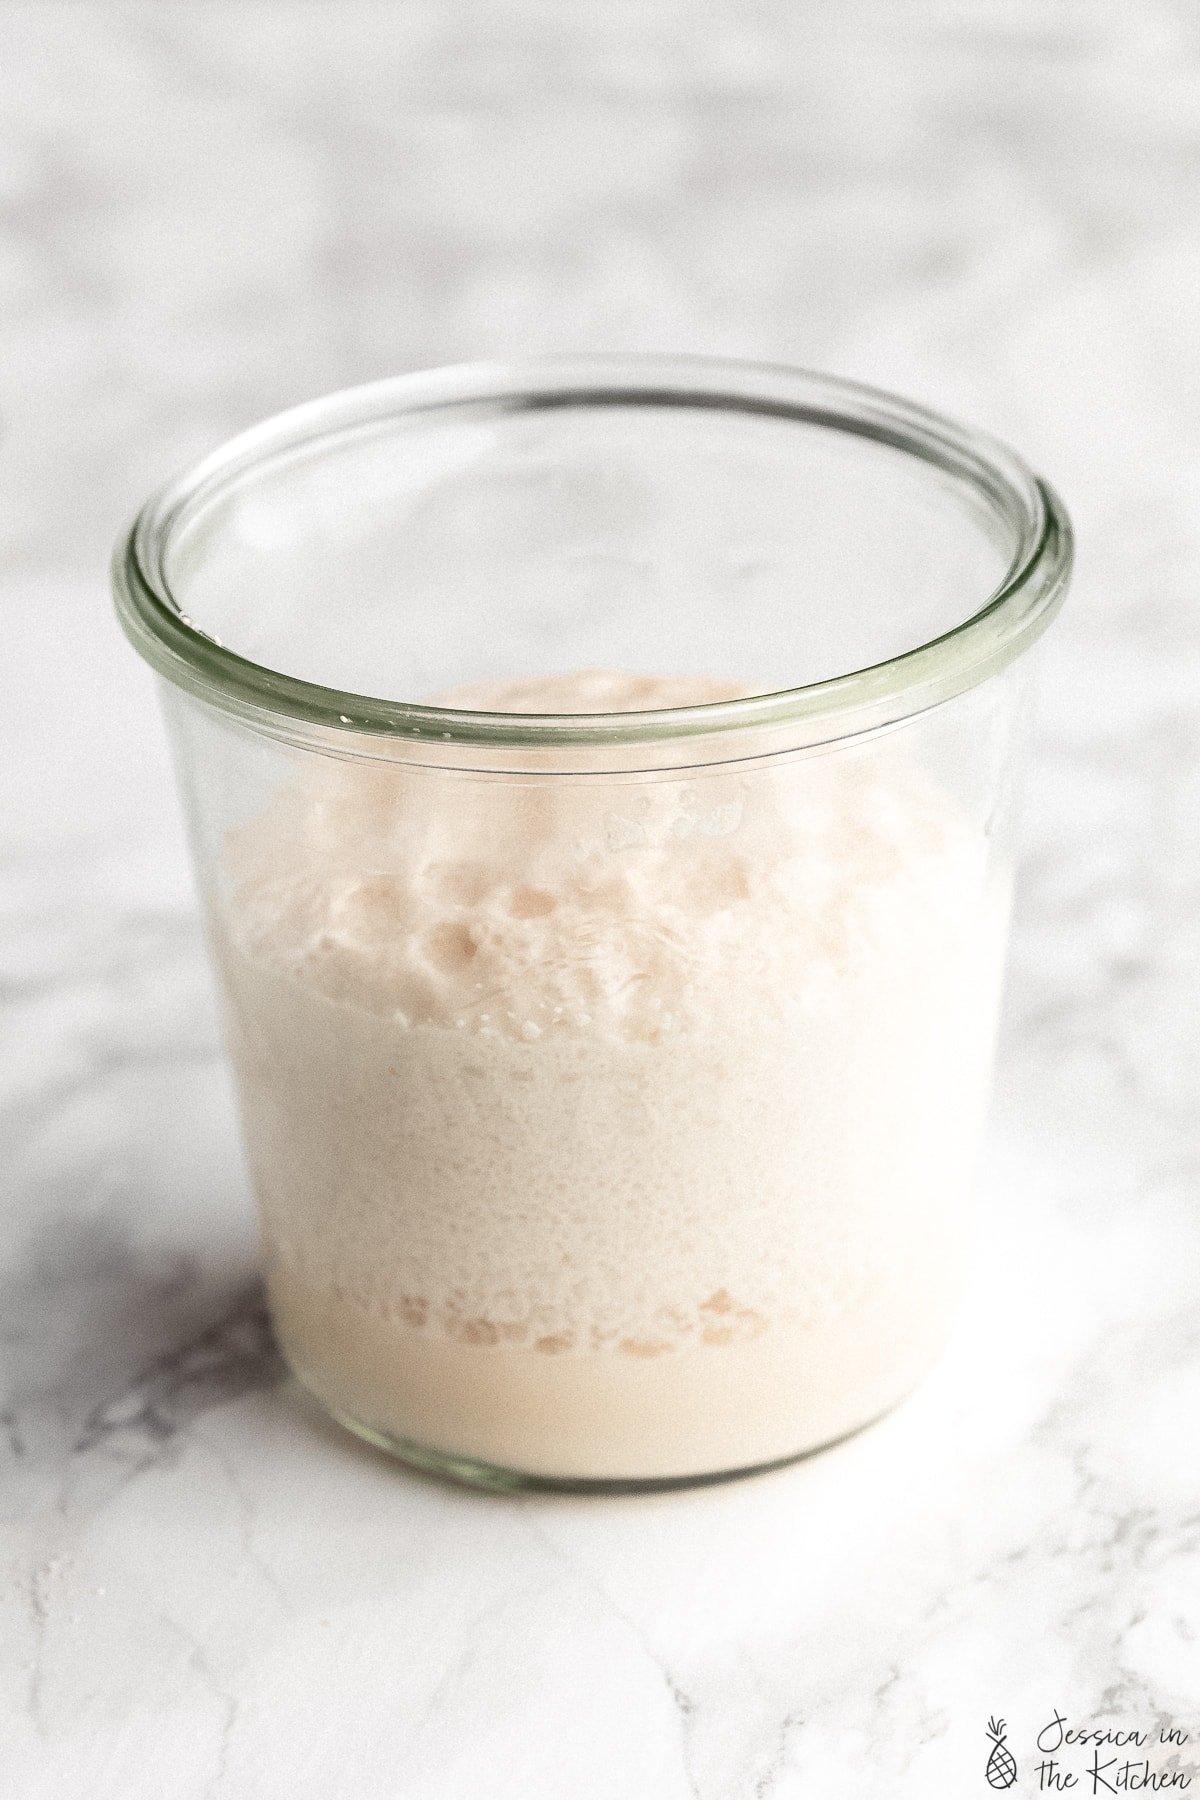
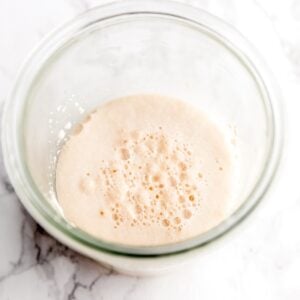
Then, add in 2 1/4 teaspoons room temperature instant yeast (or active dry yeast) and 1 teaspoon sugar. The sugar feeds the yeast and provides what my husband (the scientist) calls “activation station!”. Stir it all the combine for about 15 seconds until combined and then leave it alone for about 10 minutes. After even just a few minutes, you should start to see the top bubble and lightly bloom or foam.
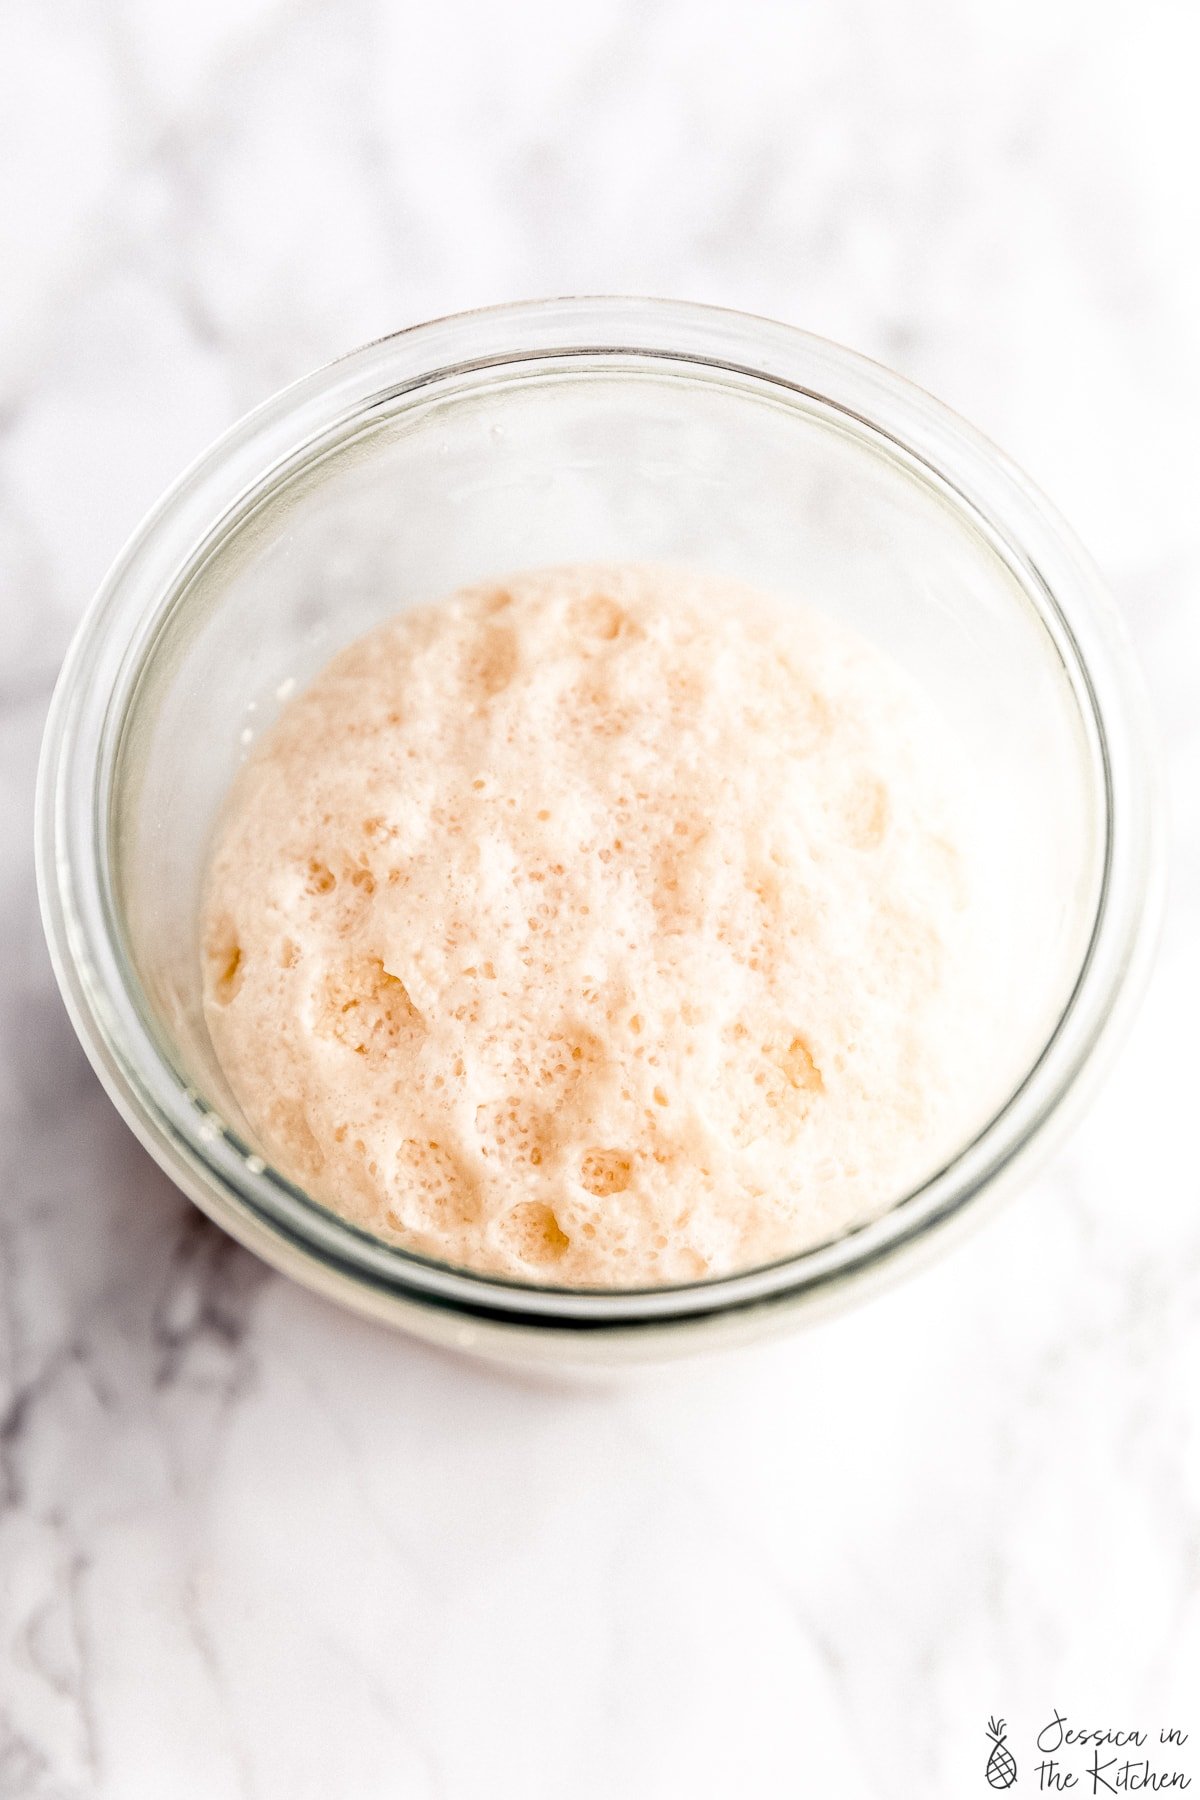
After 10 minutes, the yeast should’ve doubled or tripled in size and should be high up. The first container I tested this in, I completely forgot that I was testing and it bubbled over onto the counter! This is all good news – your yeast is fresh!
If your yeast does nothing and you added the right temperature of the water, your yeast is dead. Toss it, and get some fresh yeast.
Happy Baking! If you want a few yeast recipes to start off with here are some of my favourites:
- No Knead Bread (Dutch Oven Bread)
- Vegan Naan Bread Recipe
- Gluten Free Focaccia Bread with Garlic, Rosemary and Tomatoes
- Garlic and Rosemary Focaccia Bread
How to Store Your Yeast to Keep it Fresh
The best place to store your yeast is in the freezer or the fridge. I keep mine in the fridge, but the freezer puts a pause on the yeast’s expiry date, making it last much longer.
How long can you store yeast?
If using active dry yeast, I recommend going by the date on the bag. Instant yeast can last for years in your fridge or freezer.
I hope this post on how to test yeast helps friends and that you find it useful! Happy Baking!
How to Test Yeast to see if it's still Good
Ingredients
- 1/2 cup warm water, (about 100°F/40°C)
- 2 1/4 teaspoons instant yeast, (or active dry yeast)
- 1 teaspoon granulated sugar
Equipment
- bowl
Instructions
- In your warm water, stir in all the yeast and granulated sugar for about 15 seconds until combined and then leave it alone for about 10 minutes. After even just a few minutes, you should start to see the top bubble and lightly bloom or foam.
- After 10 minutes, the yeast should've doubled or tripled in size and should be high up. It should also have a yeast aroma. Good news - your yeast is fresh!
- If your yeast does nothing and you added the right temperature of water, your yeast is dead. Toss it, and get some fresh yeast. Happy Baking!
Disclaimer: Although jessicainthekitchen.com attempts to provide accurate nutritional information, kindly note that these are only estimates. Nutritional information may be affected based on the product type, the brand that was purchased, and in other unforeseeable ways. Jessicainthekitchen.com will not be held liable for any loss or damage resulting for your reliance on nutritional information. If you need to follow a specific caloric regimen, please consult your doctor first.


You Can Keep Yeast A Very Long Time AND Pay Attention to Packaging Content Amounts!
I purchased Instant yeast in large bricks for economic reasons roughly six or more years ago. I believe I bought them at Costco and they are the large Fleischman’s vacuum-packed bricks. That is probably enough yeast for your average occasional baker to last a lifetime lol. One is still unopened; the other was opened roughly six or so years ago with the rest kept in an old glass instant coffee jar (when things still came in glass). I keep them both in the refrigerator which is set roughly at 35 degrees. And without fail, the yeast is just fine. As a matter of fact, I found this page on how to test the yeast and it responded in the same ways you did. After ten minutes it had doubled and then after leaving it for a half hour or so it tripled. And I cannot tell you just how much I love the smell of yeast, as it reminds me of bread rising!
There is one thing I learned not too long ago regarding best buy and expiration dates on food. Apparently, there is no regulating agency in charge of making those determinations. Not the FDA nor the USDA. These best buy dates are left entirely up to the various food industries. This perhaps explains a few things I’ve noticed over the past three or so years. It seems that many of these dates are now far shorter than they had traditionally been. Americans being hypersensitive to such things are known to toss things when they’re barely at their date, so it would seem this is just one more manner of unethical price gouging that has been going on for roughly ten or so years. It was roughly a decade ago that companies were lowering the traditional quantities of what come in jars, cans, boxes, etc., without making the packaging smaller as well nor lowering the prices to account for the product shrinkage. When little was said about it by the general public, it didn’t take long for much of the various other industries to begin doing the same. This is and has been the cause of much of the inflation we’ve been experiencing these past two plus years.
Back in March 2024, Forbes Magazine reported the results of their study suspecting that there was massive multiple industry wide lying over price gouging for the previous two years. Forbes discovered that not only did industry after industry raise prices unnecessarily, but they did also so by hiding behind the fact that inflation existed. They also lied blaming those increases on Biden’s policies, wage and labor costs, and supply and distribution issues. Forbes discovered these to be lies as well, in fact there was continuous record high profits even in industries where such profits were not normal. In the end, Forbes determined that this gouging led to the inflation rate being 56% higher than it really was.
Worse yet, CSNBC reported the following month that as a result of this and many other ploys, the top 1% walked away with 44 trillion dollars in stock wealth alone by the end of the last quarter of 2023. That and the consumer debt level went from 600 billion dollars to over a trillion. To put that number one trillion into perspective; scientists estimate that there are three trillion trees on the planet.
We Americans paid out our hard-earned money with nary a complaint. We didn’t call for congressional hearings, or even one boycott. This is what not only encouraged companies to continue doing this, but it has also contributed to inflation and outrageous price hikes in just about every area of consumer purchases––especially in the area of necessities. And don’t forget, this was not just companies, but entire industries across the nation that did this and are doing it still. What makes this our shame is that unlike Europeans or anyone else who protest, hound their political leaders, etc., we simply paid those rents, those food prices, and all the other increases, utilities, etc. Some have alluded to this being a political situation as well, much akin to the way the petroleum industry plays with the pricing before elections. It usually starts no later than one year out from an election season, but in this case, it was over two because the post Covid 19 situation could be taken advantage of.
And apparently it worked. Because despite the successes the Biden administration created, most people chose to believe what they heard in the corporate media and other places instead. It was far easier to do that than to read reports, studies, or even visit the Congressional/Senatorial website and to verify who sponsored, voted for, or against or didn’t vote at all for particular bills, regulations, deregulations, etc.
The country has been fully employed for that entire time with only 3.4 to 4% unemployment rate. Economist have determined that unemployment from 5% or less is considered fully employed as 100% employment is impossible due to mismatches in qualifications, experience, education, and other reasons. The U.S. has not experience unemployment levels this low since the 1950s. Unfortunately, due to the severe income disparity that began in 1978 unabated, Americans do not earn the same amount of money that people did in that era (adjusted for inflation and cost of living). This is why the economy although doing quite well, is not booming in the bombastic manner it did at that time and on through the early 1970s when the oil embargo began.
I only learned of much of this simply by having a few recipes go utterly wrong that never had. Many recipes are based on the traditional amounts of food products within cans and packages. I discovered that one of the items called for in a long-used recipe was now 1.5 oz shorter in contents. Although the can looked exactly the same as the others I had in the pantry, the only difference was that the contents measurements was no longer 16oz, but 14.5. Now, we see this throughout much of what we purchase.
I would be careful of the water as well. If you live in a city where the water is chlorinated, I found that water can kill the yeast. I found this out the hard way when I started working with my sourdough starter. Now I always use bottled or filtered water when working with yeast. If you’re using a water filter, make sure it can take out the chlorine. Distilled water should also be safe.
Thanks for sharing this Patrick!
Thanks so much for sharing. This is probably why I fail at baking bread! I thought my house was too cold, but chlorine in the water is much more likely. Maybe now I can try again?
If after testing and finding that the yeast is good can one go ahead and add the tested yeast to the recipe?
Hi Diane!
Technically if your recipe uses that exact amount of sugar and water, then yes you can! This test works best with active dry yeast in terms of actually using it afterwards since that type of yeast actually has to be bloomed separately. But I have used instant dry yeast with similar measurements (or I adjusted it to similar measurements!) right after too!
Can i add the tested yeast water to my compost?
Hi Shelley,
Absolutely!! Yeast is a natural source of nitrogen and can help accelerate the composting process. Hope this helps!
Where does the sugar go in the testing process? I only see it in the list of ingredients. Thanks!
Hi Julia,
Thanks for your comment I just went in and re-wrote those instructions to be a lot clearer! I hope that helps – I’m about to test if my yeast is good too haha!
Thank you for this info…..my yeast is still alive, yay. I will now make some bread.
Amazing—happy baking, Mimi!