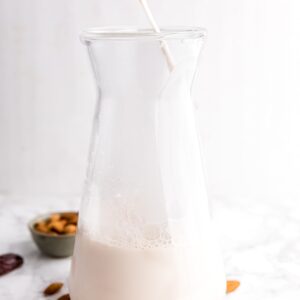
Almond Milk
Here’s how to make almond milk at home, step-by-step! It’s smooth, creamy, and you can easily customise it to your tastes.

It’s so hard to choose my favourite plant-based milk, but for sure almond milk ranks near the top! I adore Cashew Milk and Coconut Milk, but the flavour of almond milk is incredible, and when you make it at home, you can get it quite creamy, much creamier than the store-bought versions.
Why This Homemade Almond Milk Recipe Is My Go-To
Once I learned how to make almond milk, I switched entirely to homemade. Here’s why I love this recipe:
- Very few ingredients. The ingredients to make this almond milk are SO simple and actually pretty flexible too! Use any sweetener you like and add the vanilla extract or leave it out.
- Tested and perfected. I’ve been making almond milk at home for a few years now and in that time, I’ve perfected my recipe—it’s just the right amount of sweet and creamy.
- So easy to make. Once you start making your own plant milks, you’ll never go back to store-bought! It’s just a matter of blending and straining.

Notes on Ingredients
The ingredient list is short and sweet! Scroll down to the recipe card to find the ingredient quantities and recipe instructions.
- Almonds – Start with raw almonds, not roasted or salted.
- Sweetener – You can use soaked pitted dates, maple syrup, date syrup, agave, or another liquid sweetener. Alternatively, you can make it unsweetened, which is a good idea if you plan on using your almond milk in savoury recipes.
- Sea salt – Sea salt enhances the natural flavour and helps to balance out the sweetness. If you plan to make this unsweetened, reduce the salt by half, or taste it first before adding salt.
- Vanilla extract – This really boosts the flavour! If you’re using vanilla bean or vanilla paste and want those beautiful flecks, I recommend adding this after you strain the milk, then blending one last time. Leave out the extract if you’re using this milk in recipes.
- Water – You want to use filtered water for the best flavour.
How to Make Almond Milk
The full instructions for this recipe are below; this is just a quick visual overview.


- Blend. Add the soaked almonds, water, sweetener, sea salt, and vanilla extract to a high-speed blender. Blend on high for about 2 minutes, until the mixture is smooth and creamy.
- Strain. Pour the milk through a nut milk bag to catch the solids; squeeze to extract as much of the almond milk as possible.
- Use or store. Transfer the milk to a bottle or jar and use it right away or refrigerate it for later.
Tips for Success
- Don’t skip the straining. You want to strain the almond milk after you blend it so your milk is smooth and tasty and doesn’t have any grit left behind. This is the nut milk bag that I use!
- And don’t toss out the pulp. You can reuse your almond pulp, which is what remains after straining. Use it in this energy bites recipe, in your smoothies, in brownies, cookies, etc. You can also dry it out and use it as almond meal!
- Adjust the thickness. You can add more or less water to adjust the consistency of this recipe.

How to Use Homemade Almond Milk
Now that you know how to make almond milk, let’s talk about using it! You can use this recipe anywhere you need vegan milk. It tastes incredible in everything from your morning coffee or matcha, to cereal or oats, or even cakes! The subtle vanilla flavour and sweetness also make it divine for sipping as-is, especially when it’s warmed up a bit.
How to Store
Transfer the almond milk to an airtight glass bottle or jar and refrigerate for up to 4 days. Shake before each use.

More Vegan Milk Recipes
Enjoy friends! If you make this homemade almond milk recipe, please snap a photo and tag #jessicainthekitchen on Instagram! We’d also love it if you would leave a comment below, and give the recipe a rating! Thanks so much!
Almond Milk
Ingredients
- 1 cup raw almonds, soaked overnight, drained and rinsed, 140g
- 3.5 cups to 4 cups filtered cold water, 840–960g
- ¼ teaspoon sea salt, 1.5g
- 1 or 2 tablespoons maple syrup or agave nectar or 2 or 3 soaked pitted dates, 20–40g
- ½ tablespoon vanilla extract , 7.5g
Instructions
- In a high-speed blender, add the soaked almonds, filtered cold water, sweetener, sea salt and vanilla extract. Blend on high for about 2 minutes or until the mixture is completely blended out and the nut milk is smooth and creamy.
- Line a large jar or container with a nut milk bag. Pour the almond milk into the nut bag and strain it through. Squeeze the bag to remove as much liquid as possible. You can use the pulp in smoothies, cookies or other baked goods.
- Transfer the almond milk into an airtight glass bottle or jar. Shake before use and enjoy! It lasts about 4 days in the fridge.
Disclaimer: Although jessicainthekitchen.com attempts to provide accurate nutritional information, kindly note that these are only estimates. Nutritional information may be affected based on the product type, the brand that was purchased, and in other unforeseeable ways. Jessicainthekitchen.com will not be held liable for any loss or damage resulting for your reliance on nutritional information. If you need to follow a specific caloric regimen, please consult your doctor first.


How long can you store it? I am hoping longer than week. Thank you! Will try to make and leave a rating 🙂
Hi Nancy! This is great to use for around 3 – 5 days! I hope this helps!