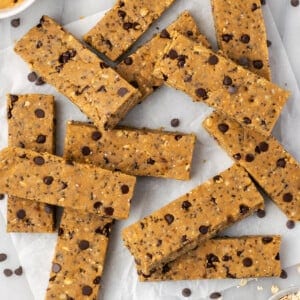
Protein Bars
Homemade vegan protein bars take minutes to make, and they’re so much tastier than the ones you buy at the store! Customise them with your favourite mix-ins, and you’ve got a healthy snack stocked in the fridge whenever you need a boost.

With so many vegan protein bars available at the grocery store and online these days, you may be wondering why you should bother making your own. Isn’t it a lot of work? Surprisingly, no! These homemade protein bars take minutes to make, and they’re much more budget-friendly than the store-bought version. They have become a staple in my home, and I know you will love them, too!
Why You’ll Love These Homemade Protein Bars
- Customizable. This recipe is a great base for creating your own unique protein bars. Add in your favourite mix-ins or switch up the flavour of the base by using different protein powders.
- No baking required. Since these are no-bake protein bars, you can make them easily without even turning on the oven! They just need an hour of chilling time in the fridge to be ready to eat.
- A healthier alternative. Many store-bought protein bars are loaded with artificial sugars, flavours, and all kinds of unpronounceable ingredients. By making your own protein bars at home, you’re in complete control of the ingredients.

Notes on Ingredients
Scroll down to the recipe card to find the ingredient quantities and recipe instructions.
- Old-fashioned rolled oats
- Natural nut butter – You can use any type you like, or use one of my recipes for homemade peanut butter, almond butter, or pecan butter.
- Medjool dates – Remove the pits before starting the recipe.
- Vegan protein powder – Any type you like or have on hand, flavoured or plain.
- Non-dairy milk – Again, whatever you have in the fridge is fine. If you use a flavoured non-dairy milk, make sure it pairs well with the flavour of your protein powder.
- Chia seeds – These add protein, fiber, and healthy fats to your protein bars.
- Maple syrup – Date syrup is another option.
- Vanilla extract
- Kosher salt
- Mini chocolate chips – Using mini chips instead of regular chips helps your bars hold together better.


How to Make Protein Bars
- Combine the first 3 ingredients. Process the oats, nut butter, and dates in a food processor until they form a rough dough.
- Finish the protein bar mixture. Add the protein powder, milk, chia seeds, maple syrup, vanilla, and salt. Pulse to combine.
- Add the chocolate. Scoop the mixture into a bowl. Add the chocolate chips and fold them in.
- Chill. Spread the mixture into a square pan lined with parchment paper. Press into an even layer, cover, and refrigerate for an hour before slicing and serving or storing.
Tips for Success
- Adjust the texture. If you prefer finer oats, you can process them alone until they form a powder before adding the nut butter and dates. This will result in a smoother texture.
- Choose your protein powder wisely. Different brands and types of vegan protein powders may affect the texture and taste of your bars. That being said, these bars are a good way to use protein powders that may not taste good alone because all the ingredients in the bars help to camouflage the taste of the powder.
- Press the bars into the pan. The more you press, the chewier your bars will be and the more they’ll stick together when you cut them.

Variations
- Swap out the mini chocolate chips. You can swap out the chips for nuts or seeds to add extra protein. You can also replace them with dried fruit. Or, mix and match your add-ins–just be sure not to add more than 1/4 cup of add-ins all together.
- Leave out the vanilla extract. If you use vanilla protein powder, reduce or eliminate the vanilla extract.
- Add spices. Add cinnamon or pumpkin spice for cozy flavour.
- Give them a dip or drizzle. Pop the bars in the freezer so they’re very cold, then dip them in melted dark chocolate, or drizzle dark chocolate over the tops.
How to Store Homemade Protein Bars
Your homemade protein bars can be stored in an airtight container in the refrigerator for up to 2 weeks.

Can I Freeze This Recipe?
Freezing is a great option if you want to make a large batch of protein bars and keep them longer. Slice them and wrap each bar separately in parchment paper or plastic wrap to prevent them from sticking together. Place them in an airtight container or freezer bag and freeze for up to 3 months. When you’re ready to enjoy one, remove it from the freezer and let it thaw for a few minutes at room temperature.
More High Protein Recipes
- Protein Pancakes Recipe
- Vegan Fajita Bowls – 10 Min Prep, High Protein
- Protein Pudding
- High-Protein Overnight Oats
- Protein Cookie Dough

Enjoy friends! If you make this protein bar recipe, please snap a photo and tag #jessicainthekitchen on Instagram! We’d also love it if you would leave a comment below, and give the recipe a rating! Thanks so much!
Protein Bars
Ingredients
- 1 ½ cups old-fashioned rolled oats, 136 g
- 1 cup natural nut butter, any type, 240 g
- 5 medjool dates, pits removed
- ½ cup vegan protein powder, 50 g
- ¼ cup non-dairy milk, 58 g
- 3 tablespoons chia seeds, 33 g
- 3 tablespoons maple syrup, 36 g
- 1 teaspoon vanilla extract
- ¼ teaspoon kosher salt
- ¼ cup mini chocolate chips, 55 g
Instructions
- Line an 8×8 pan with parchment paper and set aside.
- Combine the oats, nut butter and dates in a food processor and process until clumping together almost like a dough.
- Add the protein powder, milk, chia seeds, maple syrup, vanilla and salt. Continue to pulse until everything is mixed together. It will be processed enough when you can squeeze a small bit of the mixture and it stays clumped together.
- Transfer the mixture to a bowl and add the mini chocolate chips. Mix together by hand.
- Spread the mixture into the prepared pan in an even layer. Use a flat bottomed measuring cup to press it into an even layer.
- Cover and refrigerate for at least one hour before slicing into 12 equal bars.
- Store leftover protein bars in the refrigerator in an airtight container until ready to consume.
Notes
- If you prefer finer oats, you can process the oats alone until they are powder before adding the nut butter and dates.
- Feel free to add nuts or seeds to customize the flavor of these bars.
- If you use vanilla protein powder, reduce or eliminate the vanilla extract.
- To store: Your homemade protein bars can be stored in an airtight container in the refrigerator for up to 2 weeks.
- To freeze: Wrap each bar separately in parchment paper or plastic wrap to prevent them from sticking together. Place them in an airtight container or freezer bag and freeze for up to 3 months. When you’re ready to enjoy one, remove it from the freezer and let it thaw for a few minutes at room temperature.
Disclaimer: Although jessicainthekitchen.com attempts to provide accurate nutritional information, kindly note that these are only estimates. Nutritional information may be affected based on the product type, the brand that was purchased, and in other unforeseeable ways. Jessicainthekitchen.com will not be held liable for any loss or damage resulting for your reliance on nutritional information. If you need to follow a specific caloric regimen, please consult your doctor first.


I tried these today. I didn’t have the protein powder. I added coconut shreds and finely crushed pecans as add ins along with the mini chocolate chips. These bars are fabulous. I also used ground flaxseeds instead of chia seeds because that’s what I had. Great recipe!
So happy to hear it came out great for you Karen especially without the protein powder! Thanks so much for sharing!!
sorry.. what size should each bar me cut to meet the 11 gr off protein per bar…
Hi Larry,
This recipe makes 12 bars, so you’ll want to 12 equal bars out to get the protein amount, or divide the total weight of the mix by 12 to get the most accurate amount to what you pour in! I got 56.5 grams per bar for mine!
I made these for a second time today. I pulsed the oats into powder before adding the nut butter and dates. It seems like 50g of the nut butter wasn’t enough because the mixture was pretty dry. A scale was used to weigh out everything. I almost tripled it to get the consistency like the picture you provided, which was so helpful by the way. The overall result after that tweak was REALLY GOOD. I will most likely start making these at least twice a month. Thank you for creating this recipe!
Made these yummy bars today. Quick , easy! Just deleted the vanilla. Enough sweetness from the maple syrup & chocolate chips. Also added sliced almonds. Family loved them. Thank you!
Hi Linda,
Thank you for sharing the love on these protein bars—really happy to hear that you loved them, and were able to make them your own.
Could you bake these so they are not so chewy??
Hi Leslie,
You could definitely bake them for a little bit at a lower temperature to make them a little less chewy. Just be sure to monitor them as you go, to ensure they don’t get over-baked! It should firm them up a bit for you.
Thank you! Any idea what temperature and how much time would you recommend?
Hi Leslie,
It’s hard for me to say, since I haven’t baked them myself, but I would start very low, and monitor it. Think: 275 degrees F and keep a tight eye on it!
Please do let me know how it goes.
This recipe is fantastic! It’s in my regular roatation now. I have tried it with several combinations. My favorite so far is using chocolate peppermint protein power, swap out the vanilla extract with peppermint and chop up a dark chocolate peppermint bar to use instead of chips. I always soak the dates to help with blending. I would also like to give Jessica a big shout out. I reached out to her to ask about the appliance she was using to blend everything up. My blender was not cutting it. She got back to me right away. I would say, out of a dozen or so recipes that I use on a regular basis, at least half of them are Jessica’s. You can’t go wrong here.
Jessica – Thank you so much for all that you do!
Hi Tammy,
What a lovely message—I’m so thrilled this is now a regular in your rotation. We are always here to help with any recipe questions and I’ll make sure Jessica sees all the love you shared! We appreciate you, Tammy!
Hi Jessica. Can oat flour be used in place of ground up oats? Would it be the same measurement as the rolled oats?
Hi Becky,
Definitely you could, however just be mindful that the oat flour can be a little more fine than the texture of the ground up oats, so it will texturally be slightly different! Same measurements would apply!