Pita Bread Recipe
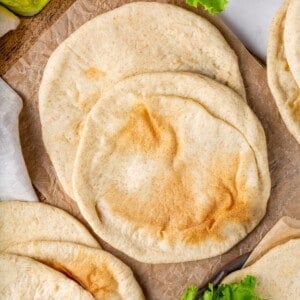
Soft, fluffy, and perfect for stuffing with all your favourite fillings, this homemade pita bread is surprisingly easy to make. It’s so much fresher and softer than store-bought!

Homemade naan is one of my absolute favourite bread recipes to whip up for a weeknight dinner. It’s that one simple trick that makes any meal feel a bit more special. And now that I’ve discovered this pita bread recipe, it’s going into my regular rotation too! Just roll out the rounds of dough, pop them into a blazing hot oven, and they inflate like balloons—which is exactly what you want, because that’s how the pockets in the middle form! Your crispy falafel sandwiches just got an instant upgrade.
Why Making Homemade Pita Bread Is SO Worth It
Once you make pita bread from scratch, it’s hard to go back to store-bought! It’s so good, I’ve even eaten it plain, fresh out of the oven.
- Perfect pita pockets. The high heat from the oven creates steam inside the dough, causing the pitas to puff and form that pocket in the middle.
- Soft and flexible texture. Ever been disappointed by dry pita bread that crumbles and tears when you try to stuff it? Me too. But don’t worry, this homemade pita bread recipe stays tender and pliable.
- Simple pantry ingredients. Flour, yeast, olive oil, and a little maple syrup are all you need!

Notes on Ingredients
Here’s what you’ll need to make this homemade pita bread recipe. Scroll down to the recipe card for exact measurements and full instructions.
- Water – Room temperature water helps activate the yeast. When I don’t have time to let water come to room temperature, I use warm water and mix in cold water until it feels room temp.
- Active dry yeast – Here’s how to test whether your yeast is still good.
- Maple syrup – To feed the yeast.
- Olive oil – This helps keep the pita bread tender and soft.
- Flour – A bit of whole wheat flour adds a little depth to the flavour, but you’ll mostly need all-purpose flour here.
- Salt
How to Make Pita Bread
Below you’ll find step-by-step photos showing the process of making this pita bread recipe, but the full instructions are in the recipe card at the bottom of the post.


- Mix the dough. Stir together the water, yeast, and maple syrup in a large bowl and let the mixture sit for about 5 minutes until slightly foamy. Add the olive oil, flours, and salt, then stir to form a shaggy dough.


- Knead. Turn out the dough or knead with a stand mixer for 6 to 8 minutes until smooth and elastic.
- First rise. Shape the dough into a ball and place it in a lightly oiled bowl. Cover and let rise in a warm place to double in size, about 1 to 1 1/2 hours.


- Divide and rest. Turn the dough onto a lightly floured surface and divide into 12 pieces. Shape each into a smooth ball, then cover and let rest for 20 to 30 minutes so the dough relaxes.
- Shape the pitas. Roll each dough ball into a round about 6–7 inches wide and roughly 1/8 inch thick. Try to keep the thickness even so the pitas puff properly.


- Bake. Preheat the oven to 450–480°F with a baking sheet or pizza stone inside so it gets very hot. Place the rolled pitas on parchment and carefully transfer them onto the hot surface. Bake for 4 to 6 minutes, until puffed and lightly golden.
- Finish. Remove the pitas from the oven and immediately stack them, covering with a clean kitchen towel. This locks in the steam to keep them tender.
- Serve or store. Enjoy warm, or cool completely before storing.
Tips for Making Your Own Pita Bread
Never made pita bread before? These tips will help you make sure it turns out perfect!
- Get the oven very hot. High heat is the secret to getting pita pockets to puff. Don’t put the dough in the oven while it’s still preheating!
- Roll evenly. If one side of the dough is thicker than the other, it may not inflate properly. Using a rolling pin, rather than your hands, is the best strategy here.
- Don’t overbake. Baking too long can make homemade pita bread dry and prone to tearing when stuffed.

Serving Suggestions
Serve this pita bread recipe with homemade hummus, baba ghanoush, or your favourite dips. You can also slice the pitas open and fill them with falafel (this beet falafel is awesome!), roasted veggies, or chickpea salad. If it starts going stale, you can use it to make homemade pita chips!
Storage and Reheating
- Refrigerator: Store pita bread in an airtight container for up to 4 days.
- Freezer: Freeze in a sealed bag for up to 2 months. Separate layers with parchment if needed.
- To reheat: Warm briefly in a dry skillet or wrap in foil and heat in the oven until soft.

More Homemade Bread Recipes
Enjoy friends! If you make this pita bread recipe, please snap a photo and tag #jessicainthekitchen on Instagram! We’d also love it if you would leave a comment below, and give the recipe a rating! Thanks so much!
Pita Bread Recipe
Ingredients
- 2 cups water, room temperature, 380mL
- 2 1/4 teaspoons active dry yeast, 7g
- 1 tablespoon maple syrup, 15mL
- 4 tablespoons olive oil, 60mL
- 3/4 cup whole wheat flour, 100g
- 4 1/2 cups all-purpose flour, 560g
- 2 teaspoons salt, 12g
Instructions
- In a large bowl, combine the water, yeast, and maple syrup. Stir gently and let stand for 5 minutes, until lightly foamy.
- Add the olive oil, whole wheat flour, all-purpose flour, and salt. Mix until a shaggy dough forms.
- Knead by hand or with a mixer for 6–8 minutes, until the dough is smooth, elastic, and soft. The dough should feel supple and only slightly tacky, but not sticky.
- Shape the dough into a ball and place it in a lightly oiled bowl. Cover and let rise in a warm place for 1 to 1 1/2 hours, until doubled in size.
- Turn the dough onto a lightly floured surface and divide into 12 equal pieces. Shape each piece into a smooth ball.
- Cover and let rest for 20–30 minutes. This rest allows the gluten to relax so the dough rolls out easily and puffs properly.
- Lightly flour the surface and roll each ball into a round 6–7 inches wide, about 1/8 inch thick. Keep the thickness even to encourage proper pocket formation.
- Preheat the oven to 450–480°F (230–250°C) with an empty baking sheet or pizza stone inside. The baking surface must be very hot for proper puffing.
- Place the rolled pitas onto parchment paper and carefully transfer them onto the hot baking surface.
- Bake for 4–6 minutes, until fully puffed and lightly golden. Do not overbake, as this will dry them out.
- Remove from the oven and immediately stack the pitas. Cover with a clean towel to keep them soft and flexible.
Notes
- Refrigerator: Store pita bread in an airtight container for up to 4 days.
- Freezer: Freeze in a sealed bag for up to 2 months. Separate layers with parchment if needed.
- To reheat: Warm briefly in a dry skillet or wrap in foil and heat in the oven until soft.
Disclaimer: Although jessicainthekitchen.com attempts to provide accurate nutritional information, kindly note that these are only estimates. Nutritional information may be affected based on the product type, the brand that was purchased, and in other unforeseeable ways. Jessicainthekitchen.com will not be held liable for any loss or damage resulting for your reliance on nutritional information. If you need to follow a specific caloric regimen, please consult your doctor first.


