No Knead Bread (Dutch Oven Bread)
What Is No-Knead Bread?
No-knead bread was pioneered by bread baker Jim Lahey (you can see the post here) about 10 years ago when Mark Bittman published the recipe in the New York Times. It’s basically the simplest bread recipe possible. You mix all the ingredients until just mixed, cover it, then let it rise. That’s it.
The yeast works it’s magic, then you bake it in a Dutch oven! You can get artisan style bread with little to no work. You can allow the bread to rise fully overnight, or in just a few hours. As someone who loves bread as quick as possible, we’re making the faster version today. I’ll definitely do the long version very soon, too.
My recipe is a variation of the original. It uses more flour, more liquid to balance it out, and more yeast to compensate for the shorter rise time. And it’s perfect.
No Knead Bread Ingredients
- instant yeast – You want to ensure you’re using instant yeast here since it doesn’t need to proof separately, and can just be mixed into the dry ingredients Always check to ensure that your yeast is fresh before you start (I’ll show you how to below).
- warm water – since we’re speeding up the rise time of this recipe, you want to use warm/hot water instead of room temperature water. This means that instead of rising for 8 to 24 hours, we’re only rising for 2 hours. You don’t want your water to be hotter than 120°F else you’ll kill your yeast. Just test the heat before. If you don’t have a food or candy thermometer, use touch. You don’t ever want boiling water, you want water that’s pretty warm to touch.
- flour – I use all-purpose sifted flour for this recipe. If you have bread flour, go ahead. I know some people who use half whole wheat and half white and that also works.
- maple syrup, agave, or granulated sugar – a little bit of sugar in the recipe feeds the yeast and helps with the rising process of the bread. It won’t make it taste sweet.
- sea salt – I use sea salt, and salt helps to boost/enhance flavour in this bread. If you’re using table salt, you’ll want to cut back since it has finer granules and might be too much, probably to 1 teaspoon.
- olive oil – this is optional, but I love adding 1 teaspoon of olive oil into my bread because it creates an extra beautiful crust, while helping with the moisture inside the bread. That means you can leave it out for a few days before it begins to get stale!
How To Make
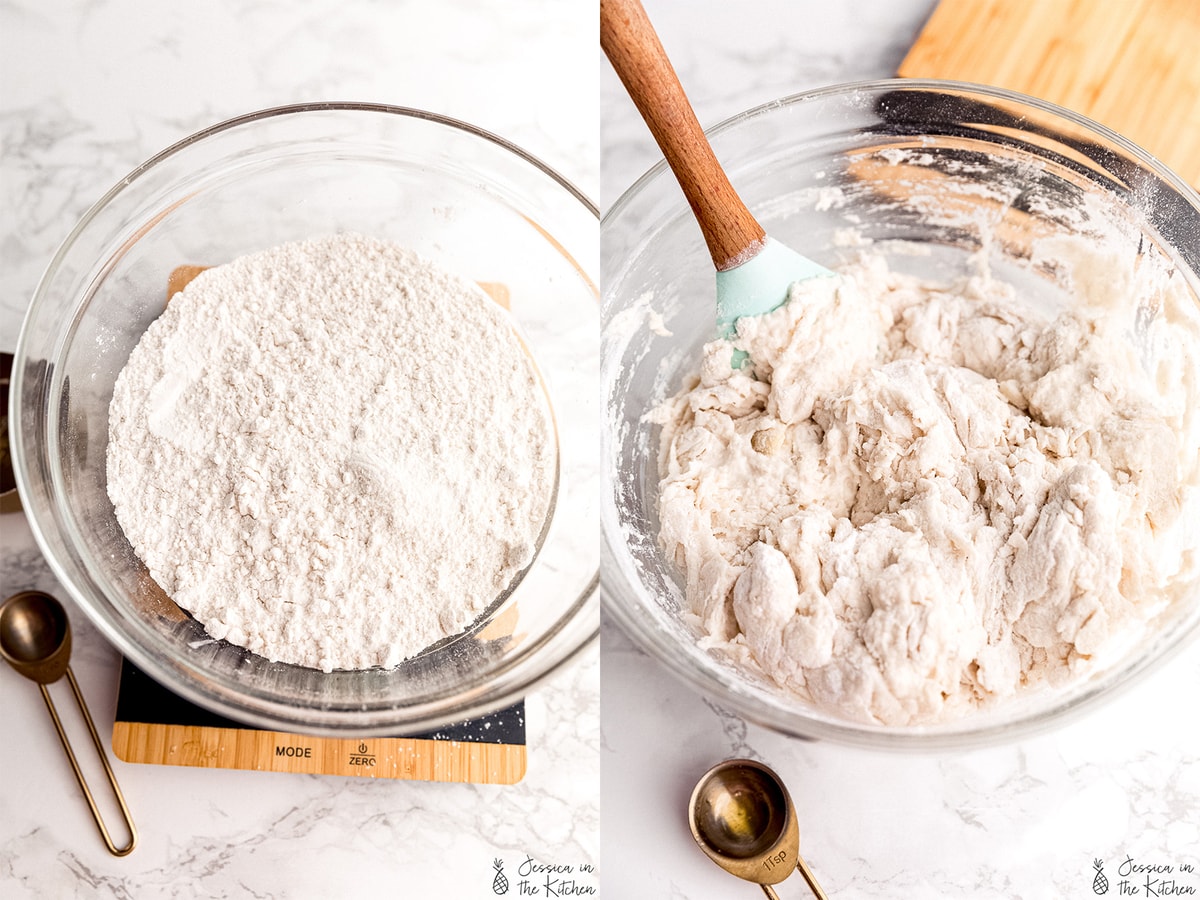
- mix the dry ingredients together. You want to thoroughly combine them. Then, create a well, and add in the wet ingredients.
- Stir with a spatula to combine until you get a shaggy dough (like in the photos). Fold over into a ball and cover and let it rise on your counter.
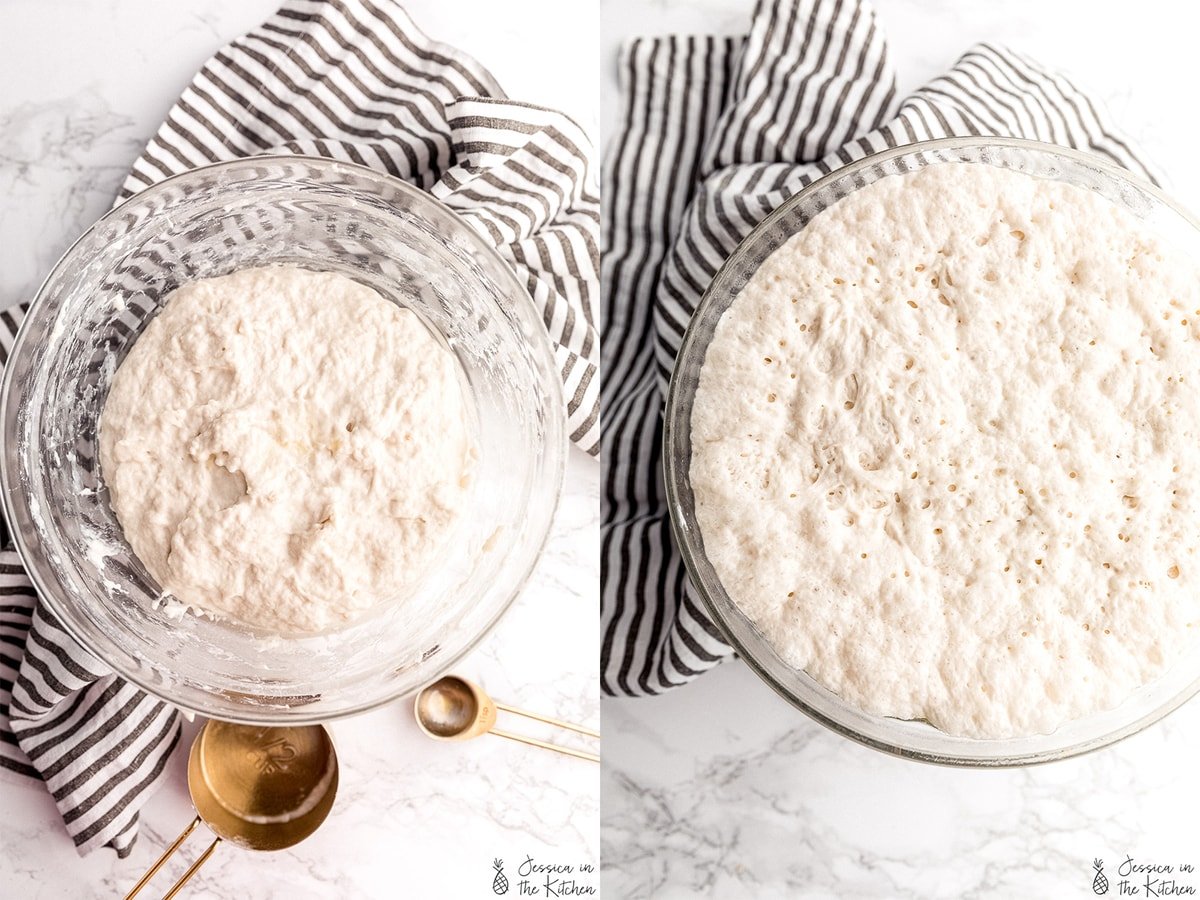
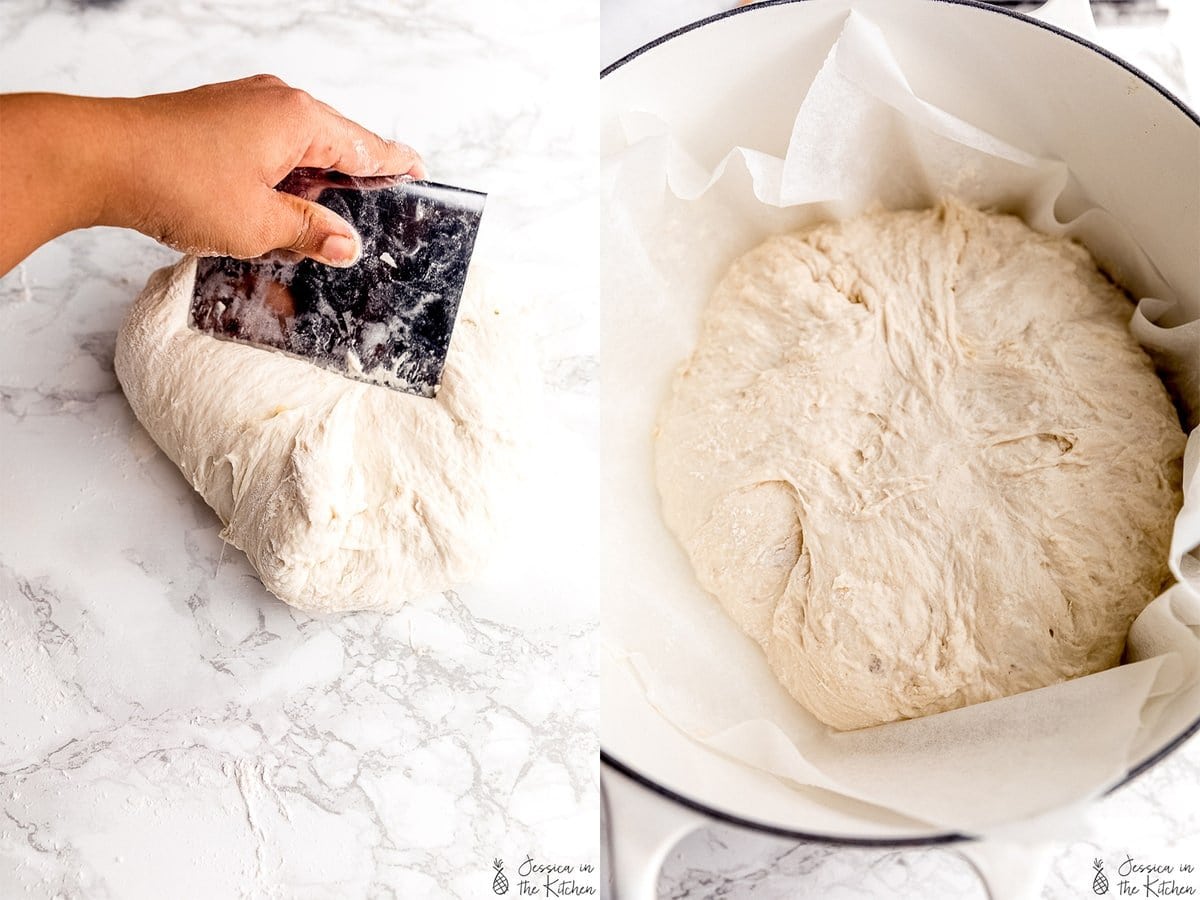
- The dough will double in size (mine sometimes triples!) with beautiful bubbles on top. Pour the dough onto a well floured surface and then add some flour to your hands and the top. You want to fold it in on itself using a dough scraper. If you don’t have a dough scraper, you can use a large floured spatula or a large floured knife. You just want a surface that’s sturdy since the dough is so loose.
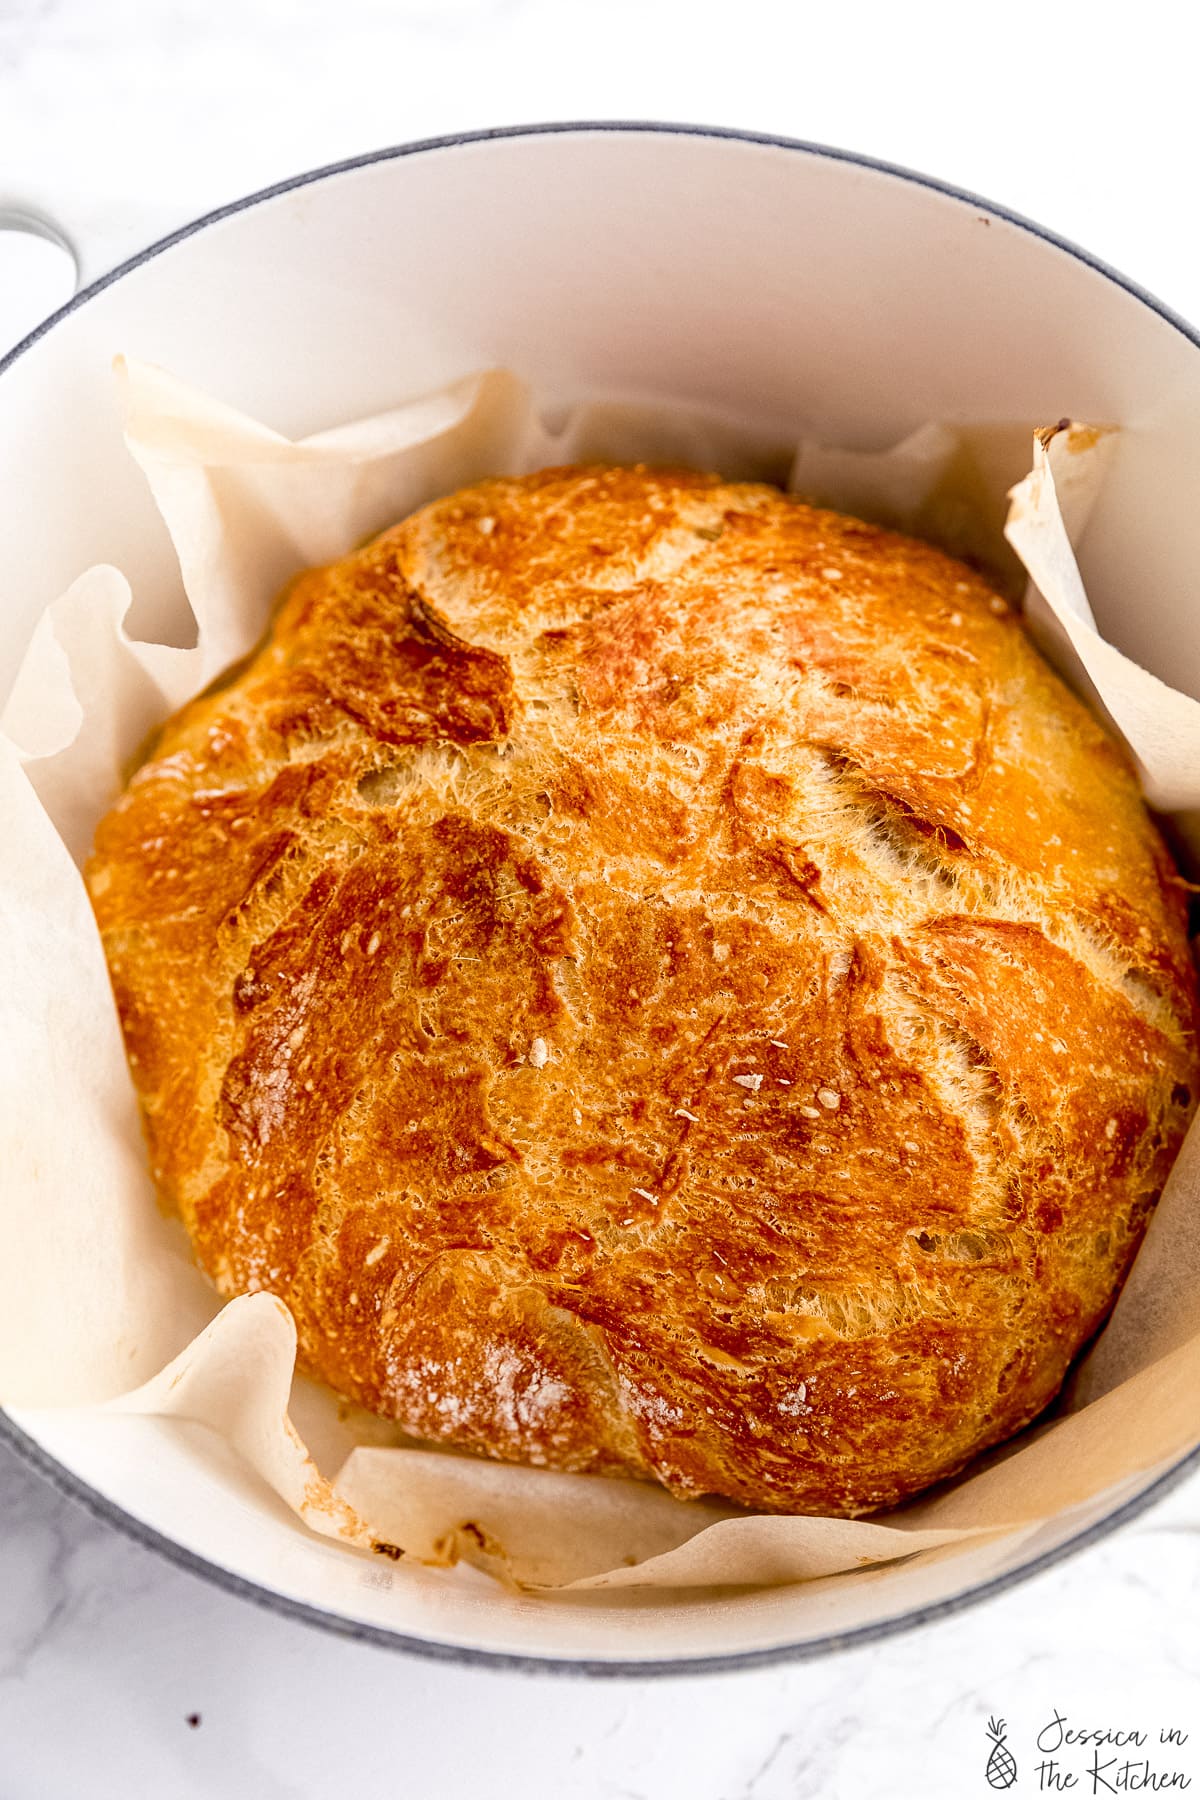
- Put the dough on your parchment, then your parchment into your preheated dutch oven. Cover, bake, remove cover, bake further, then you’re done!
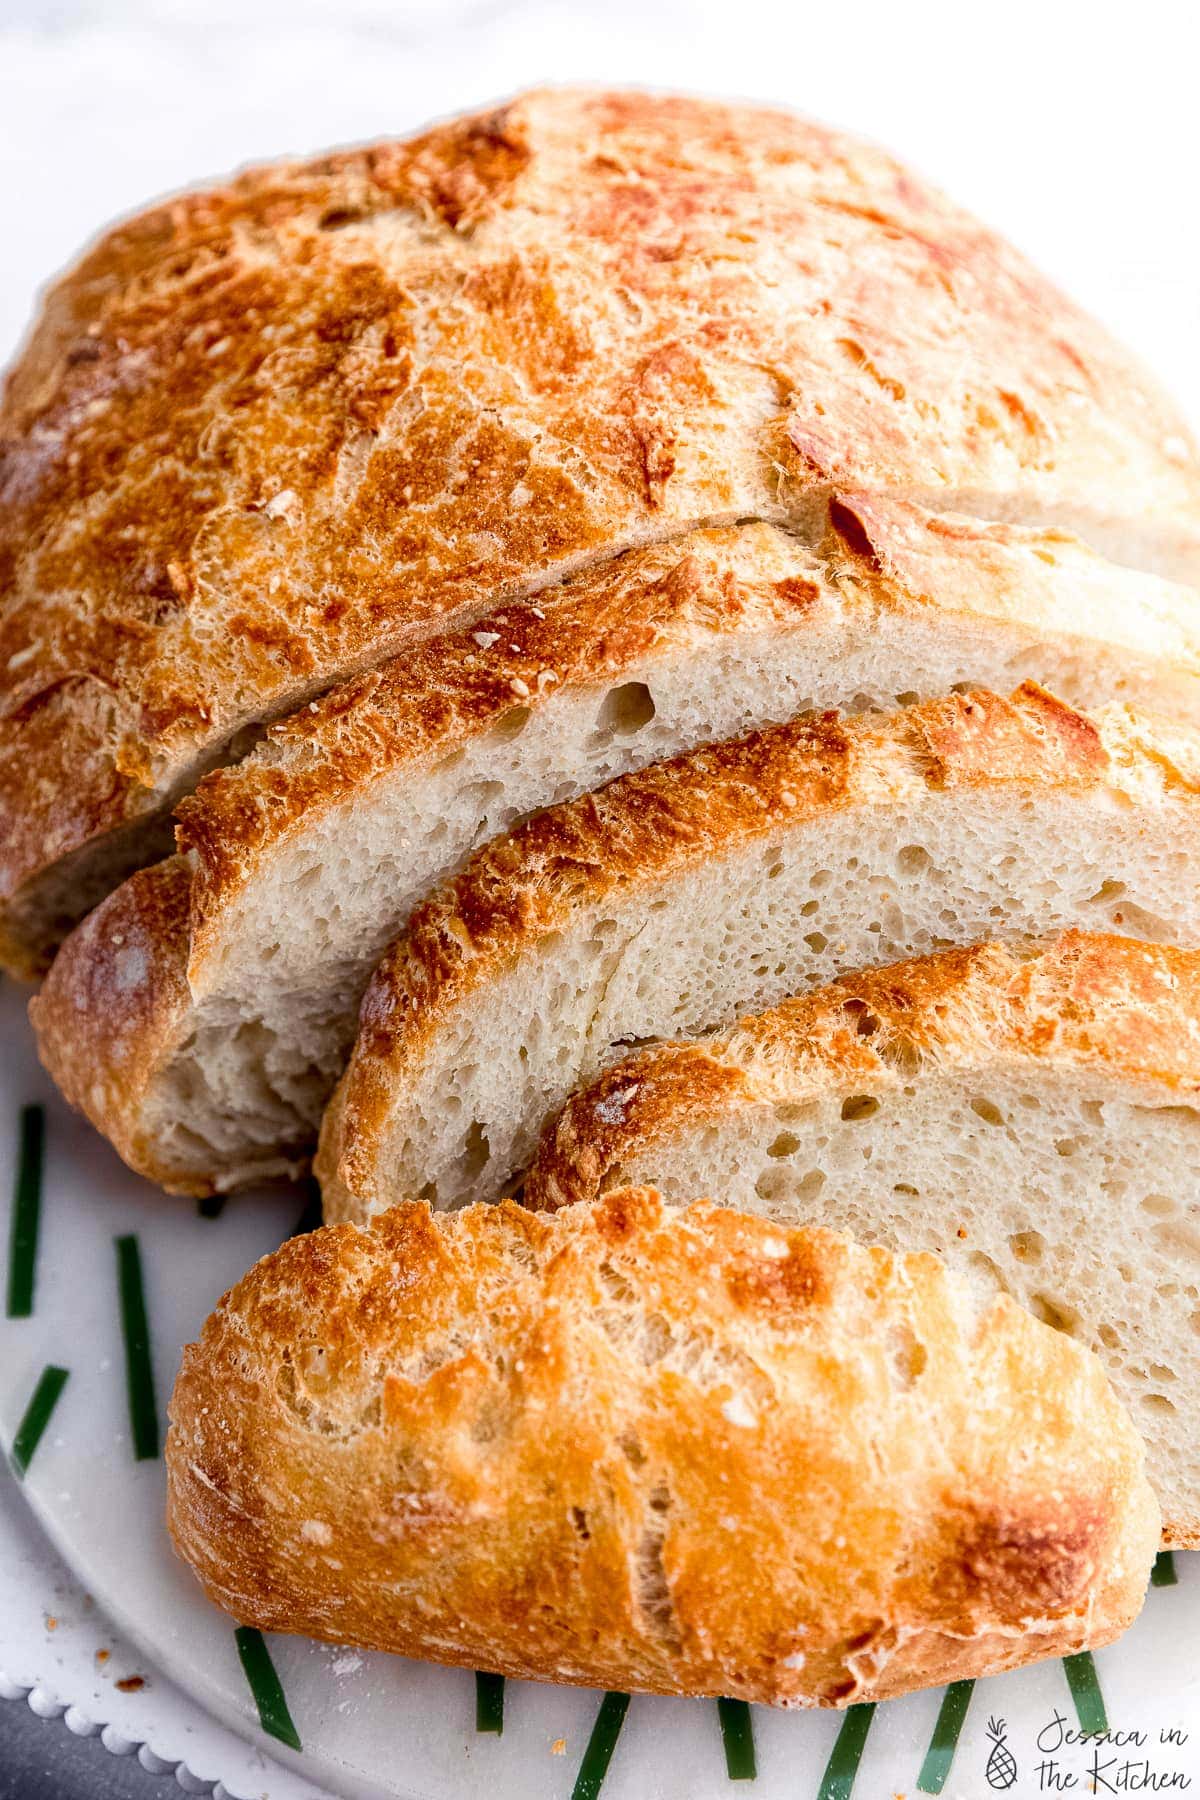
- Let it cool as long as you can (what can I say, we all love warm bread right?) then tear or slice and enjoy! Slather some vegan butter on it and devour!
Key Steps for No-Knead Bread
- ensure your yeast is fresh. Your yeast is your (pun intended) bread and butter of this entire recipe, so it’s crucial that it’s fresh. You can test. You can test it by putting about a teaspoon of it into warm water (about 100°F). Stir to combine, and let it sit for about 5 minutes. It should foam or bubble slightly. You’re good to go!
- Be sure to let it rise for the full time! Just set a timer and leave it alone. If you play with it too much it’ll affect the rise.
- Ensure your dutch oven is preheated. I’ll remind you in the instructions, but I always just set a timer about 30 minutes before I know my dough is going to be done. This is the key to that stunning crust because it gets our home ovens to the temperature of bakery ovens. Feel free to preheat your dutch oven for up to 30 minutes at 450F or even longer.
- Use a kitchen scale. I can’t stress this enough – this is the single kitchen tool that’ll make you an incredible baker. All the patience, effort and hard work in the world doesn’t replace the precision of a scale. I never have to worry if I’m scooping enough flour or adding in too much water because I just follow my scale! Before your next baking project, I recommend ordering one. This is the scale I used for years.
- Don’t overthink it. Yes, the dough will be loose, but together enough to pick up and put on the parchment paper. Yes, it’ll work! You got this.
Recipes to enjoy No Knead Bread with
- Chickpea Tuna
- Lentil Soup
- A good ole Grilled Cheese Sandwich
- Coconut Curry Lentil Soup
- My Vegan Lentil Stew
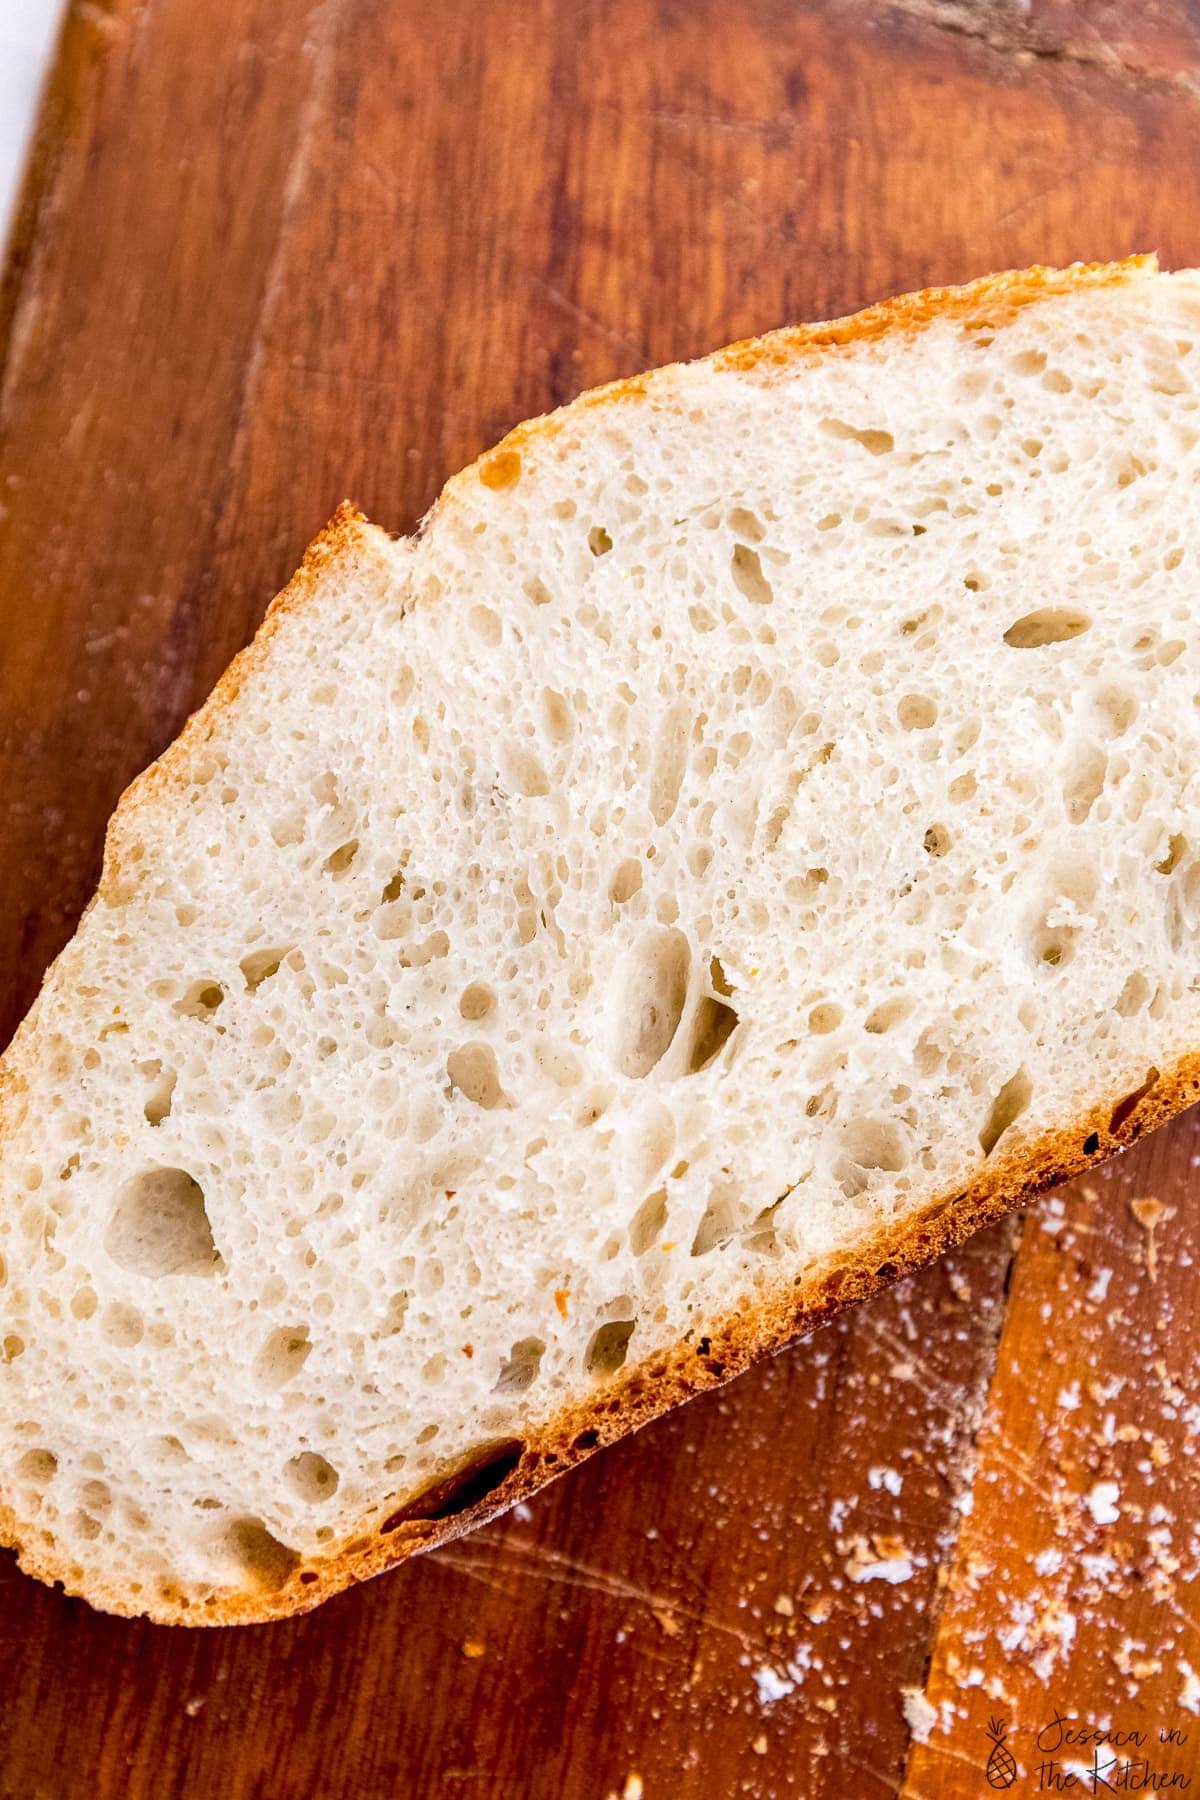
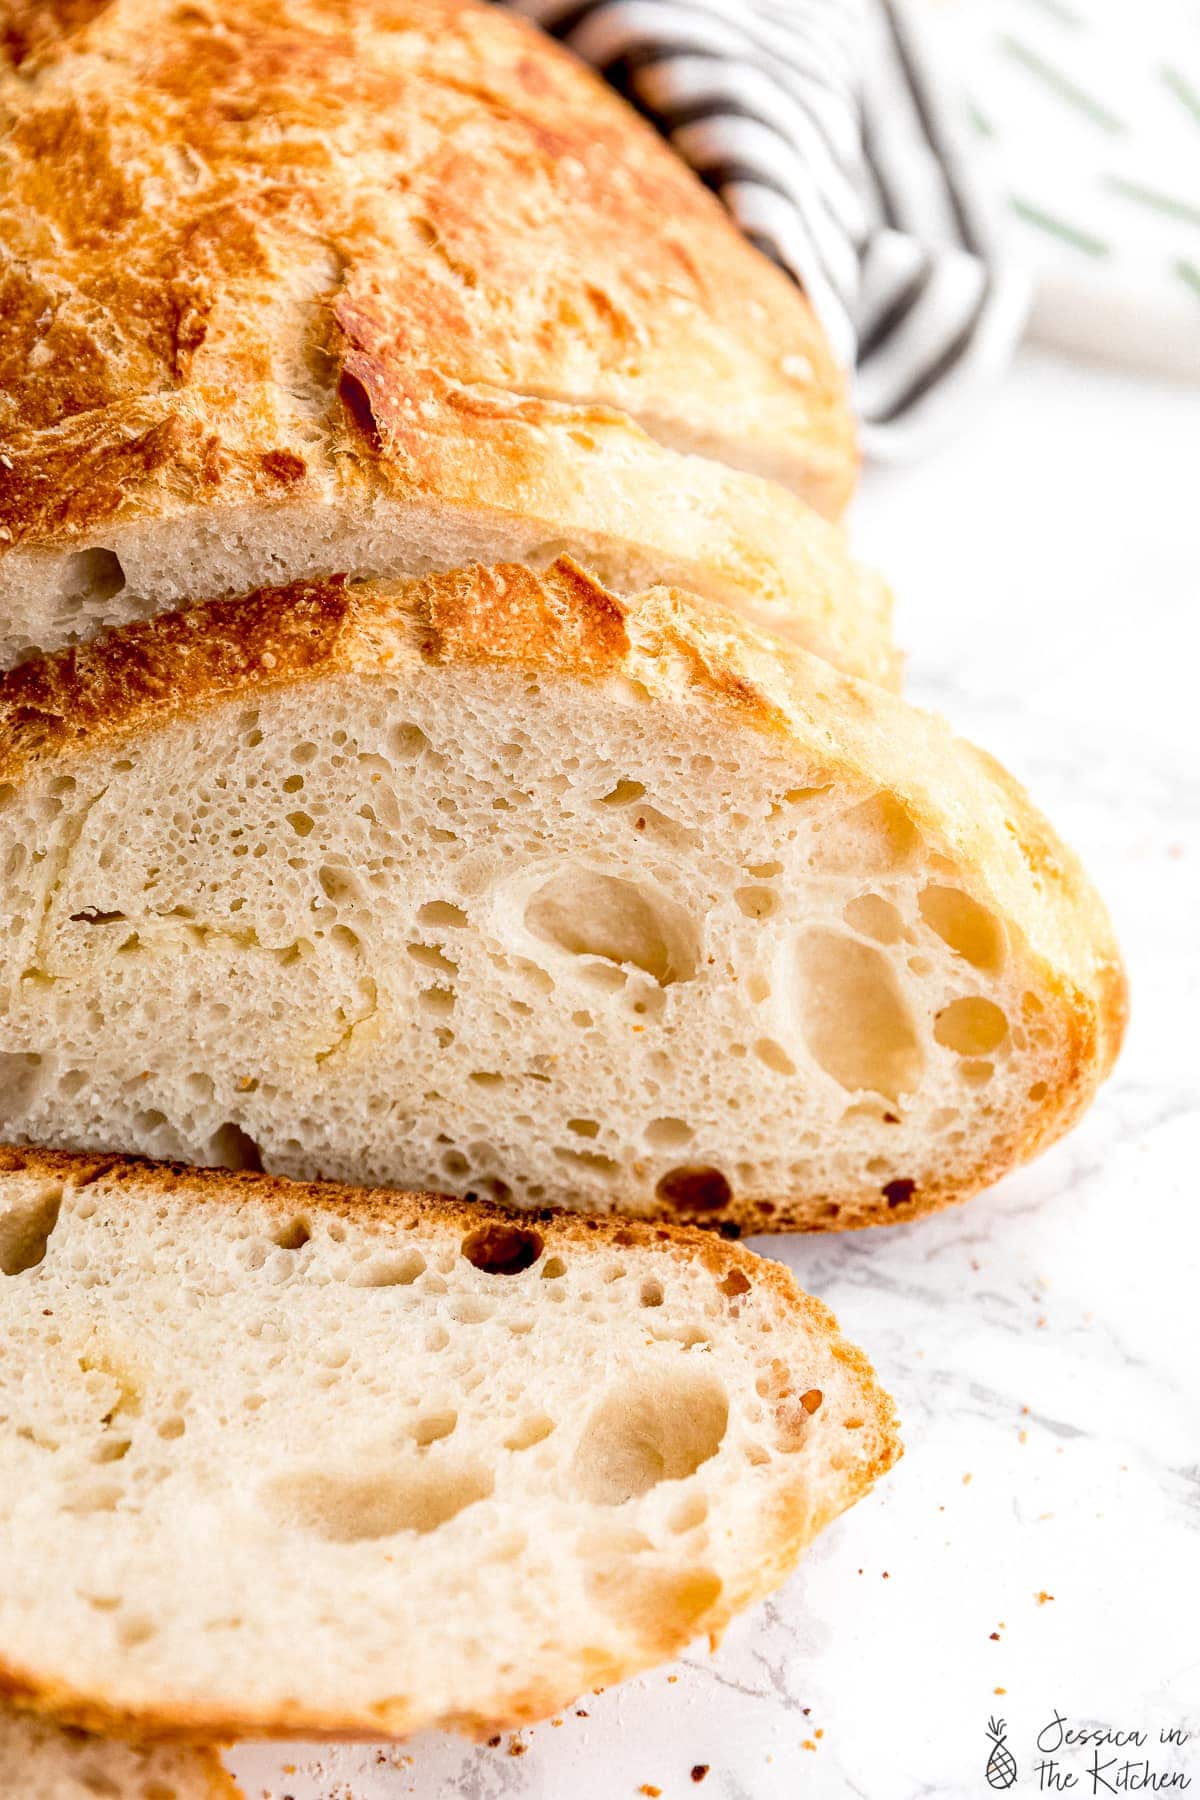
Look how beautiful that crumb structure is! I hope you enjoy this recipe, friends, and send me photos!
Enjoy friends! If you make these No Knead Bread (Dutch Oven Bread), please snap a photo and tag #jessicainthekitchen on Instagram! We’d also love it if you would leave a comment below, and give the recipe a rating! Thanks so much!
No Knead Bread (Dutch Oven Bread)
Ingredients
- 4 3/4 cups all purpose flour + some extra for flouring, (570g)
- 2 1/4 teaspoons instant yeast, (about 1 packet) (7g)
- 2 teaspoons sea salt, (12g)
- 2 cups very warm water (about 120°F/48°C), (472 ml)
- 2 teaspoons maple syrup, agave or granulated sugar, (13.5g)
- 1 teaspoon olive oil or any oil, (4.4g)
Instructions
- In a very large bowl, whisk the dry ingredients together until thoroughly combined. Create a well in the centre and add the warm water, maple syrup and the oil. Stir the water into the dry ingredients to form a dough. You want to stir until it’s all incorporated and the dough looks shaggy but mixed together, about 1 minute.
- Lightly grease the sides of the bowl, and turn the dough over in it to grease the dough. Cover with greased plastic wrap, an alternative wrap or light kitchen towel and let it rise on your counter for 2 to 3 hours. If your kitchen is cold, place it in your oven with the oven light turned ON and the oven OFF for a warm, draft free area for it to rise. The dough will double in size so be sure to use a bowl tall enough to manage this rise.
- In the last 30-40 minutes of rising, place your Dutch oven in the oven and preheat at 450°230°C. You want to add your Dutch before preheating so it preheats with the oven (this will ensure it doesn’t crack).
- After two hours, the dough should have bubbles on the top. Flour a surface with at least 1 tablespoon flour spread out, then pour the risen dough onto it. Sprinkle another 1/2 tablespoon of flour onto the top of the dough and flour your dough scraper/knife/large spatula.
- Using your dough scraper or large knife or spatula, fold the dough on top of itself. Do this by pulling the outer edges up and onto the centre. Rotate the dough and do it a few more times, about 6 to 12 times. You want the dough to feel a bit tighter and to start forming a shape. Feel free to lightly sprinkle more flour during this process. It should take you less than a minute.
- Scoop the dough and place onto a piece of parchment paper. Using your hands, scoop/shape it into a circle.
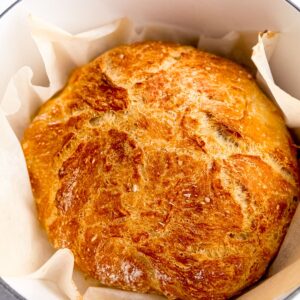
- When the oven is preheated, remove the dutch oven carefully with oven mitts. Take the lid off and place the dough (on the parchment paper) into the Dutch oven. Place lid back on (remember it’s hot!!) and place it all back into the oven.
- Bake for 45 minutes. After that time, open the oven, carefully remove the lid and continue to bake for an additional 15 to 20 minutes until the crust is at your desired level. If you're using a gas oven/convection oven, only do it for 5 to 10 minutes so the bottom and tips don't burn. I love mine golden brown.
- Remove from the oven, and set down. Lift up the edges of the parchment to transfer the bread to a wire cooling rack. If you want to test it for doneness, you can turn it over and lightly tap on the bottom. It should sound hollow.
- Completely cool, then slice, serve and enjoy! If you can't wait, cool it for at least 30 minutes!
Notes
Disclaimer: Although jessicainthekitchen.com attempts to provide accurate nutritional information, kindly note that these are only estimates. Nutritional information may be affected based on the product type, the brand that was purchased, and in other unforeseeable ways. Jessicainthekitchen.com will not be held liable for any loss or damage resulting for your reliance on nutritional information. If you need to follow a specific caloric regimen, please consult your doctor first.


Delicious and SO easy! I’ll probably never go back to making knead bread again. This tasted equally delicious and is so much easier. I used half whole wheat flour the first time – made for a hearty bread that is perfect for fall soups! I will say I didn’t get a ton of brown at first, so I actually turned on the broiler for a few minutes and it was PERFECT. Love love love this recipe.
We’re happy that you’re happy Juli! Thanks for such a nice review!
Homemade bread has always been very intimidating for me. Until I found this recipe. It is super easy and delicious! Highly recommend trying it out for yourself if you haven’t made it already. Thanks Jessica for the great recipes.
My dough was very wet and not easy to shape or work with. I’m certain I followed all measurements and even weighed the flour. Any thoughts or suggestions! TIA!
Hey Jenna,
Would love to help to see what might’ve gone wrong for you! At what stage did this happen? And did you check that your yeast was working/did the dough rise?
Doesn’t matter if it is on the wet side. Just place parchment in your Dutch oven, and plop the dough in there, cover, and bake according to directions. Mine was same consistency, so with a bit of flour I made a bit of a round wet ball with my spatula and baked. Omg, it was so good and baked into the perfect round rustic ball. My company raved over it and there was none left😂
In reply to the baker who had a problem with their dough being too “wet” I too had the problem until I discovered that the measuring cup I was using was not accurate. 2 cups was actually almost 2!/4 cups of water. I went back to a simple 1 cup measuring cup and my dough stopped being too “sloppy”.
This was my first attempt At making bread so I was a bit nervous but it came back out fantastic. Thank you for this recipe.
So happy to hear Renee thanks so much! 🙂
This is my go to recipe for bread. So easy and the results are always on point. Thank you so much Jessica!!!!
Thank you so much Nisha!! So happy to hear this!
Jessica I have baked using your recipe on 2 occasions and both loaves turned out nicely. Now I’m going to start experimenting with adding different spices to add some more unique flavors to my baking. One question though… you mention greasing the bowl what type of “grease” are you referring to? Margarine? Butter? Olive oil? Would you recommend fresh or dried spices? Thank you Ron from Indiana
Hi Ron,
So happy to hear this!! I like to “grease” the bowl with a little bit of olive oil – possibly less than 1 teaspoon, to coat the dough and the bowl. This also helps with that crust! Re herbs, I love either fresh or dried in here but I personally used fresh herbs last time! I also dice mine very fine and ensure to dry them thoroughly first. I especially love fresh herbs if you’re going for colour. But truly, either one works well! Hope that helps so much!!
Tasted great and pretty simple to follow. Thanks. Will try adding some sundried tomatoes or herbs or something like other comments suggested. Will definitely come back to this one.
Great easy recipe ! Amazing taste , texture and appearance ! Love this Dutch oven recipe –
Definitely one to keep on hand – attempting your focaccia next ! 😁😊
Thanks so much Anokhi!!
This is the BEST no knead bread Bread recipe! Such an effortless recipe yet it’s better than any bread I have purchased in a bakery! Perfection in flavor, texture and crunch! Thank you Jessica for sharing this wonderful recipe. I will not only be making this for my family often but will also be gifting this to friends, neighbors and family.
I’m SO happy to hear this Kimberly!! Thank you so much!!
How can I change this to fit in my 3.5 quart Dutch oven- thanks!
Hi Janet,
It should still work – it’ll just be higher! I hope this helps!