Sweet and Sour Cauliflower Wings
This Sweet and Sour Cauliflower Wings recipe is a twist on a popular takeout order! They’re crispy, crunchy and coated in a sweet and sour sauce with just a few ingredients. Learn how to make these in HALF the time!!
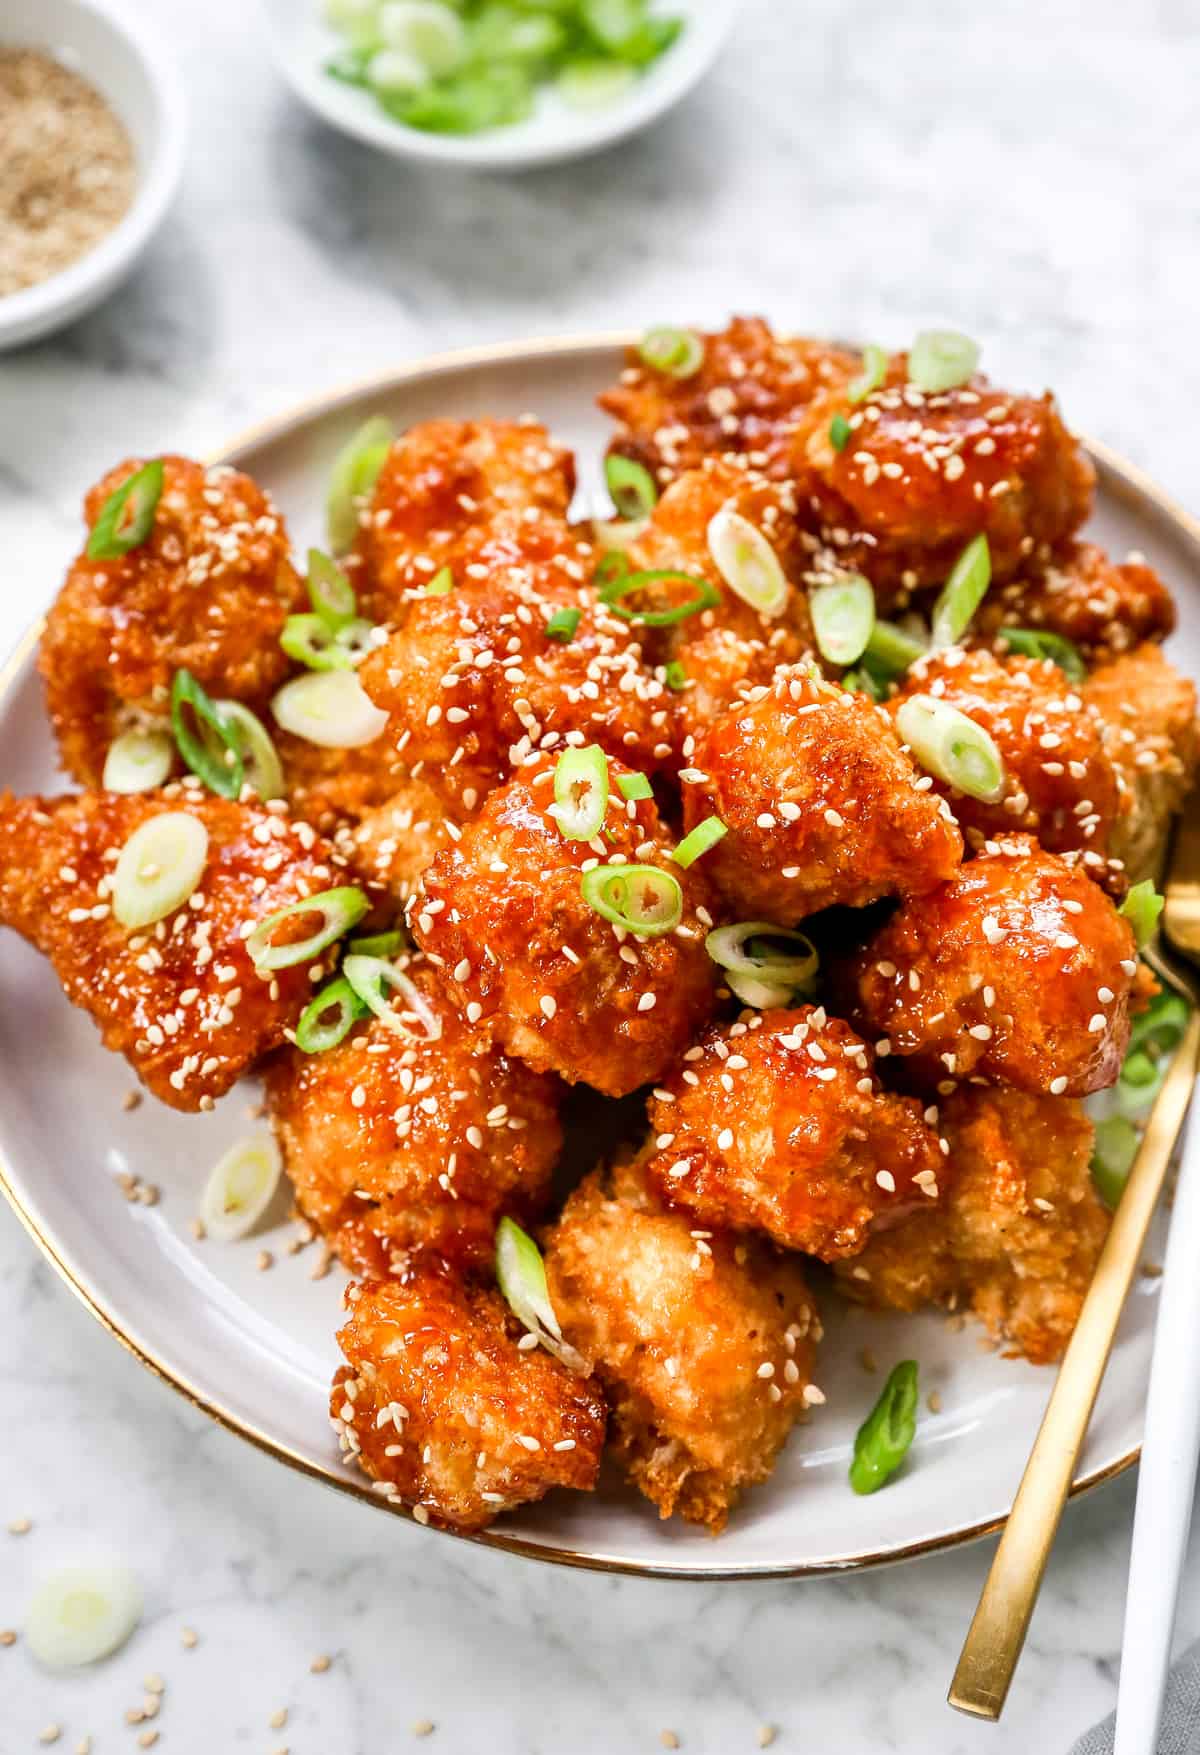
I first made this sauce 10 years ago during Jessiker Bakes days & have been trying to find every way that I can use it since then (hello sweet and sour tofu!). 10 years later (and after a little tweaking) I’m so happy to add this to one of my favourite veggies, cauliflower!
This sweet and sour cauliflower wings recipe hits all the notes. Tangy, sweet and savoury. If the 100+ 5-star reviews on my sweet and sour tofu is any indication, you’ll love this version, especially if you can’t eat tofu. It’s definitely another great addition to your game-day options, or for a great vegan dinner recipe.
Notes on Ingredients
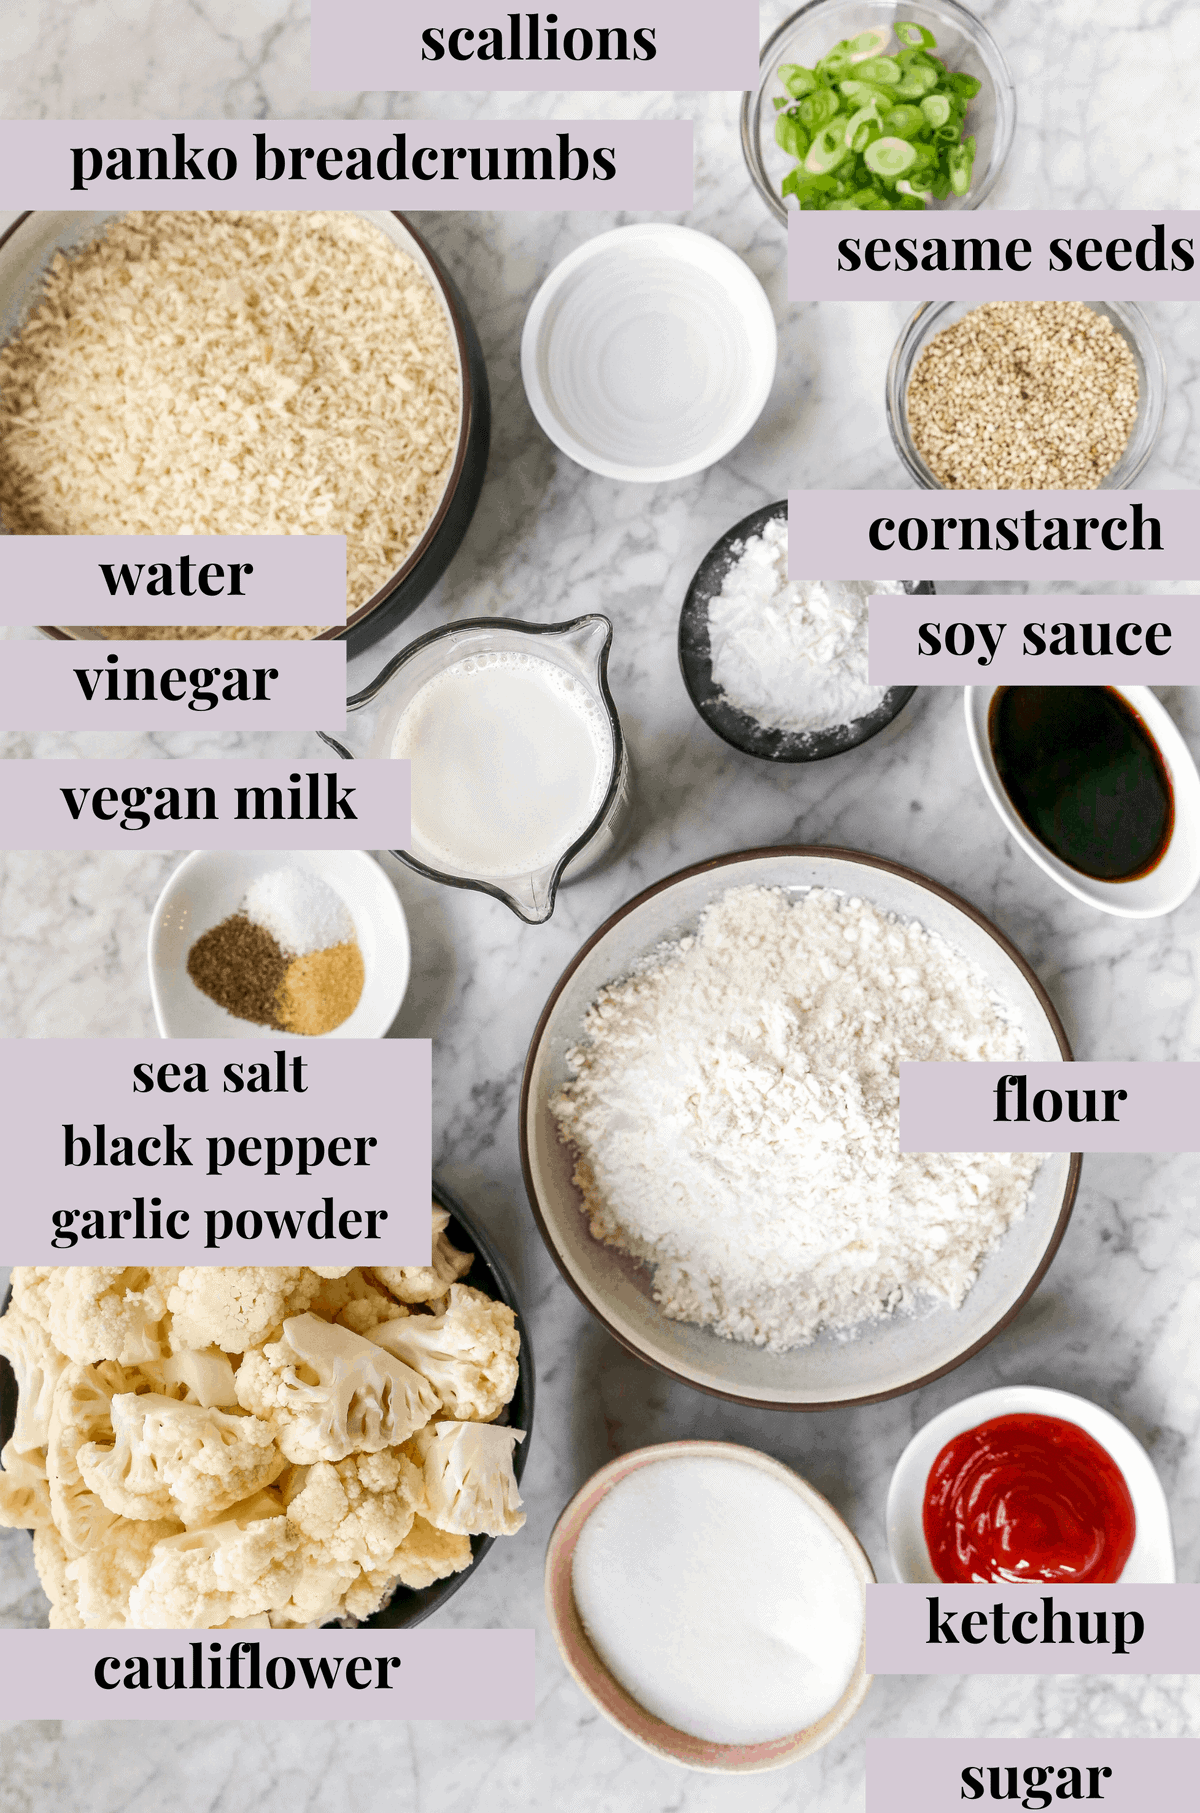
This recipe calls for standard dredging and will be absolutely easy for all cooking levels.
Cauliflower: If you’re using a large cauliflower head instead of medium, definitely double it! It’s hard for me to guess the size of yours, so size up your ingredients accordingly!
Sweet and Sour Sauce: Using ingredients that you enjoy are important. I prefer the subtle taste of rice wine vinegar but white vinegar works well too.
Flour, breadcrumbs: these work perfectly any version of these ingredients! Regular or gluten free flour or breadcrumbs – the choice is up to you.
Vegan milk: For the vegan milk, any kind will work. If you want the best battering result, might I suggest a thicker one like soy milk or cashew milk?
Seasonings: There is a lot of flavour in the sauce so basic seasonings like garlic powder, black pepper and sea salt go a long way.
How to make Sweet and Sour Cauliflower Wings (Step by Step)
Here are some step by step instructions on how to make this sweet and sour cauliflower wings recipe.
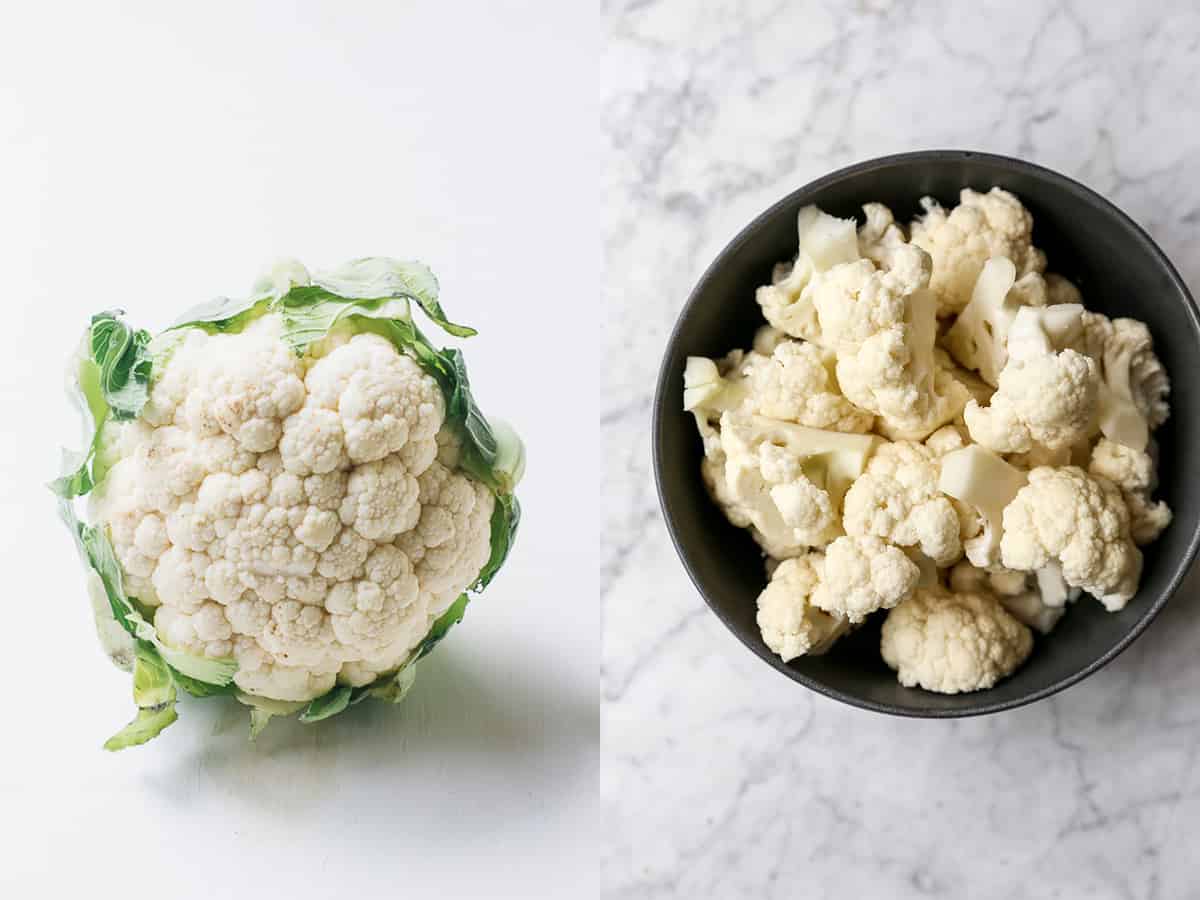
Using a knife, remove florets from the cauliflower (aka cut off the leaves and don’t use the stems). Chop the cauliflower into smaller pieces to resemble the size of the wings.
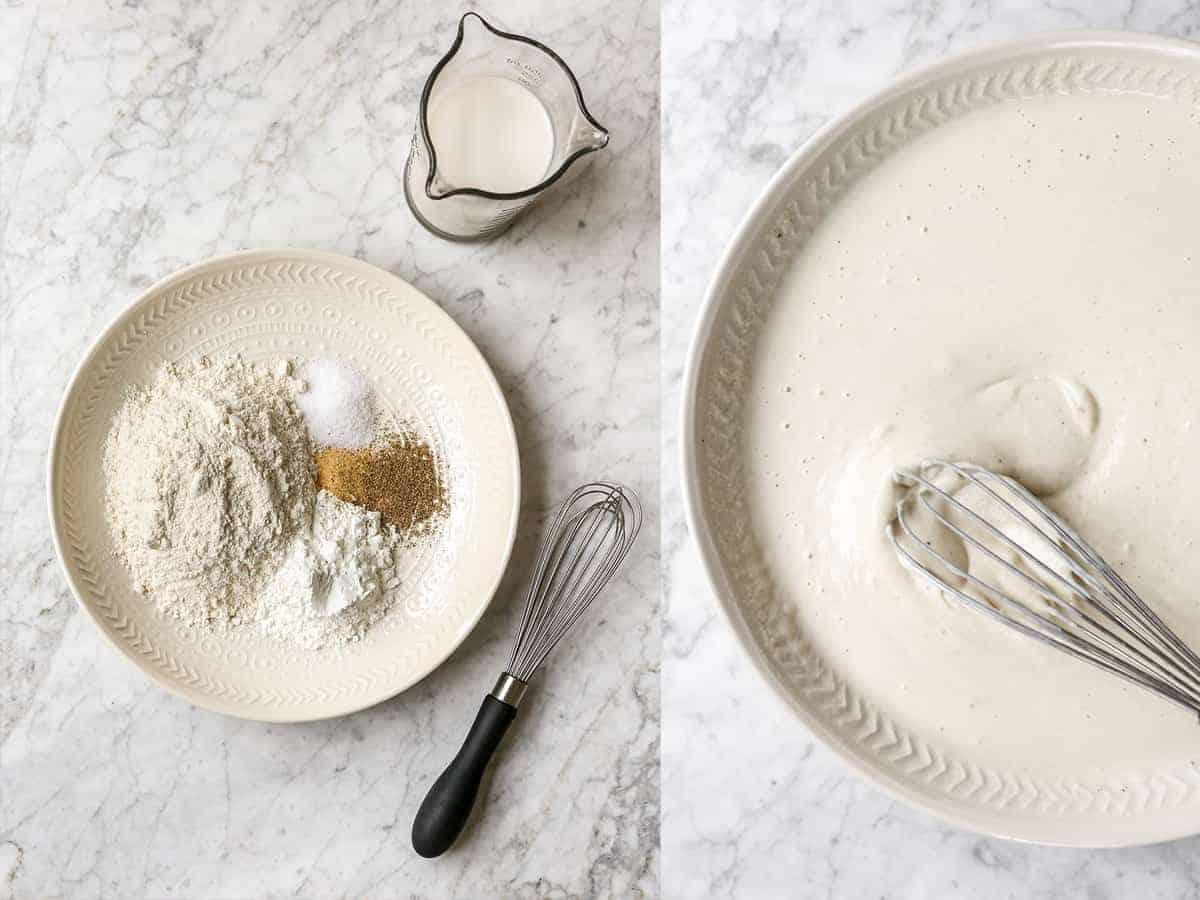
In a bowl, whisk the flour, vegan milk and sea salt, ground black pepper and garlic powder in a bowl to make the batter. If the batter is too thick, feel free to thin it out with some more milk and vice versa.
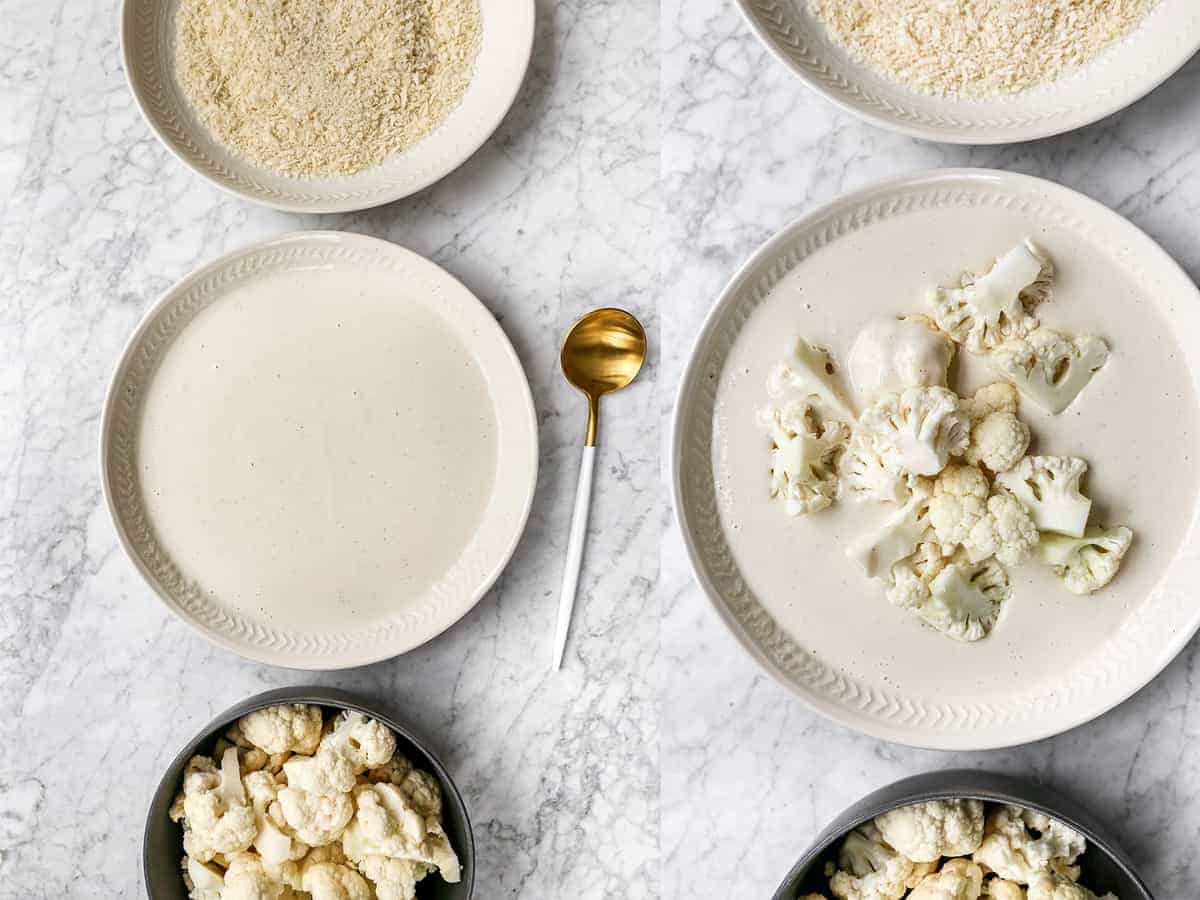
In a separate bowl, place the breadcrumbs. Line it up beside the batter bowl and the cauliflower (for a dredging station). Toss the cauliflower in the batter mixture (you can add them all at once), using a spatula or spoon to coat them all.

Transfer them to the breadcrumbs (you can do this in two or three batches) to coat completely.
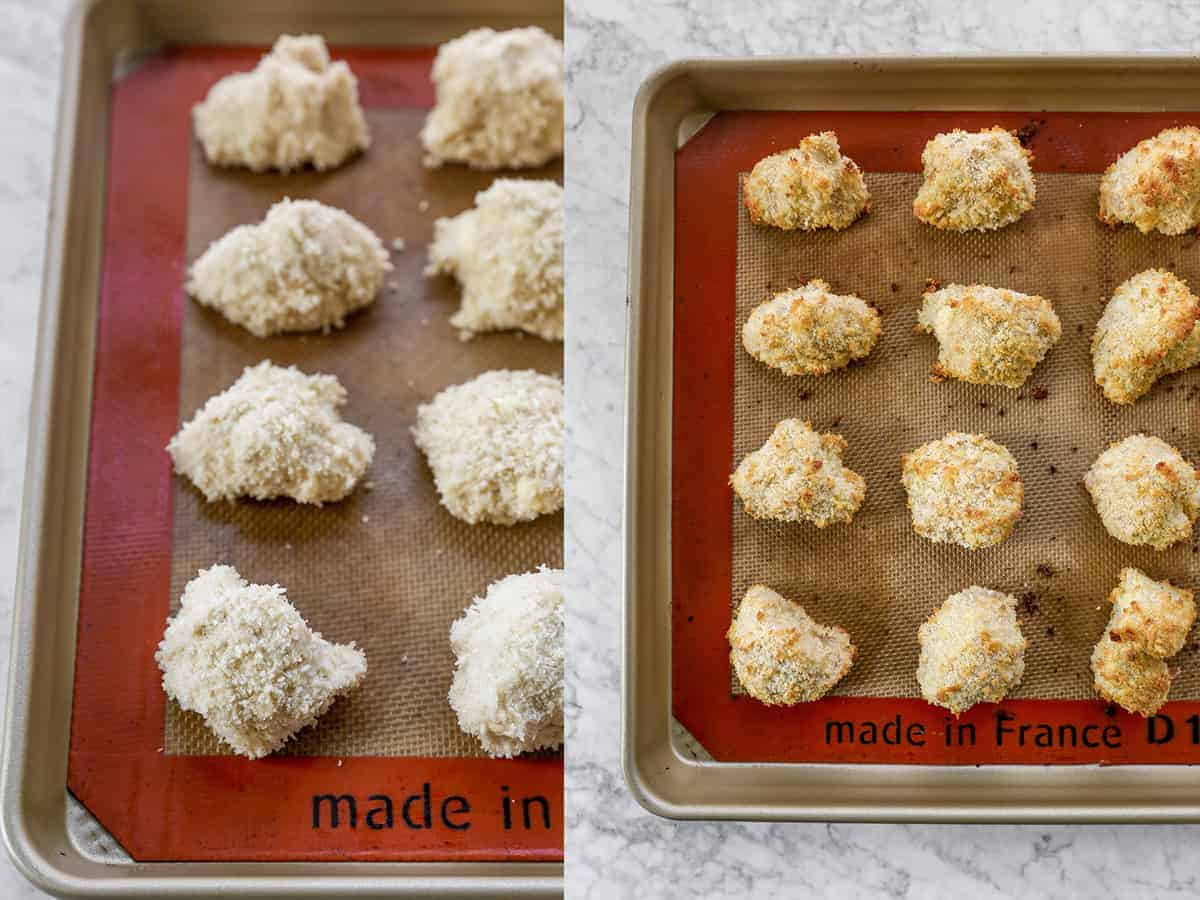
Then place onto the baking sheet, giving each wing enough space. Repeat until all of the wings are coated. Bake for 22 minutes.

While baking, prepare the ingredients for the sauce by heating & whisking together. Allow it to cool while the wings finish cooking.
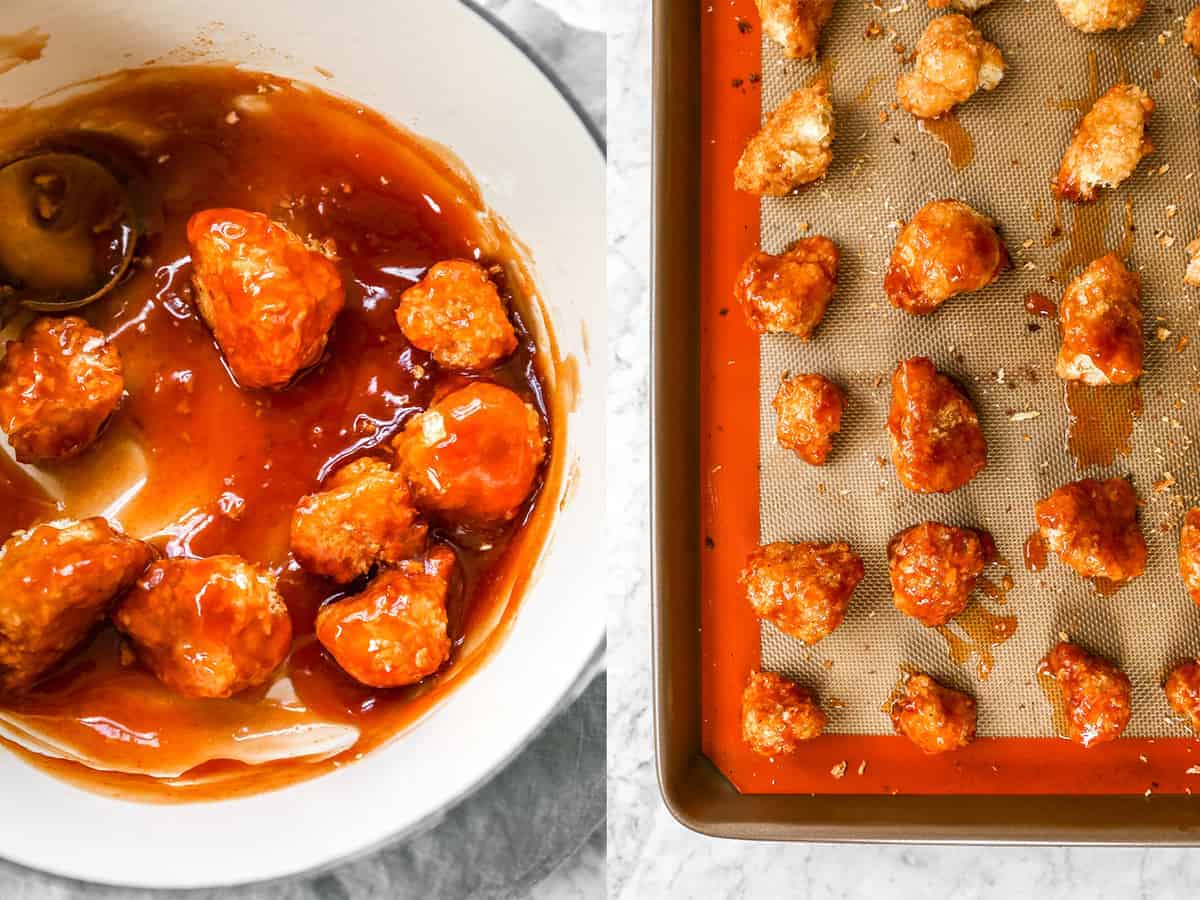
Remove from oven. Toss the wings in the sauce (I like to use a spatula to move them around to get properly coated) then using tongs or a spoon, remove and place back on the baking sheet. Bake for another 5 minutes for the sauce to soak into the wings.
Remove from oven, and garnish with sesame seeds and chopped scallions. Eat immediately – enjoy!

Expert Tips and FAQs
When you’re cutting the cauliflower off of the stem, don’t make them too small. Think: hand held wing-like pieces!
BTW, and it’s a big “by the way”, I completely hacked my own recipe! You don’t have to dip each cauliflower wing in individually (like I used to in the past). Like in the video, you can just toss them all at once! It saves SO much time and energy (and you get to eat them faster!)!
When making your sauce, ensure that you actually simmer it for the full 5 minutes so that the sauce reaches the perfect viscosity. A thick sauce is preferred over a thin one.
The sauce only takes a short time to prepare. Starting it early in the baking process allows the sauce to cool and ensures the wings stay crispy (so you’re not pouring piping hot sauce over crispy wings and losing the crispiness).
I highly recommend using a (affiliate link) silicone baking sheet for this. Nothing sticks to it, and it’s so easy to clean! This is especially important with this sticky sweet and sour cauliflower wings recipe. This is the (affiliate link) one I use.
Serving Suggestions for Sweet and Sour Cauliflower Wings
Keeping it simple is key with the combination of flavours in this dish. So one of the best pairings for it is white rice.
If simple isn’t your thing using you can try these 15 Minute Sesame Noodles. It also pairs really well.

More Vegan Game Day Snacks
As game day approaches, these cauliflower wings are must on the table. It works as a stand-alone or a treat to pass around to the family. The best part is that these cauliflower wings work perfectly with the other “wings” I have on the blog.
You can make a platter with your family by adding the following:
- BBQ Cauliflower Wings
- Lemon Pepper Cauliflower Wings
- Crispy Cauliflower Tacos with Chipotle Crema
- Sticky Spicy Sesame Cauliflower Wings
- Bang Bang Cauliflower Wings
To find even more me approved cauliflower wings to mix and match, you can look through all my cauliflower recipes!
Enjoy friends! If you make this Sweet and Sour Cauliflower Wings, please snap a photo and tag #jessicainthekitchen on Instagram! We’d also love if you would leave a comment below, and give the recipe a rating! Thanks so much!

Sweet and Sour Cauliflower Wings
Ingredients
- 1 medium head cauliflower, if using a large head, you may need to double the batter and sauce quantities
- ¾ cup flour, all-purpose gluten-free flour or regular all purpose flour works
- 3 tablespoons cornstarch
- ¾ cup unsweetened vegan milk, any kind works
- ¼ teaspoon sea salt
- ½ teaspoon ground black pepper
- ½ teaspoon garlic powder
- 1 cup panko breadcrumbs , seasoned with salt & pepper (use gluten free if needed)
Sweet and Sour Sauce
- ½ cup sugar , I use cane sugar, you can use brown or any granulated kind (meaning not a liquid sugar)
- ¼ cup ketchup
- ¼ cup vinegar, preferably rice or white
- ¼ cup water
- 1 tablespoon soy sauce, gluten free if needed, or liquid aminos or tamari
- 1 teaspoon garlic powder
- 2 teaspoons cornstarch + 2 teaspoons water stirred together
- ½ tablespoon sesame seeds , for garnish
- Chopped Scallion, for garnish
Instructions
Cauliflower Wings
- Preheat oven to 450°F/230°C.
- Prepare a baking sheet by lining it with a silicone baking sheet or greased foil. Using a knife, remove florets from the cauliflower (aka cut off the leaves and don't use the stems). Chop the cauliflower into smaller pieces to resemble the size of the wings.
- In a separate bowl, whisk the gluten-free flour, cornstarch, almond milk, sea salt, ground black pepper and garlic powder in a bowl to make the batter. If the batter is too thick, feel free to thin it out with some more milk and vice versa. In a separate bowl, place the breadcrumbs. Line it up beside the batter bowl.
- Toss the cauliflower in the batter mixture (you can add them all at once), using a spatula or spoon to coat them all. Transfer them to the breadcrumbs (you can do this in two or three batches) to coat completely, then place onto the baking sheet, giving each wing enough space. Repeat until all of the wings are coated.
- Bake for 22 minutes. Please ensure your oven is completely preheated and hot.
- While baking, prepare the ingredients for the sauce by heating & whisking together.
- Remove from oven. Toss the wings in the sauce (I like to use a spatula to move them around to get properly coated) then using tongs or a spoon, remove and place back on the baking sheet. Bake for another 5 minutes for the sauce to soak into the wings.
- Remove from oven, and garnish with sesame seeds and chopped scallions. Eat immediately – enjoy!
Sweet and Sour Sauce
- In a pan over medium high heat, whisk together the sugar, ketchup, vinegar, water, soy sauce, garlic powder and the cornstarch slurry for the sweet and sour sauce and stir together until fully combined and cornstarch slurry is dissolved.
- Bring to a slight boil, then reduce to a simmer for about 5 minutes until the sauce has thickened up. Taste test and add more sugar or soy sauce if you desire. Whisk frequently so the cornstarch doesn't thicken up in spots but instead mixes evenly throughout the sauce. If you’d like the sauce thicker, add more cornstarch, one teaspoon (+ a teaspoon of water) at a time. Remove from heat until needed.
Notes
Expert Tips and FAQs
When you’re cutting the cauliflower off of the stem, don’t make them too small. Think: hand held wing-like pieces! BTW, and it’s a big “by the way”, I completely hacked my own recipe! You don’t have to dip each cauliflower wing in individually (like I used to in the past). Like in the video, you can just toss them all at once! It saves SO much time and energy (and you get to eat them faster!)! If you can’t have it, you can skip the cornstarch. But it does make the cauliflower extra crispy and crunchy by drawing out any excess liquid! Ensure that you simmer for 5 mins so that the sauce reaches the perfect viscosity. A thick sauce is preferred over a thin one. The sauce only takes a short time to prepare. Starting it early in the baking process allows the sauce to cool and ensures the wings stay crispy. I highly recommend using a (affiliate link) silicone baking sheet for this. Nothing sticks to it, and it’s so easy to clean! This is especially important with this sticky sweet and sour cauliflower wings recipe. This is the (affiliate link) one I use.Disclaimer: Although jessicainthekitchen.com attempts to provide accurate nutritional information, kindly note that these are only estimates. Nutritional information may be affected based on the product type, the brand that was purchased, and in other unforeseeable ways. Jessicainthekitchen.com will not be held liable for any loss or damage resulting for your reliance on nutritional information. If you need to follow a specific caloric regimen, please consult your doctor first.


Thanks for sharing this recipe!
You’re welcome Maria!
hi there, I was just wondering if this is suitable for freezing. heading off on a trip soon and have loads of the ingredients to use up!
Hi Bronte,
I haven’t tried freezing these but I don’t think they would thaw and still be crispy! If you’re okay with them not being crispy then yes you can! Just thaw them overnight then reheat in your air fryer or oven. Enjoy so much!
Fabulous recipe! Perfect!
Thank you so much Brenda! We’re so happy that you like it.
PERFECT BATTER! I’ve tried so many recipes for breaded cauliflower and this was the FIRST I found that doesn’t fall off! It sticks so well and cooks well and tastes great! Will use it again for so many things! thank you!
You’re so welcome Valerie!
Perfection! A much faster process than other baked cauli recipes. The last 5 minute oven trick to set the glaze makes this recipe sing!
Awesome! We’re so happy that it worked out well for you.
Made this for dinner this evening and it was delicious. My meat loving, cauliflower hating husband loved it too! A real winner. I was surprised by how quickly I was able to throw this together and how unfiddly it was. Also super impressed that the recipe for the sauce and batter produced just enough for the job so no waste. I am now going to work my way through all the cauliflower wing recipes on this site, see which is our favourite. Thanks for sharing such a great recipe 😊
thanks so much Judy! We’re so happy that you enjoyed it.
Made this totally using the recipe with the exception I used fresh garlic. It was absolutely delicious. My husband loved it. This recipe will be a regular in this house
The sweet and sour sauce is the absolute BEST thing I have ever tasted! I already love your Buffalo cauliflower so I knew the cauliflower would be divine but I had NO IDEA how good this sauce would be! Have to go lick my plate now.
Hi Erin,
Ahh, this is music to my ears. Thank you so much for taking the time to share this lovely review! So so happy you loved these Sweet and Sour Cauliflower Wings.
Hoping this will work using the sauce just as a dip?
Hi Dawn,
You definitely could use the sauce as a dip yes! Who doesn’t love a good sweet and sour dip?