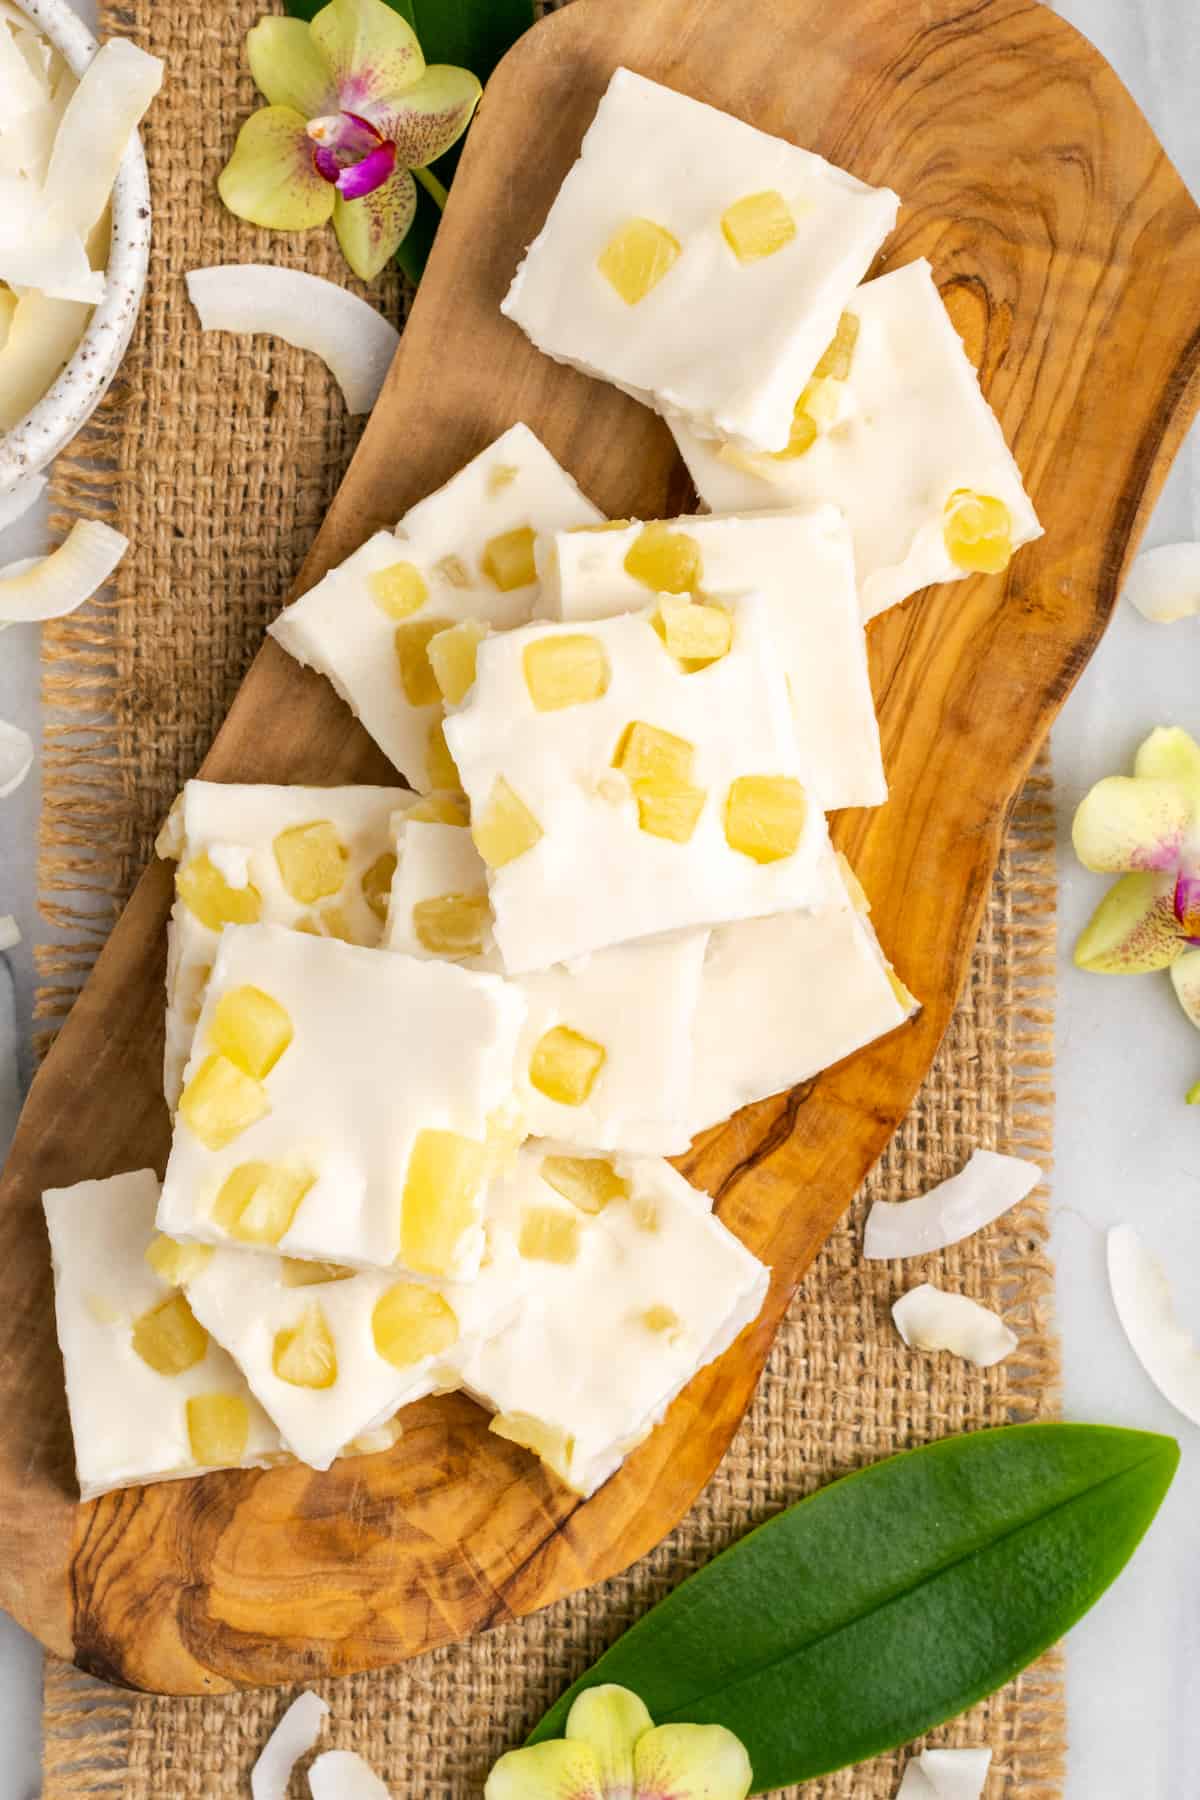
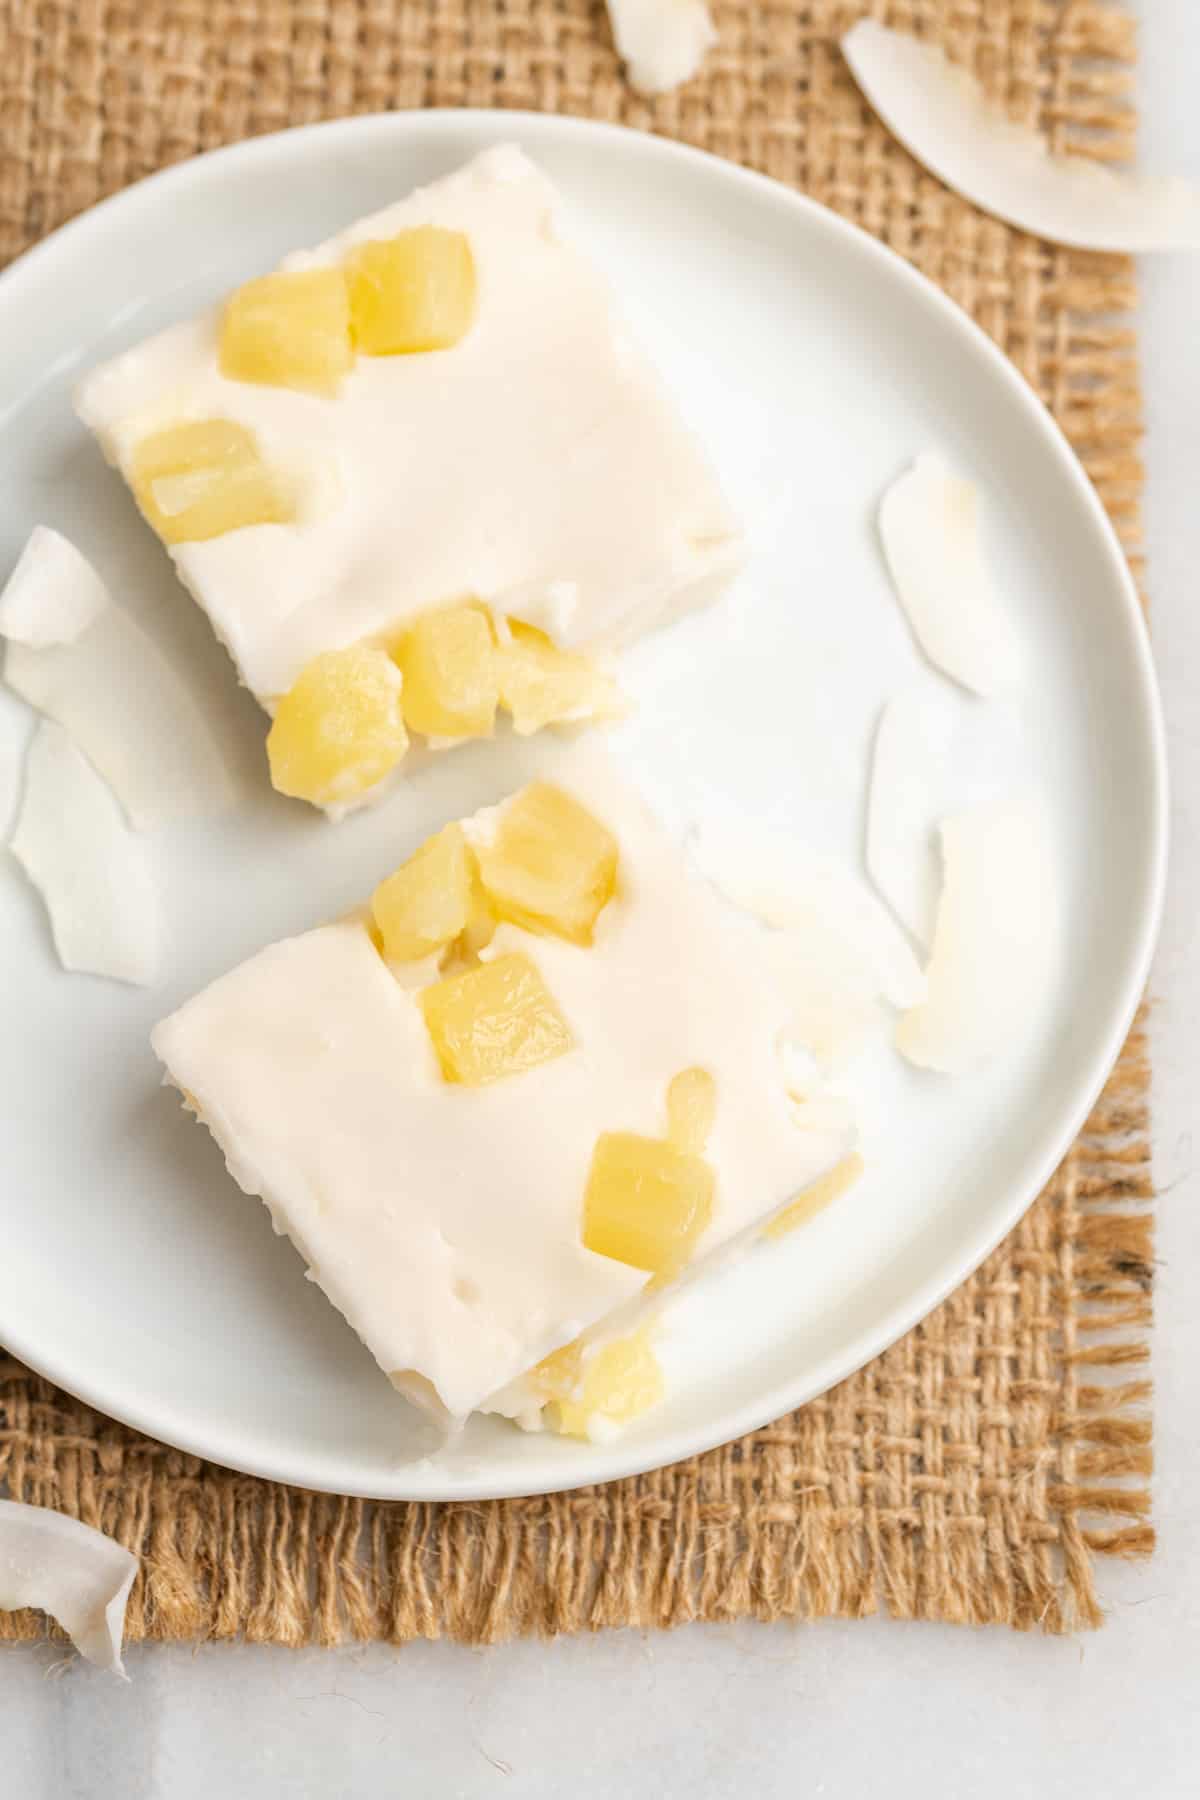
Haupia
Haupia is a classic Hawaiian dessert that’s cool, creamy, and full of tropical flavour. Also known as coconut pudding, my version of haupia is vegan, studded with pieces of juicy pineapple, and oh-so-easy to make.
I love a good vegan dessert recipe, from chocolate avocado ice cream to vegan carrot cake and pecan pie, but this vegan haupia recipe is definitely my new favourite. Truly, the hardest part is waiting for it to chill in the fridge!
What Is Haupia?
Haupia is a traditional Hawaiian dessert made with coconut milk, sugar, and cornstarch or arrowroot. (Arrowroot starch, or pia, is the more traditional option, but cornstarch is commonly used today.) Some recipes call for the addition of whole milk or even gelatin, but it’s not necessary—in fact, some argue that haupia made with gelatin isn’t haupia at all!
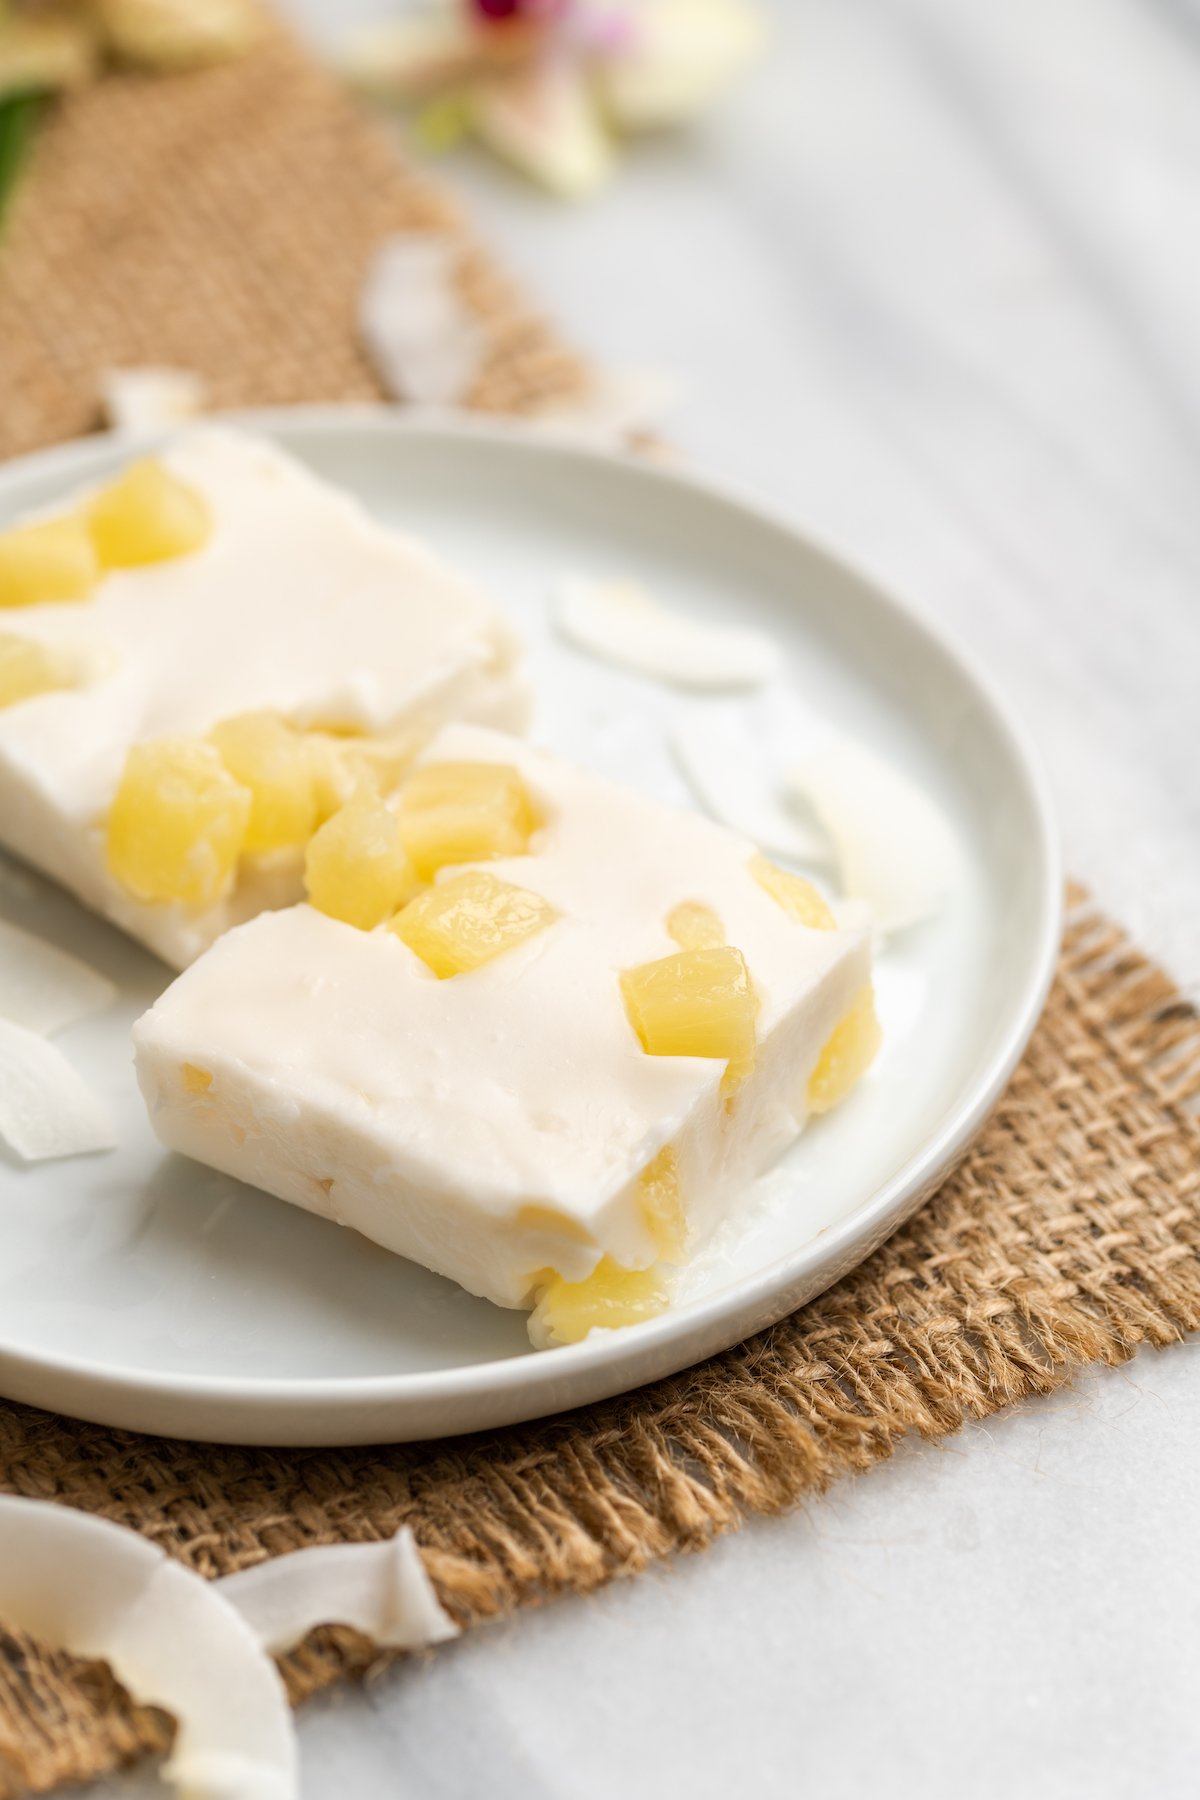
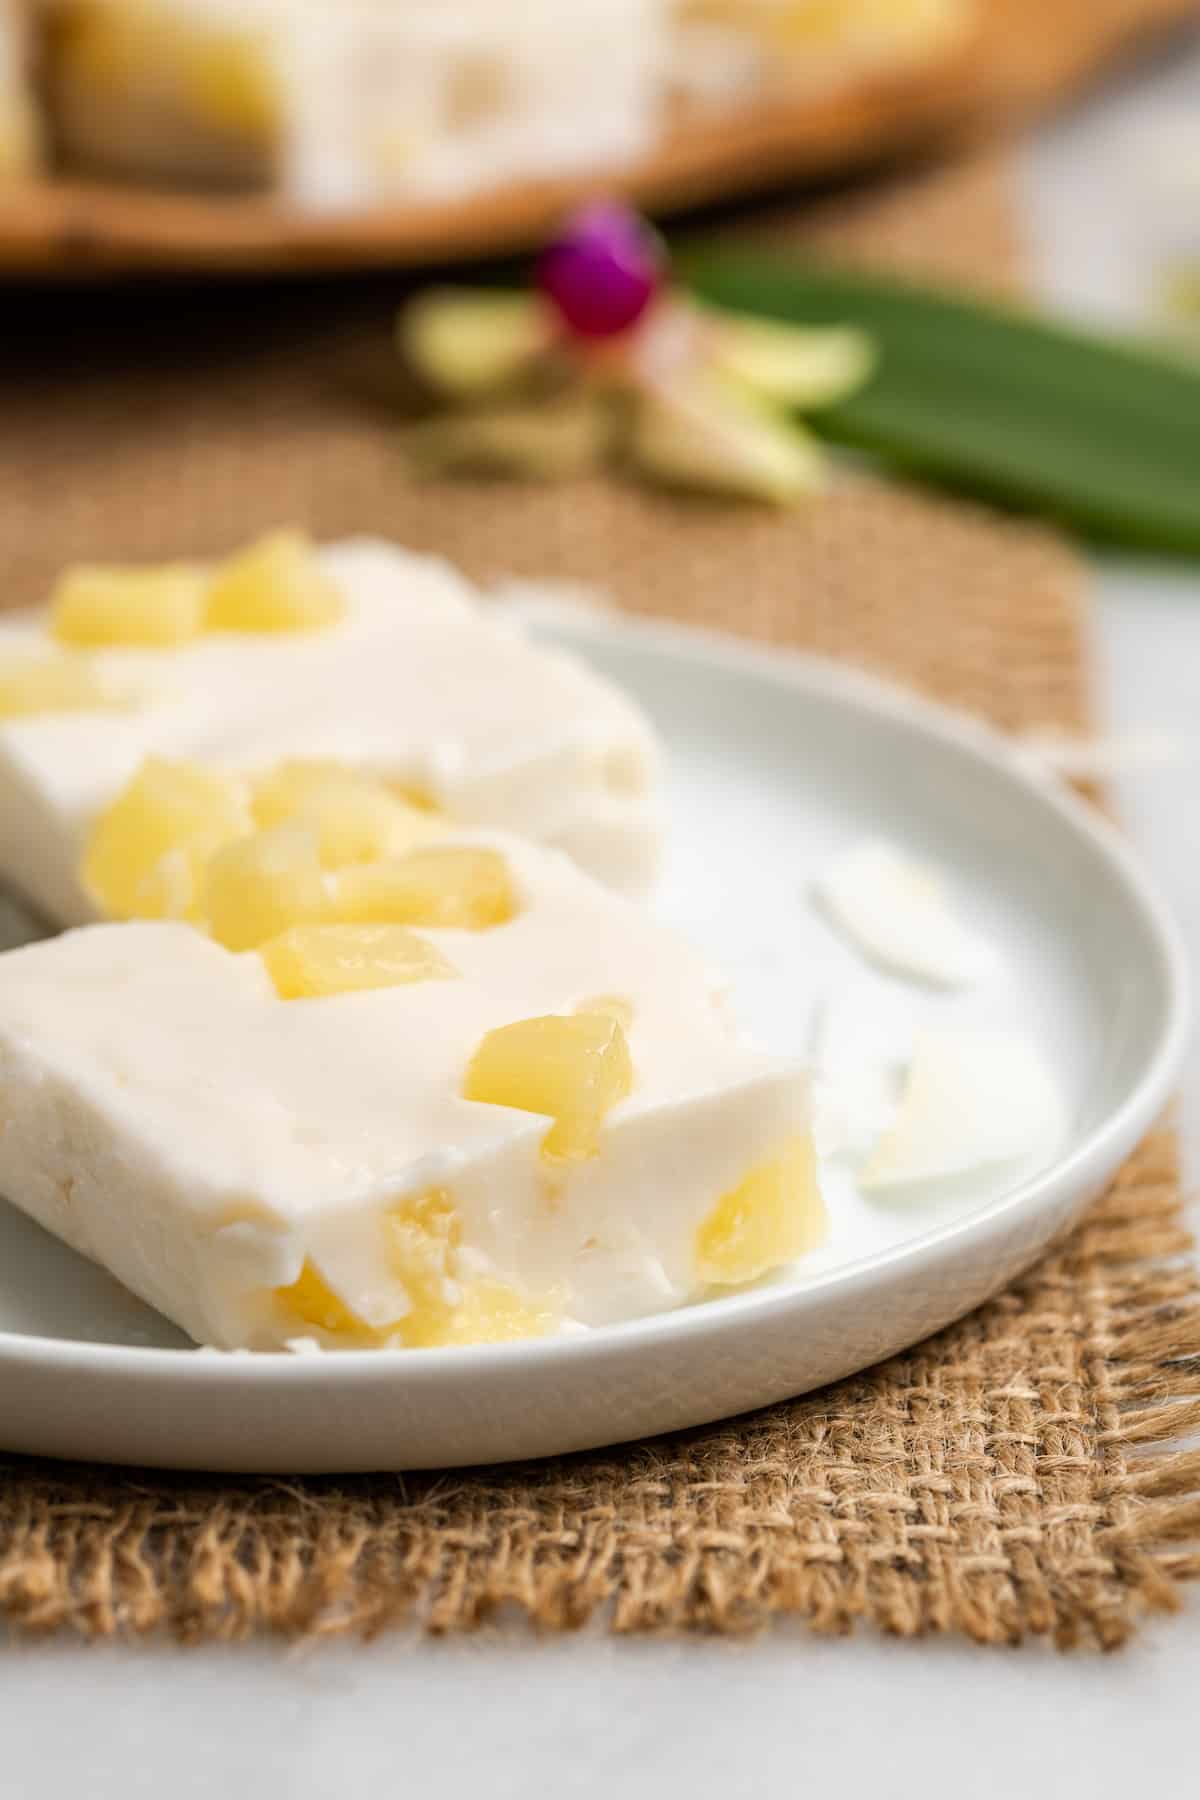
Haupia has a creamy texture similar to pudding or custard, but it’s often served cut into blocks or squares like Jello. Haupia is commonly served at luaus and other special occasions in Hawaii because of its delectable flavour and cultural significance.
Although haupia is most often served as a single layer pudding or sliced into squares, it’s also popular layered over cake for added flavor. And, if you go to a McDonald’s in Hawaii, you’ll even see haupia pies on the menu!
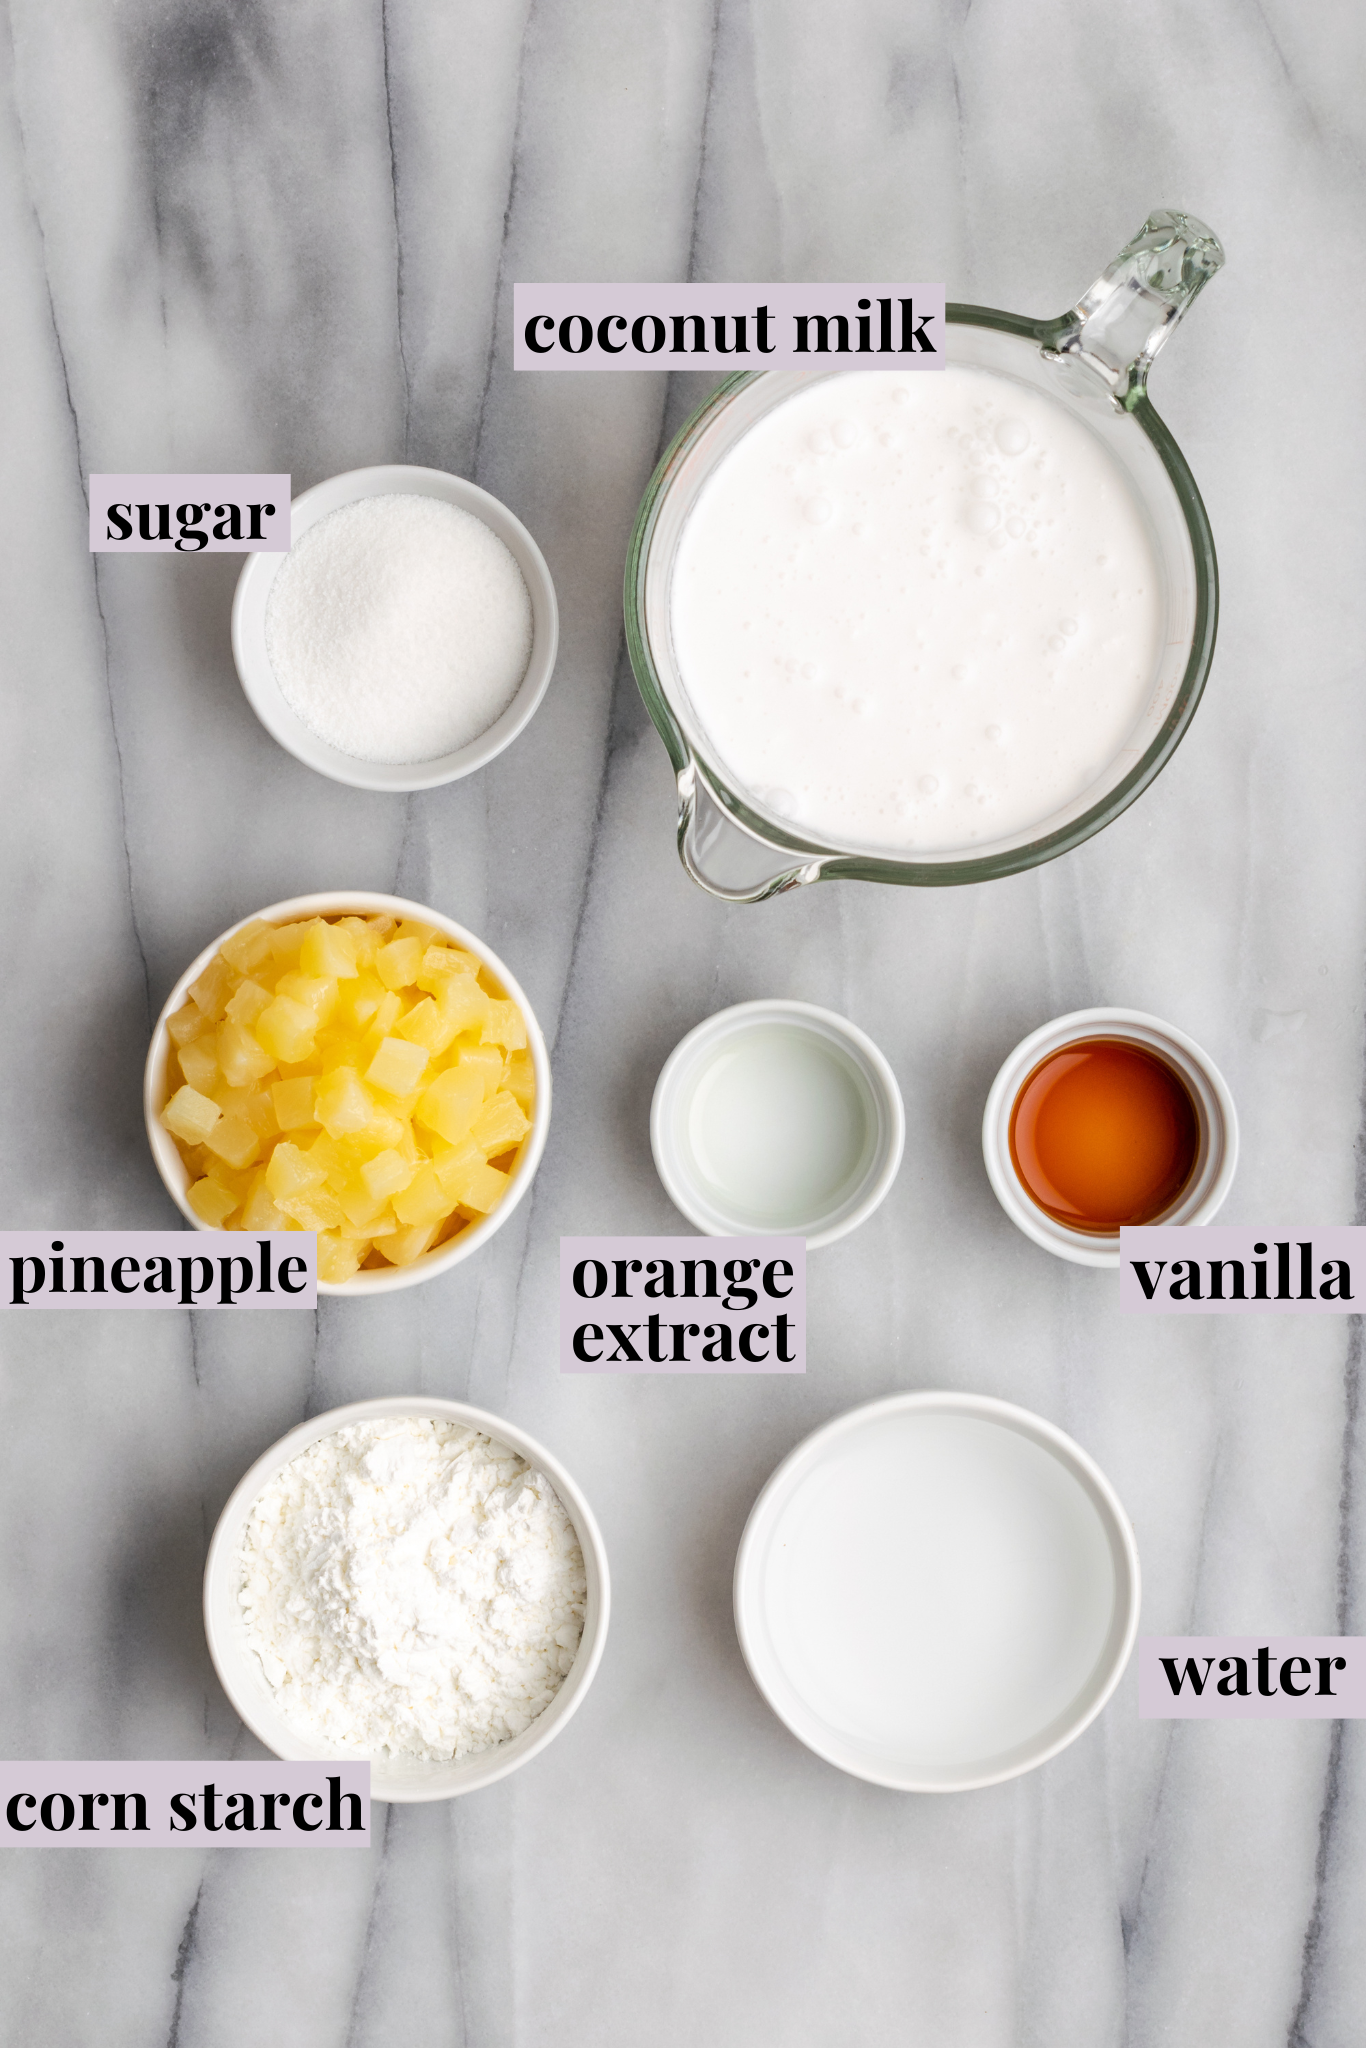
Notes on Ingredients
Scroll down to the recipe card to find the ingredient quantities and recipe instructions.
- Full-fat coconut milk – Don’t substitute lite coconut milk! You really need full-fat here.
- Sugar
- Vanilla extract – While this isn’t in the traditional version, I love the creamy flavour vanilla adds to the recipe.
- Orange extract
- Cornstarch
- Water
- Pineapple tidbits – Fresh, canned, or frozen and thawed will all work here.
What Can I Use Instead of Orange Extract?
You can simply omit the orange extract, or substitute orange zest or an orange liqueur like Cointreau. For a different flavour, try using almond extract instead.
How to Make Haupia
Making haupia is easy, and similar to making other types of pudding. Here’s what you’ll need to do.
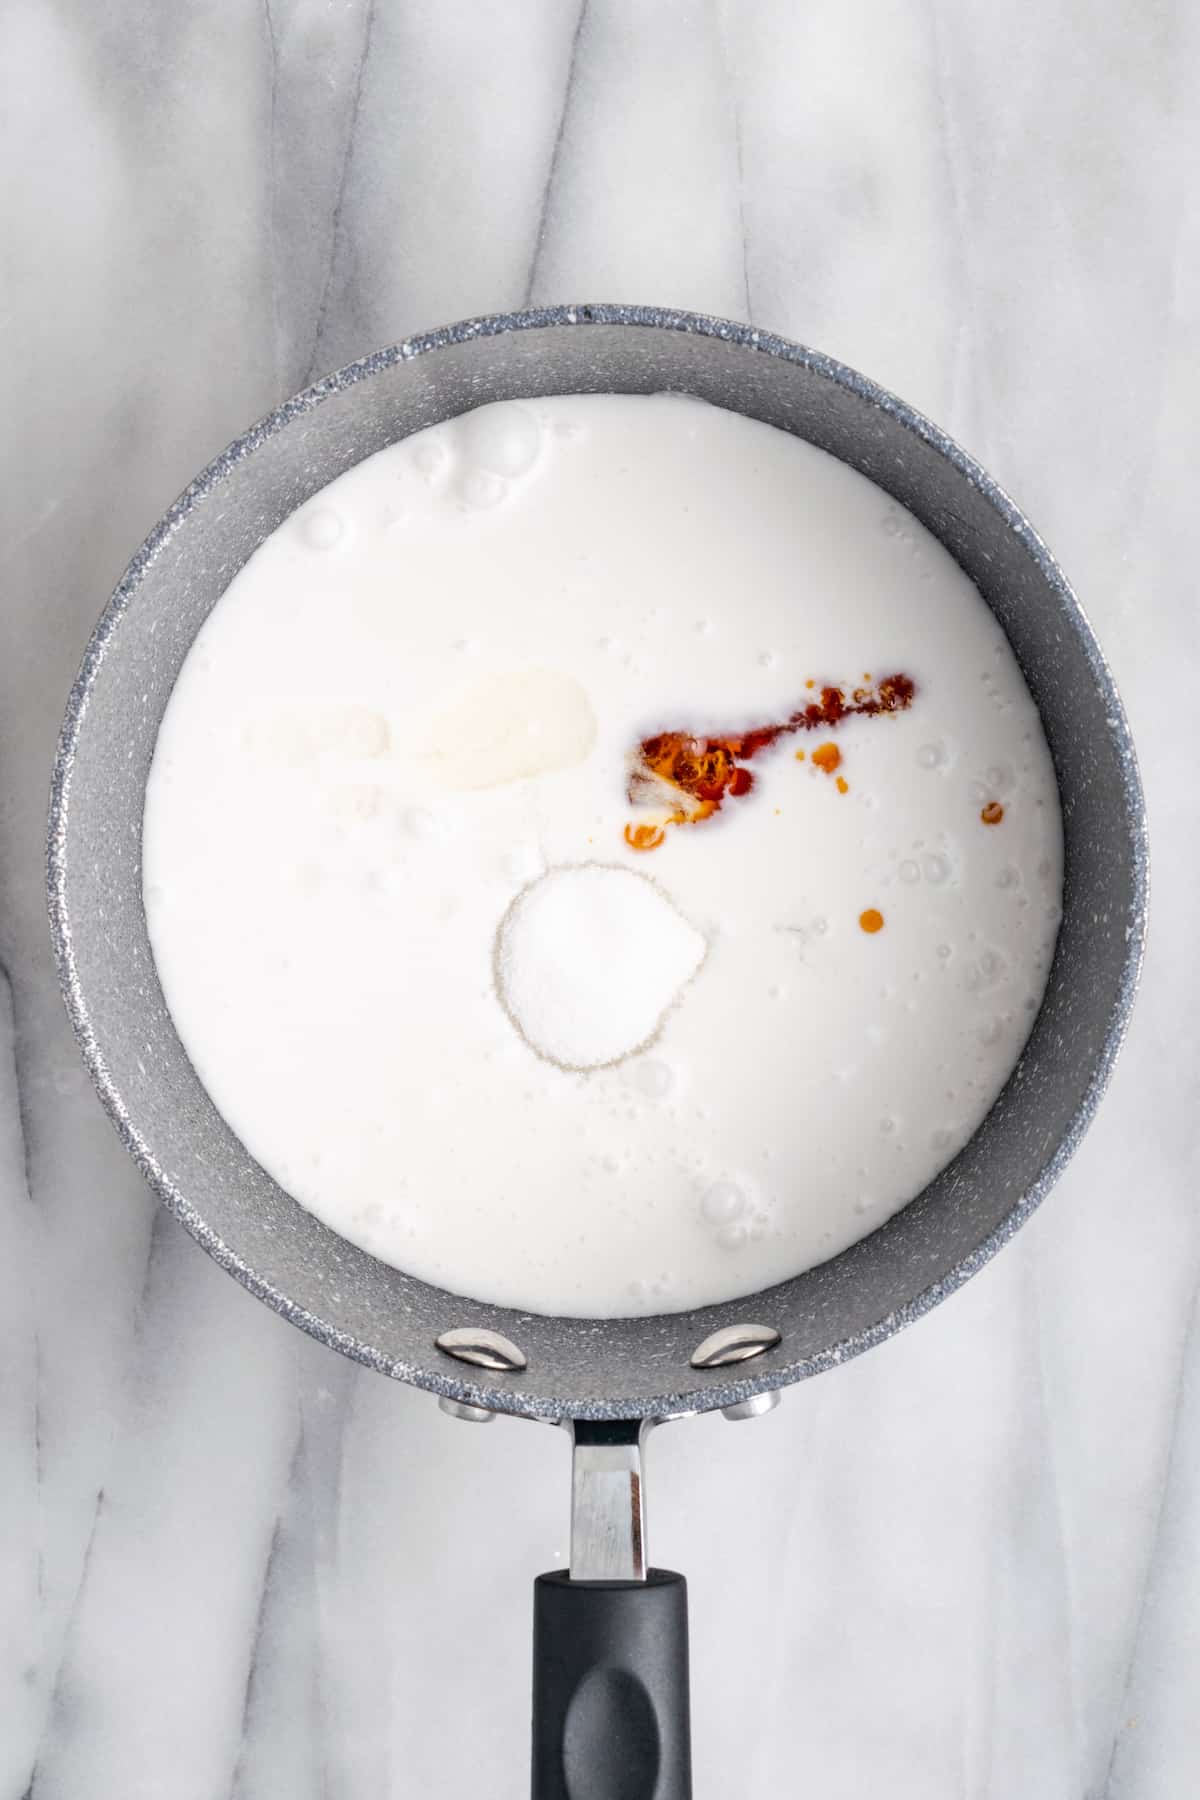
Bring the liquid to a boil. Whisk the coconut milk, sugar, vanilla extract, and orange extract in a saucepan set over medium-high heat. Continue to whisk until the mixture comes to a gentle boil.
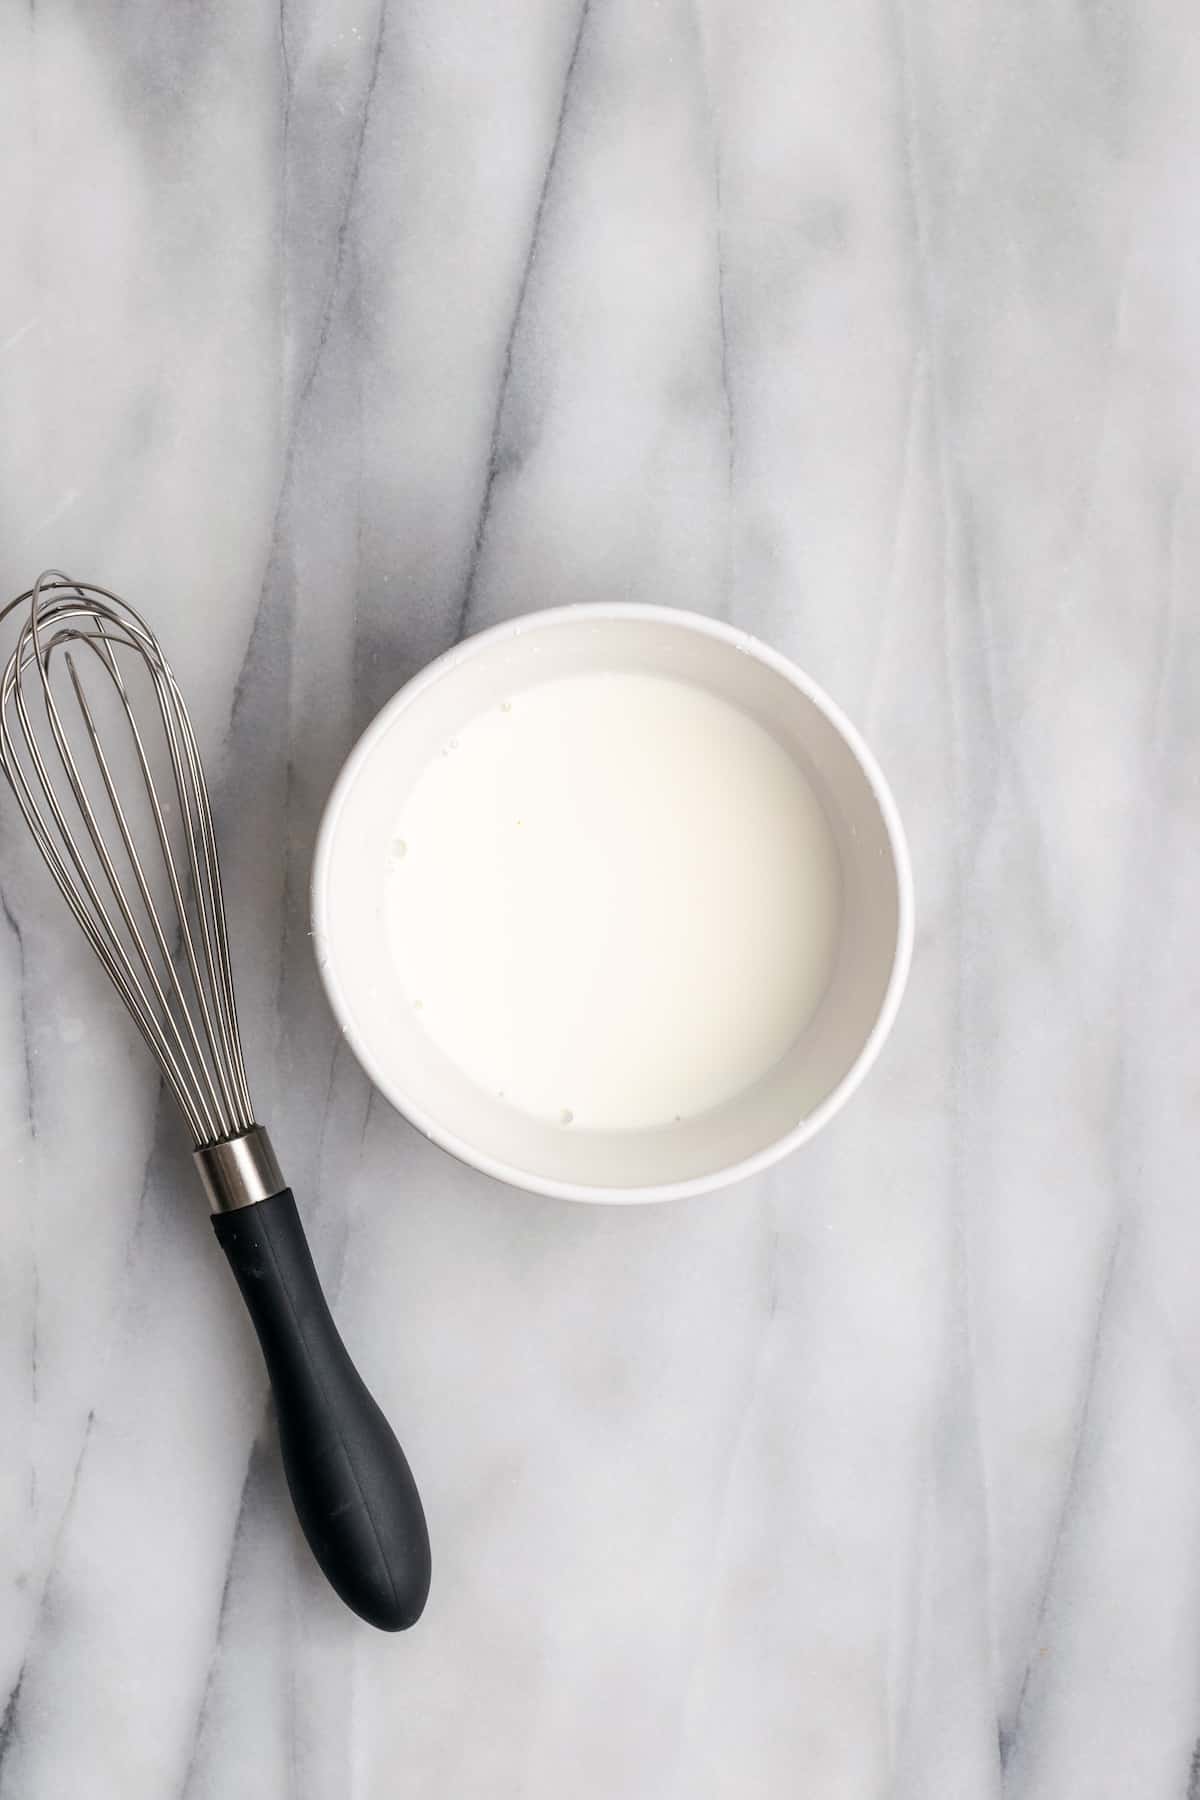
Make cornstarch slurry. In a small bowl, whisk together the cornstarch and water to create a slurry.
Once the coconut mixture is boiling, reduce the heat to a simmer and whisk in the cornstarch slurry.
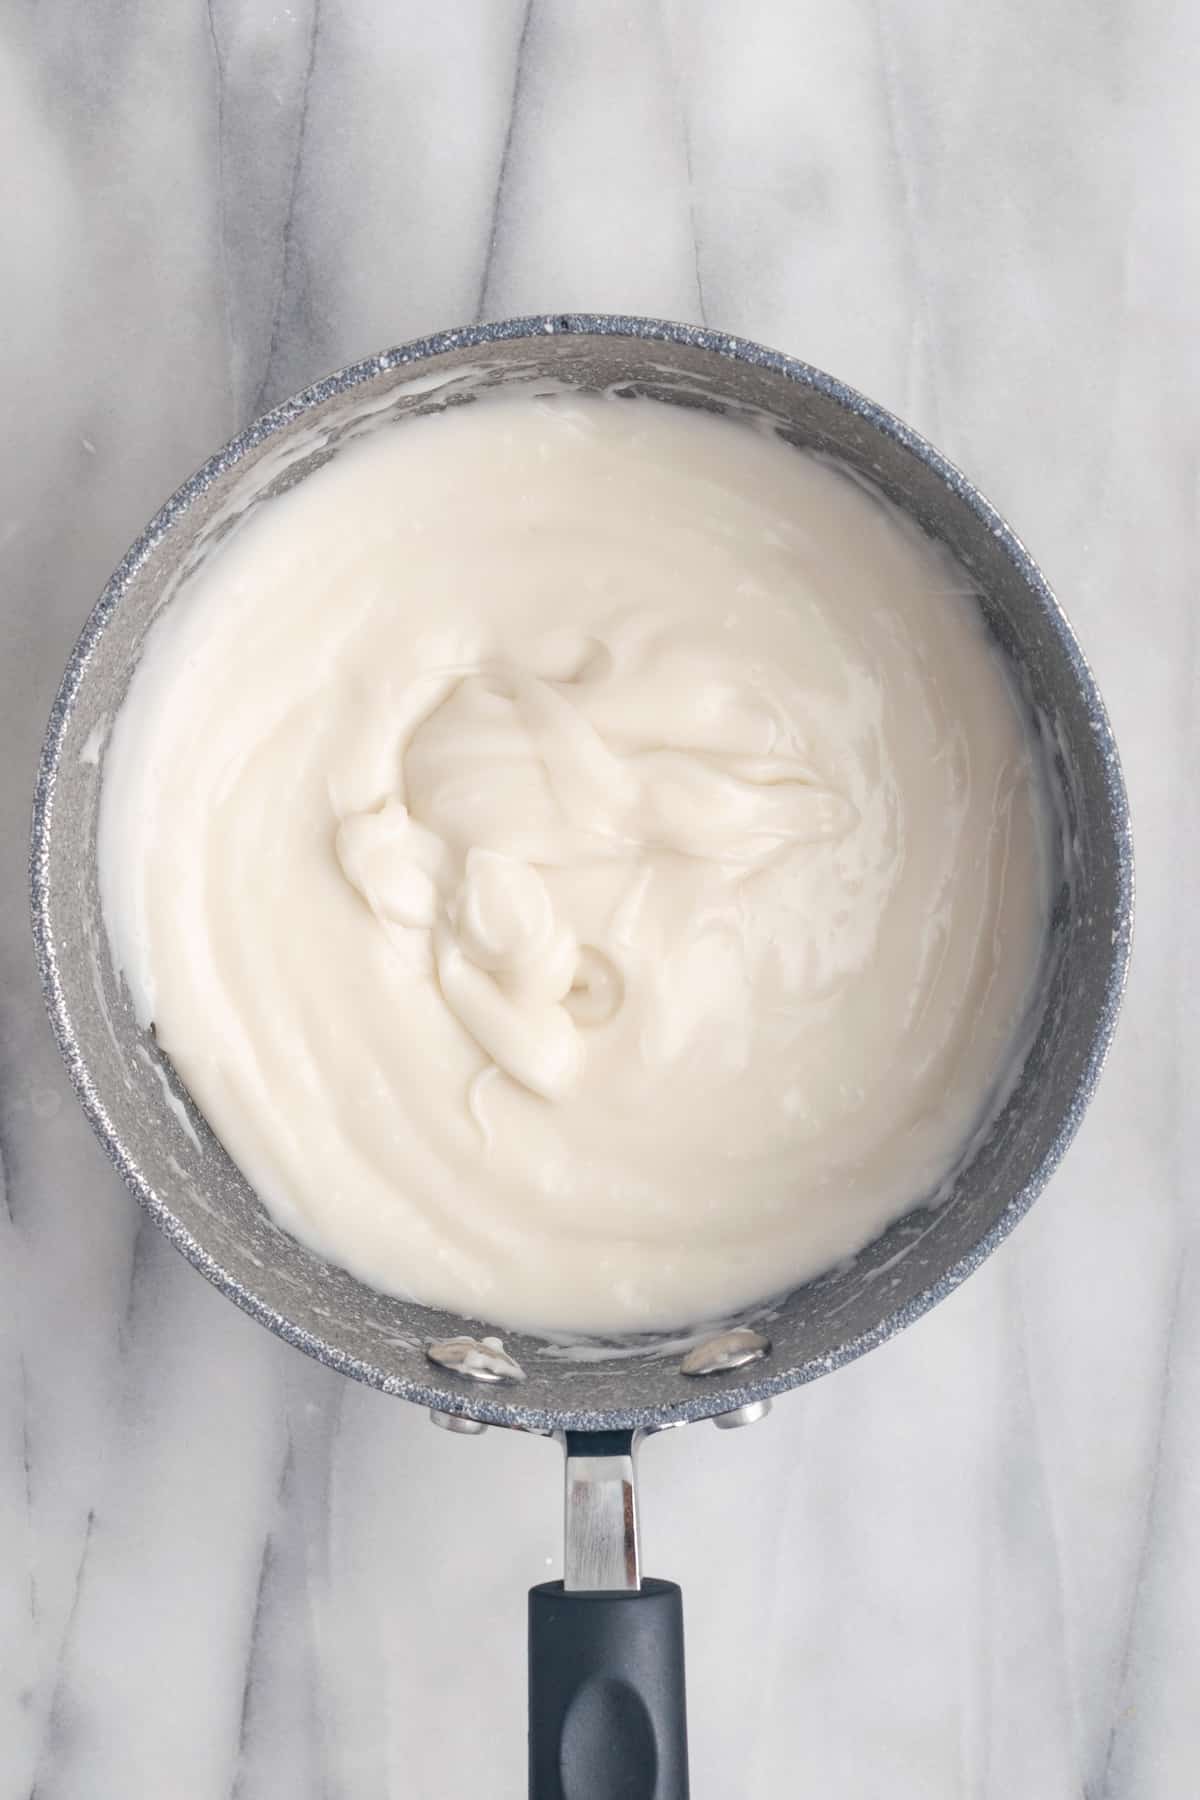
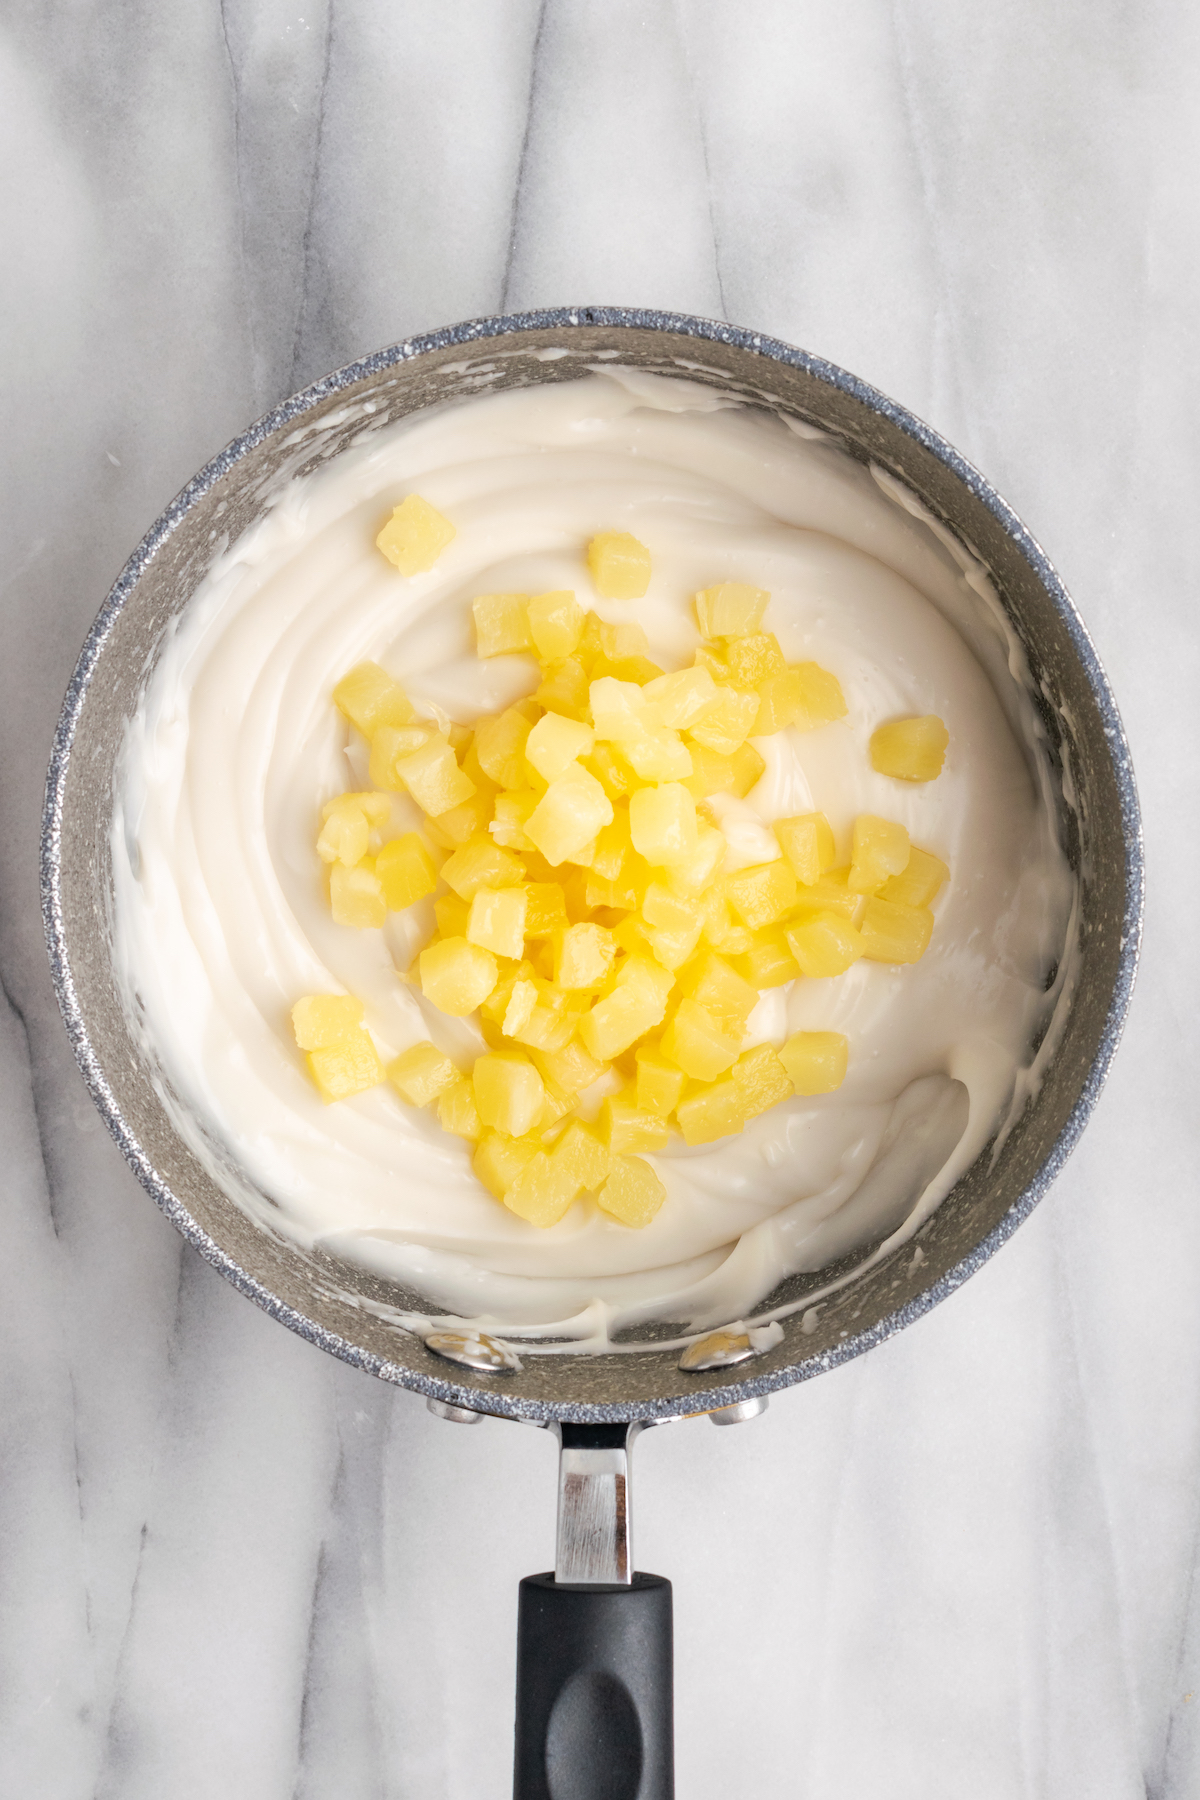
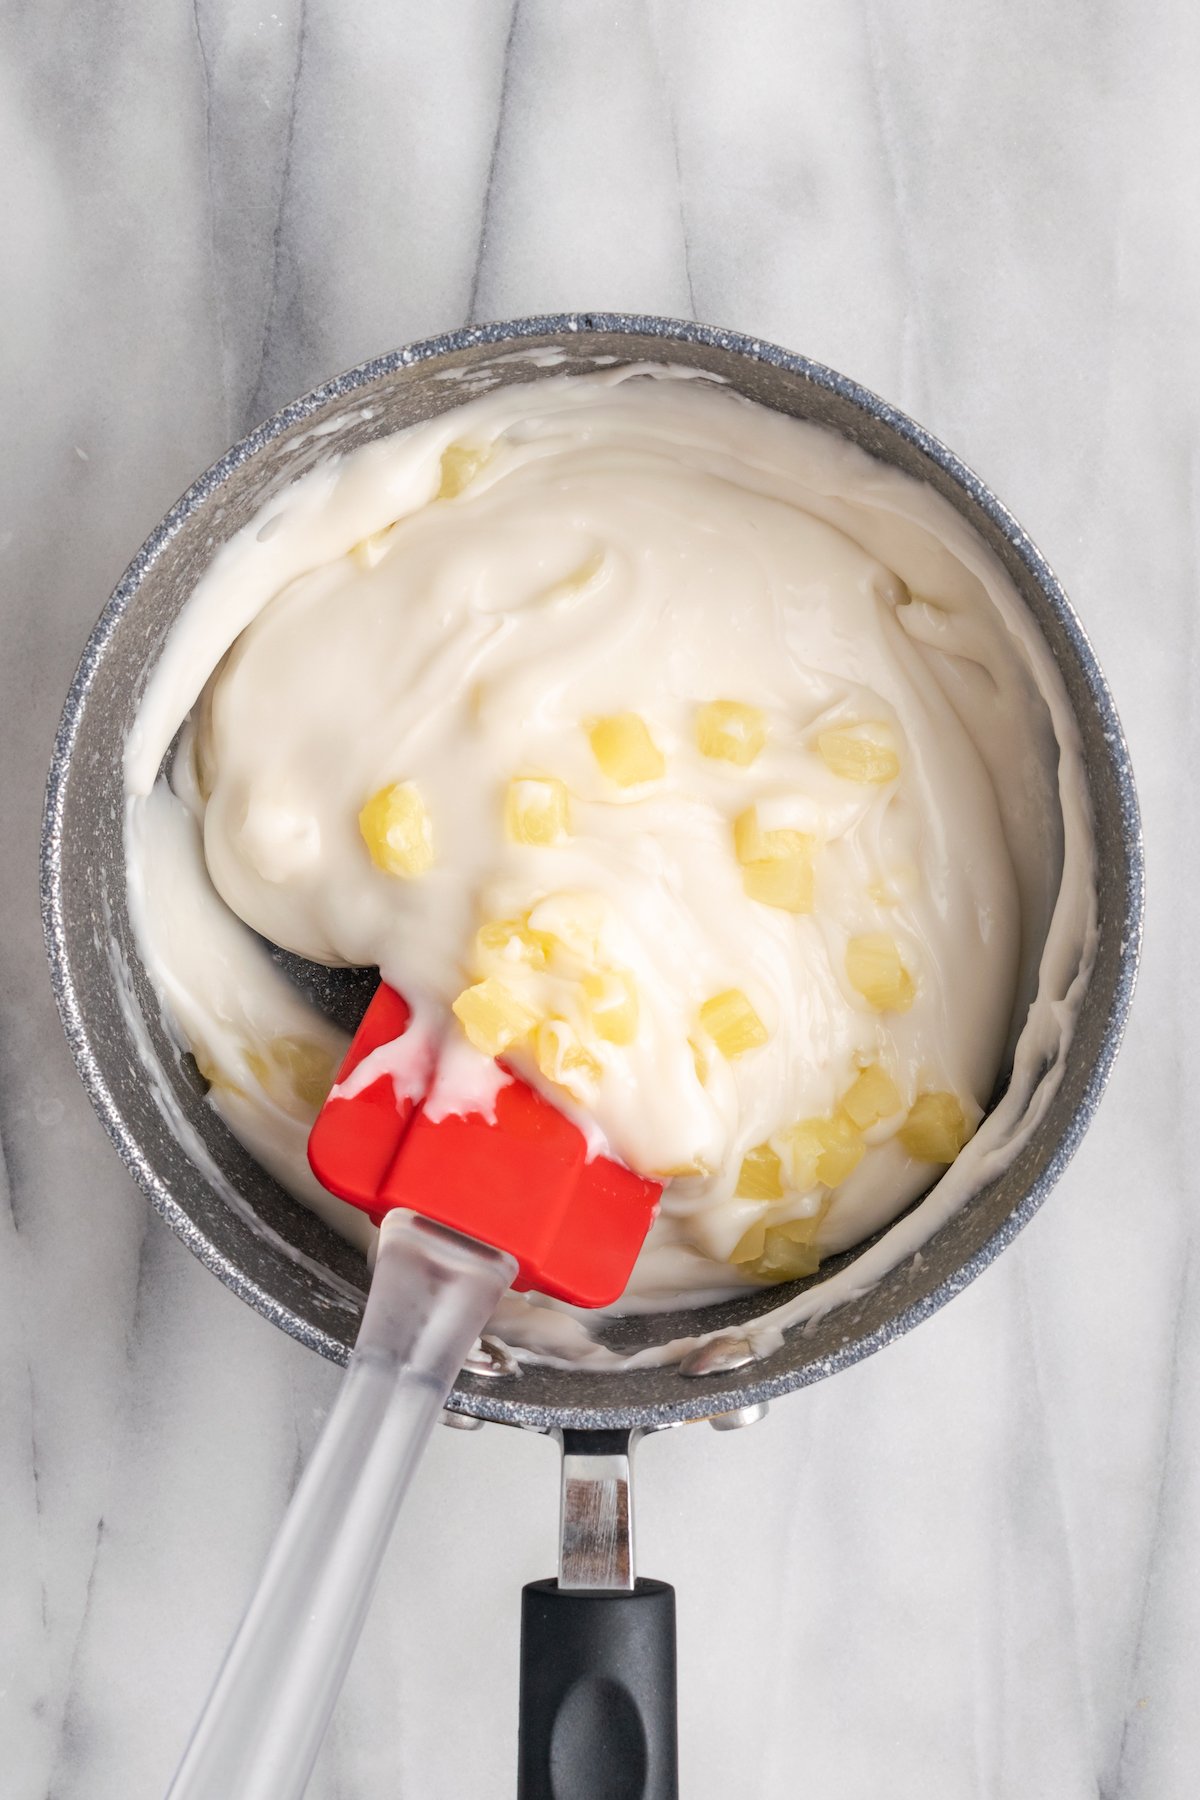
Add half of the pineapple. When the haupia mixture has thickened to the consistency of pudding, remove the pan from heat. Fold in half of the pineapple.
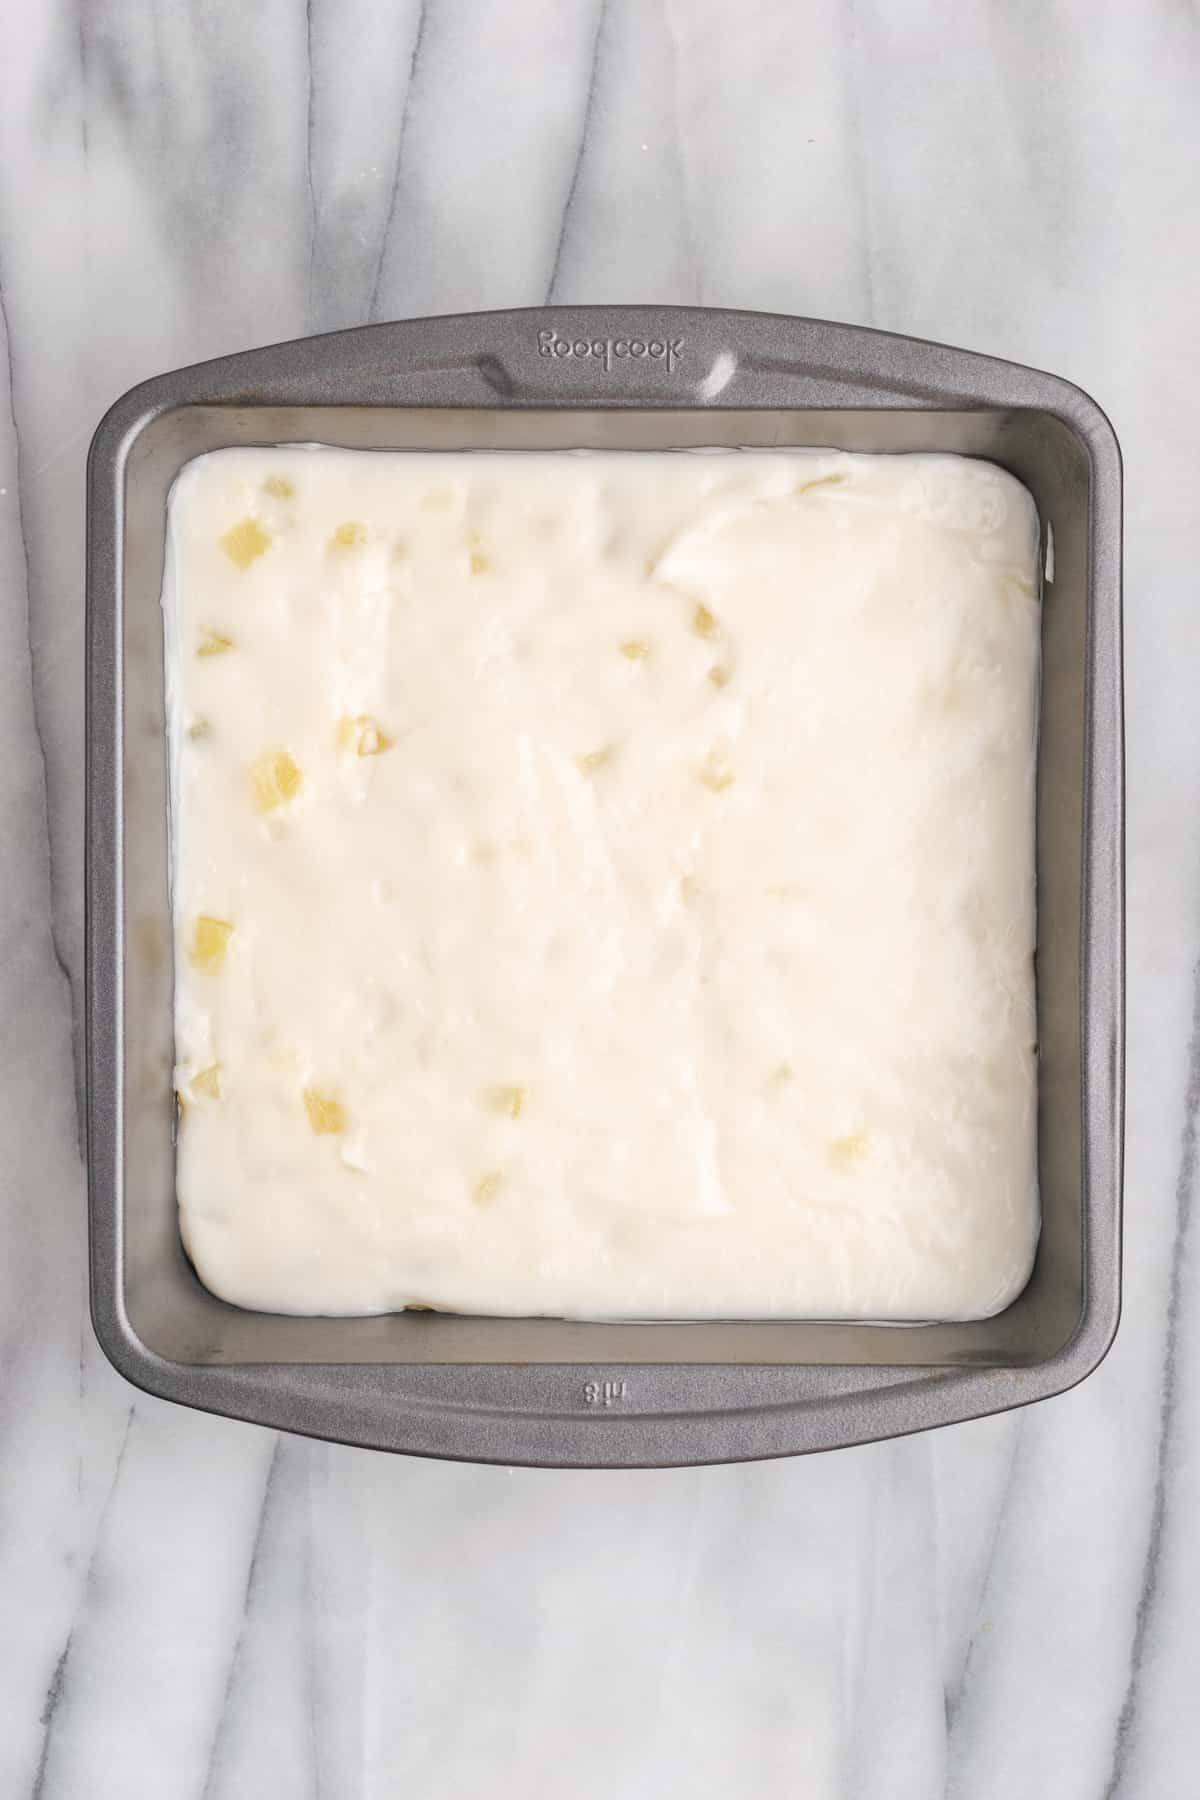
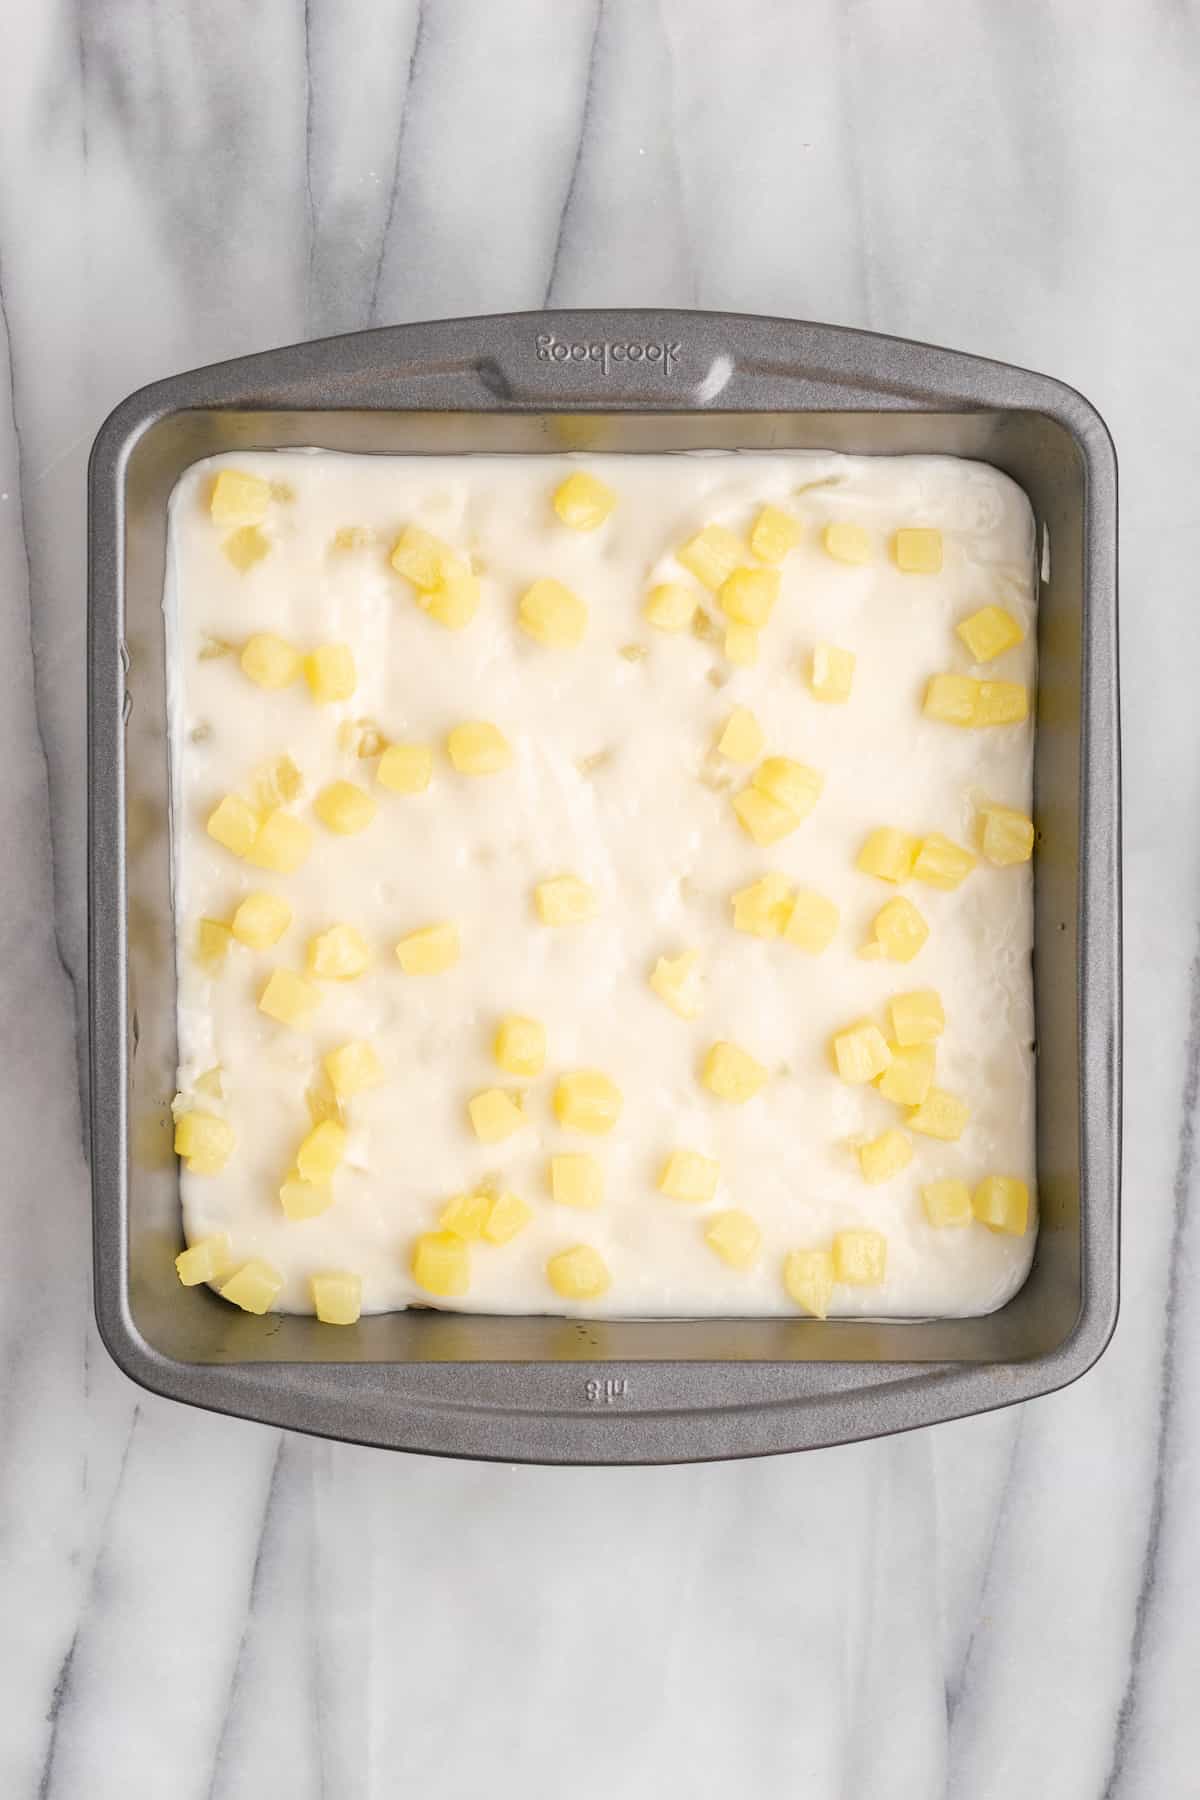
Assemble. Pour the haupia into an 8×8-inch pan. Smooth the top with an offset spatula. Scatter the remaining pineapple over the top and gently press it into the haupia so it sticks.
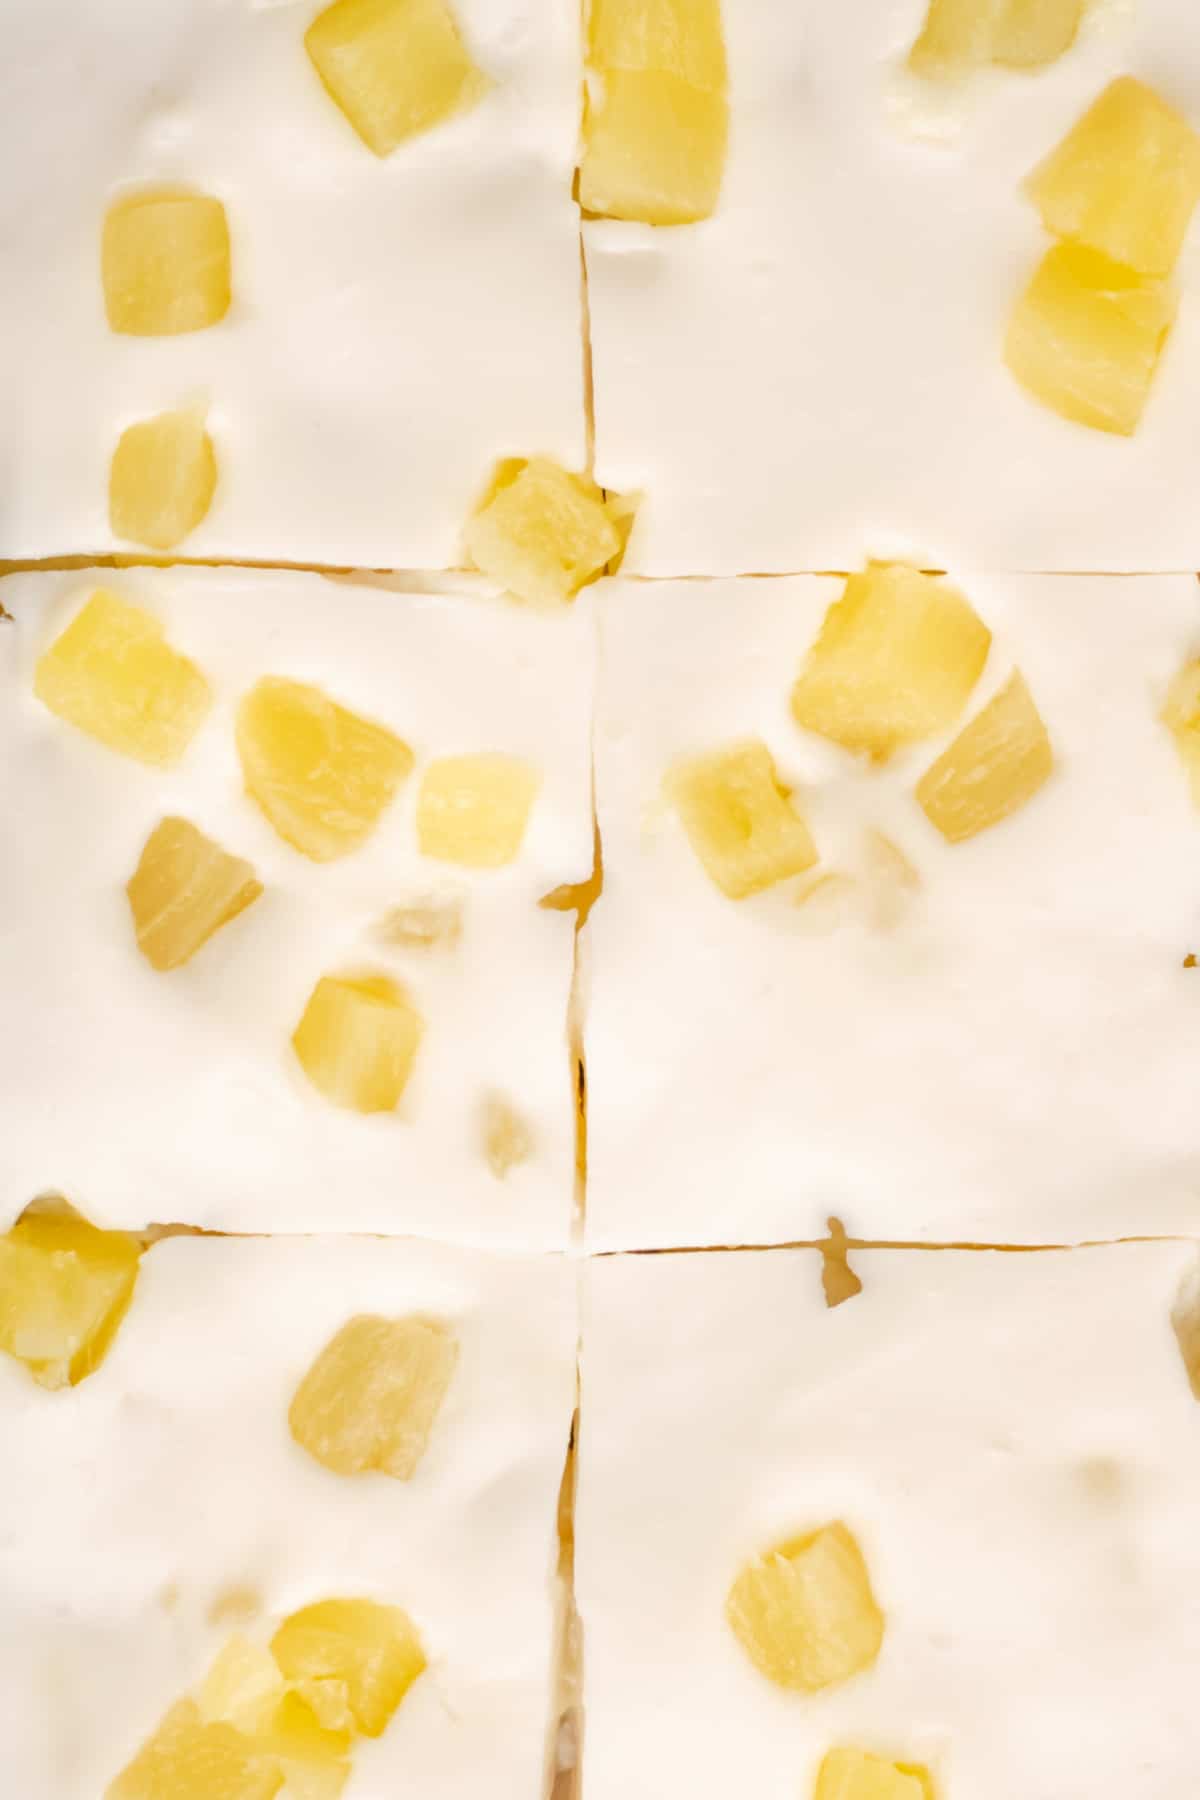
Chill. Place the pan in the refrigerator and chill for at least 2 hours. Cut into 2-inch
squares and serve cold.
Tips for Success
This haupia recipe couldn’t be easier, but I still have a few tips to help make sure it turns out perfect!
- Whisk the slurry well. To avoid lumps, make sure the cornstarch is fully dissolved before adding it to the coconut milk, and then whisk constantly while adding it in.
- Make sure it’s thickened. Don’t remove the pan from the heat until the mixture is nice and thick. If you take it off the stovetop too soon, you’ll still have a delicious dessert, but it will be more creamy and pudding-like, rather than sliceable.
- Don’t rush it. Allow the haupia to cool completely before slicing it into squares, or it might be too soft to hold its shape.

Variations
Haupia can be easily customized with a variety of add-ins and flavours. Here are some of my favourite ideas:
- Add mango, passion fruit, or other fresh fruits for added flavor.
- Flavour the haupia with almond extract and top with sliced almonds.
- Top with macadamia nuts, coconut whipped cream, and toasted coconut for an island-inspired treat.
How to Store
Haupia should be stored in an airtight container in the refrigerator for 3 to 4 days. You can place parchment paper between the layers if you need to stack them.
Can I Freeze This Recipe?
Haupia can be frozen for up to 3 months. Thaw in the refrigerator overnight before serving. Note that the texture may change upon freezing and thawing; it will be a bit more chewy.
Enjoy friends! If you make this haupia recipe, please snap a photo and tag #jessicainthekitchen on Instagram! We’d also love it if you would leave a comment below, and give the recipe a rating! Thanks so much!

Haupia
Ingredients
- 15 ounces full-fat coconut milk, 1 can, 403 ml
- ¼ cup sugar, 50 grams
- ½ teaspoon vanilla extract
- ¼ teaspoon orange extract
- 4 ½ tablespoons cornstarch, 36 grams
- 4 tablespoons water, 60 ml
- 8 ounces pineapple tidbits, 227 grams, drained and cut into small cubes (optional)
Instructions
- Add coconut milk, sugar, vanilla and orange extract to a saucepan over medium high heat. Whisk until it starts to gently boil.
- In a small dish, combine the cornstarch and water to create a slurry.
- Once the coconut milk is boiling, reduce the heat to a simmer and quickly whisk in the cornstarch slurry.
- Once thickened to the consistency of pudding, remove from heat. Fold in half the pineapple pieces if using.
- Pour into an 8×8 pan. Use an offset spatula to smooth the top.
- Sprinkle the remaining pineapple on top and press it gently into the coconut mixture.
- Place the pan in the refrigerator to cool for at least 2 hours. Once cooled, slice into 2” squares. Serve cold.
Notes
Disclaimer: Although jessicainthekitchen.com attempts to provide accurate nutritional information, kindly note that these are only estimates. Nutritional information may be affected based on the product type, the brand that was purchased, and in other unforeseeable ways. Jessicainthekitchen.com will not be held liable for any loss or damage resulting for your reliance on nutritional information. If you need to follow a specific caloric regimen, please consult your doctor first.


That looks delicious. Thanks for posting. I never heard of Haupia before.
Looks delicious! Going to make this weekend. What is 80k calories in US terms?
Hi Laurie it’s 80 calories!