Strawberry Kiwi Cheesecake
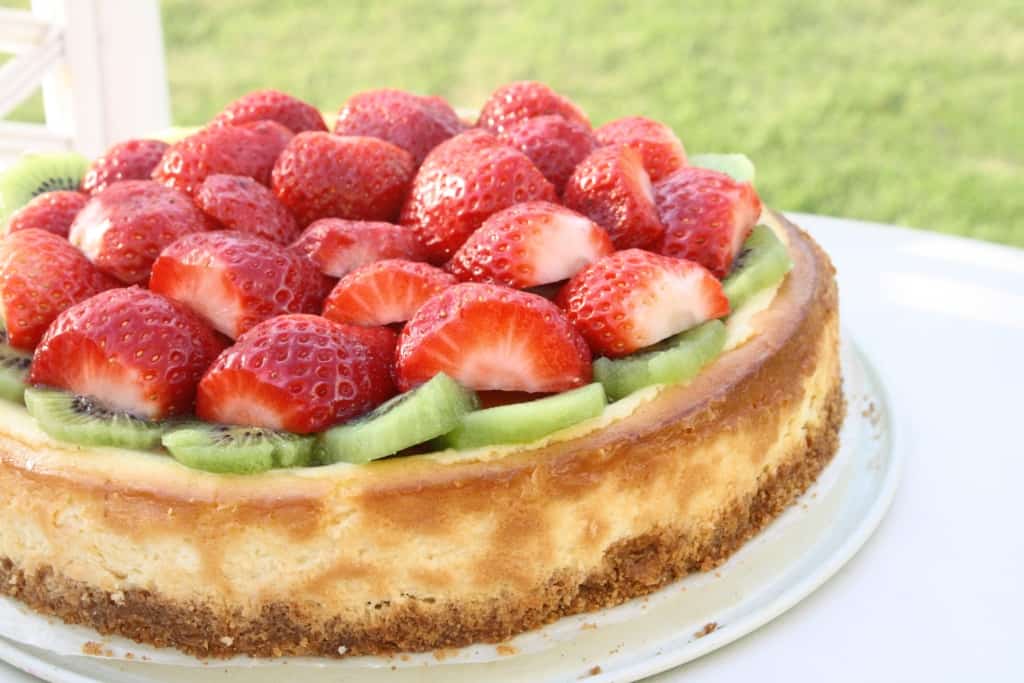
This strawberry kiwi cheesecake is made with a sweet graham cracker crust, a creamy cheesecake filling, and fresh fruit! One bite, and you’ll be in love with this easy homemade cheesecake.
If you’re a big fan of strawberry desserts, check out this 5-Ingredient Strawberry Crumble, too. And this Vegan Strawberry Crisp is another personal favorite!

Greetings, pastry lovers.
Finally, a time has come where I am allowed to reblog!!

I’m newly a part of a great blogging group GIG and I am so excited to be hosting the 4th GIG Spotlight: Come Bake With Me – Share with us your favourite recipe, along with my co-host the gorgeous and very talented Angela of The Charmed Cupcake (have you seen her themed cakes and cupcakes? Perfection.) We will be running this spotlight from the 4th – 17th March and anyone is welcome to join us, all details can be found here.

Anyone, and I mean ANYONE can take part in this and you can bake anything your heart desires.
For this spotlight, I knew I would be choosing a cheesecake. I mean, let’s be honest. I think about cheesecake all day and all night.
No, really.
Creamy Strawberry Kiwi Cheesecake
I’ve always loved all kinds of cheesecakes but I realized that I always opt for strawberry cheesecake, and not the frozen drippy gooey ones meant for shakes and sauces but the fresh ones where I can taste the flavour. Of course I do love strawberries, but that plus kiwis makes this my favourite recipe.
Cheesecakes are pretty easy to make once you’ve done them over 100 times, but they can be a bit intimidating at first. Next week I am having a Series of How-To’s in The Bakery, with one post where I will show you how to make the perfect cheesecake and mini cheesecakes (two completely different techniques). Make sure you check it out.
In the meantime, why not share with us your favourite recipe? Just post the link to your blog post in the comments and I will happily promote it. 🙂


Strawberry Kiwi Cheesecake
Ingredients
Crust:
- 5 ounces graham crackers
- 3 tablespoons sugar
- 4 tablespoons unsalted butter, melted and kept warm
Filling:
- 1 1/4 cups sugar, 8 3/4 oz.
- 1 1/2 pounds packages cream cheese, cut into 1 inch chunks, at room temperature, 3 8-oz.
- 4 large eggs, at room temperature
- 2 teaspoons vanilla extract
- 1 tablespoon lemon juice
- 1/4 teaspoon salt
- 1/2 cup heavy cream
Topping:
- 1 pint fresh, cold strawberries, stems removed
- 2 kiwis, peeled and sliced
- 2-4 teaspoons brown sugar
Instructions
For the crust:
- Adjust an oven rack to the lower-middle position and preheat the oven to 325F. In a food processor, process the graham crackers until you have fine crumbs. You should have about 1 cup. Add in the sugar and pulse. In a steady stream, add the butter while pulsing, about 10 1-second pulses.
- Transfer the crumb mixture to a 9-inch springform pan and press evenly into the bottom.
- Bake until fragrant and golden brown. The instructions say 15 to 18 minutes, but mine was done at about 12 minutes, so keep an eye on it. Cool on a wire rack to room temperature. When cool, wrap the pan with 2 18-inch square pieces of foil. Set the pan in a roasting pan.
For the filling:
- In a bow of a stand mixer, beat the cream cheese to break it up and soften it slightly, about 10 seconds. With the machine is running, add the sugar mixture in a slow stream; increase the speed to medium and beat until combined, creamy and smooth – about 3 minutes. Scrape down the sides of the bowl as needed.
- Reduce the speed to medium low and add the eggs, 2 at a time. Beat until incorporated, about 30 seconds. Scrape the bowl before each addition. Add the lemon juice, vanilla and salt and mix to combine. Add the cream and mix until incorporated, about another 5 seconds.
- Give the bowl a final scrape and pour the mixture into the prepared springform pan. Fill the roasting pan with enough water to make it about halfway up the sides of the pan. Bake until the center jiggles slightly, the sides start to puff, and the surface is no longer shiny, about 55 to 60 minutes. The center should read about 150 degrees F.
- Turn off the oven and prop the door of the oven open with a potholder or wooden spoon. Allow the cake to cool in the water bath in the oven for about an hour. Transfer the springform pan to a wire rack and run a small paring knife around the edges of the pan to loosen the cake. Let it sit to room temperature for 2 hours.
- Refridgerate cheesecake for at least 6 hours, preferable 24 hours.
For the topping:
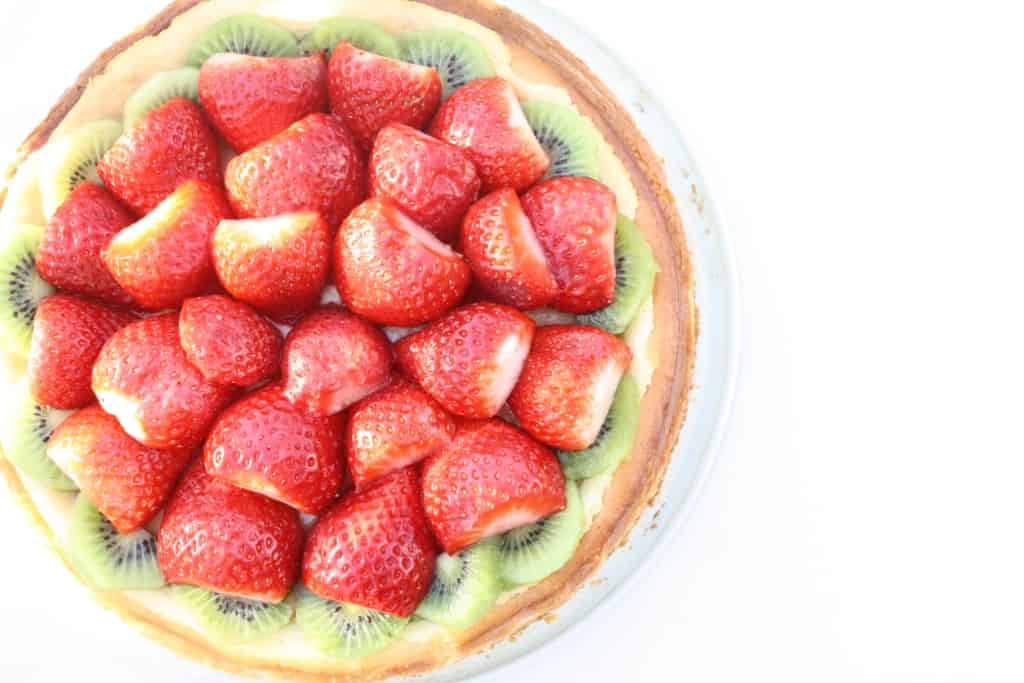
- Remove stems from strawberries when ready to use them. Slice each strawberry in half and arrange them in a circular shape on top of the strawberry (Larger ones on the outside, smaller ones on the inside). Be sure to enjoy a few extra strawberries before placing on cheesecake by slowly eating them and smiling (essential step). Not only is this the most enjoyable step before consuming the cheesecake, it lets you know how sweet/tart your strawberries are. If strawberries are already naturally sweet, sprinkle them with 2 teaspoons of sugar and leave to stand for 2 minutes to macerate. If tart, add up to 4 teaspoons. This will bring out the natural juices in the strawberries.
- Slice the kiwi slices and then in half and put them on the outside of the cheesecake. Arrange the strawberries on the cheesecake and enjoy.
Disclaimer: Although jessicainthekitchen.com attempts to provide accurate nutritional information, kindly note that these are only estimates. Nutritional information may be affected based on the product type, the brand that was purchased, and in other unforeseeable ways. Jessicainthekitchen.com will not be held liable for any loss or damage resulting for your reliance on nutritional information. If you need to follow a specific caloric regimen, please consult your doctor first.


OH WOW!! Jess this cheese cake looks absolutely divine, I’Ve printed it out and adding it to my baking list 🙂 Thanks for sharing this and what a lovely post for the GiG Baking Spotlight.
xooxo
Angela
Thanks so much Angela!! xx Let me know when you try it!
Oh sweet yummy. I love cheesecake! And like you, I prefer fresh fruits on things like this. I’m a sucker for fruit!
Thanks Mrs Gaeul! Oh yes fresh fruits are amazing!
Ohmygosh this looks AMAZING. So gorgeous & delicious!
Thanks hun!!! Really appreciate it!
Oh my! This looks absolutely amazing and delicious!
Thanks mom! 😀
I LOVE all types of cheesecake! I can’t wait to try this out!
Thanks Alia!!
This is really fascinating, You are an overly skilled blogger.
I have joined your rss feed and look forward to in the hunt for extra of your fantastic post.
Also, I have shared your web site in my social networks
Thanks Ashton!
Thanks you!
I’m impressed, I have to admit. Rarely do I come across a
blog that’s equally educative and interesting,
and without a doubt, you have hit the nail on the head. The
issue is something that not enough people are speaking intelligently about.
I’m very happy that I stumbled across this in my hunt for
something relating to this.
I like what you guys are usually up too. Such clever work
and reporting! Keep up the terrific works guys I’ve included you guys to blogroll.
Its like you read my mind! You seem to know a lot about
this, like you wrote the book in it or something.
I think that you can do with some pics to drive the
message home a bit, but other than that, this is magnificent blog.
A great read. I’ll definitely be back.
Have a look at my blog post: insulation contractors