Garlic and Rosemary Focaccia Bread
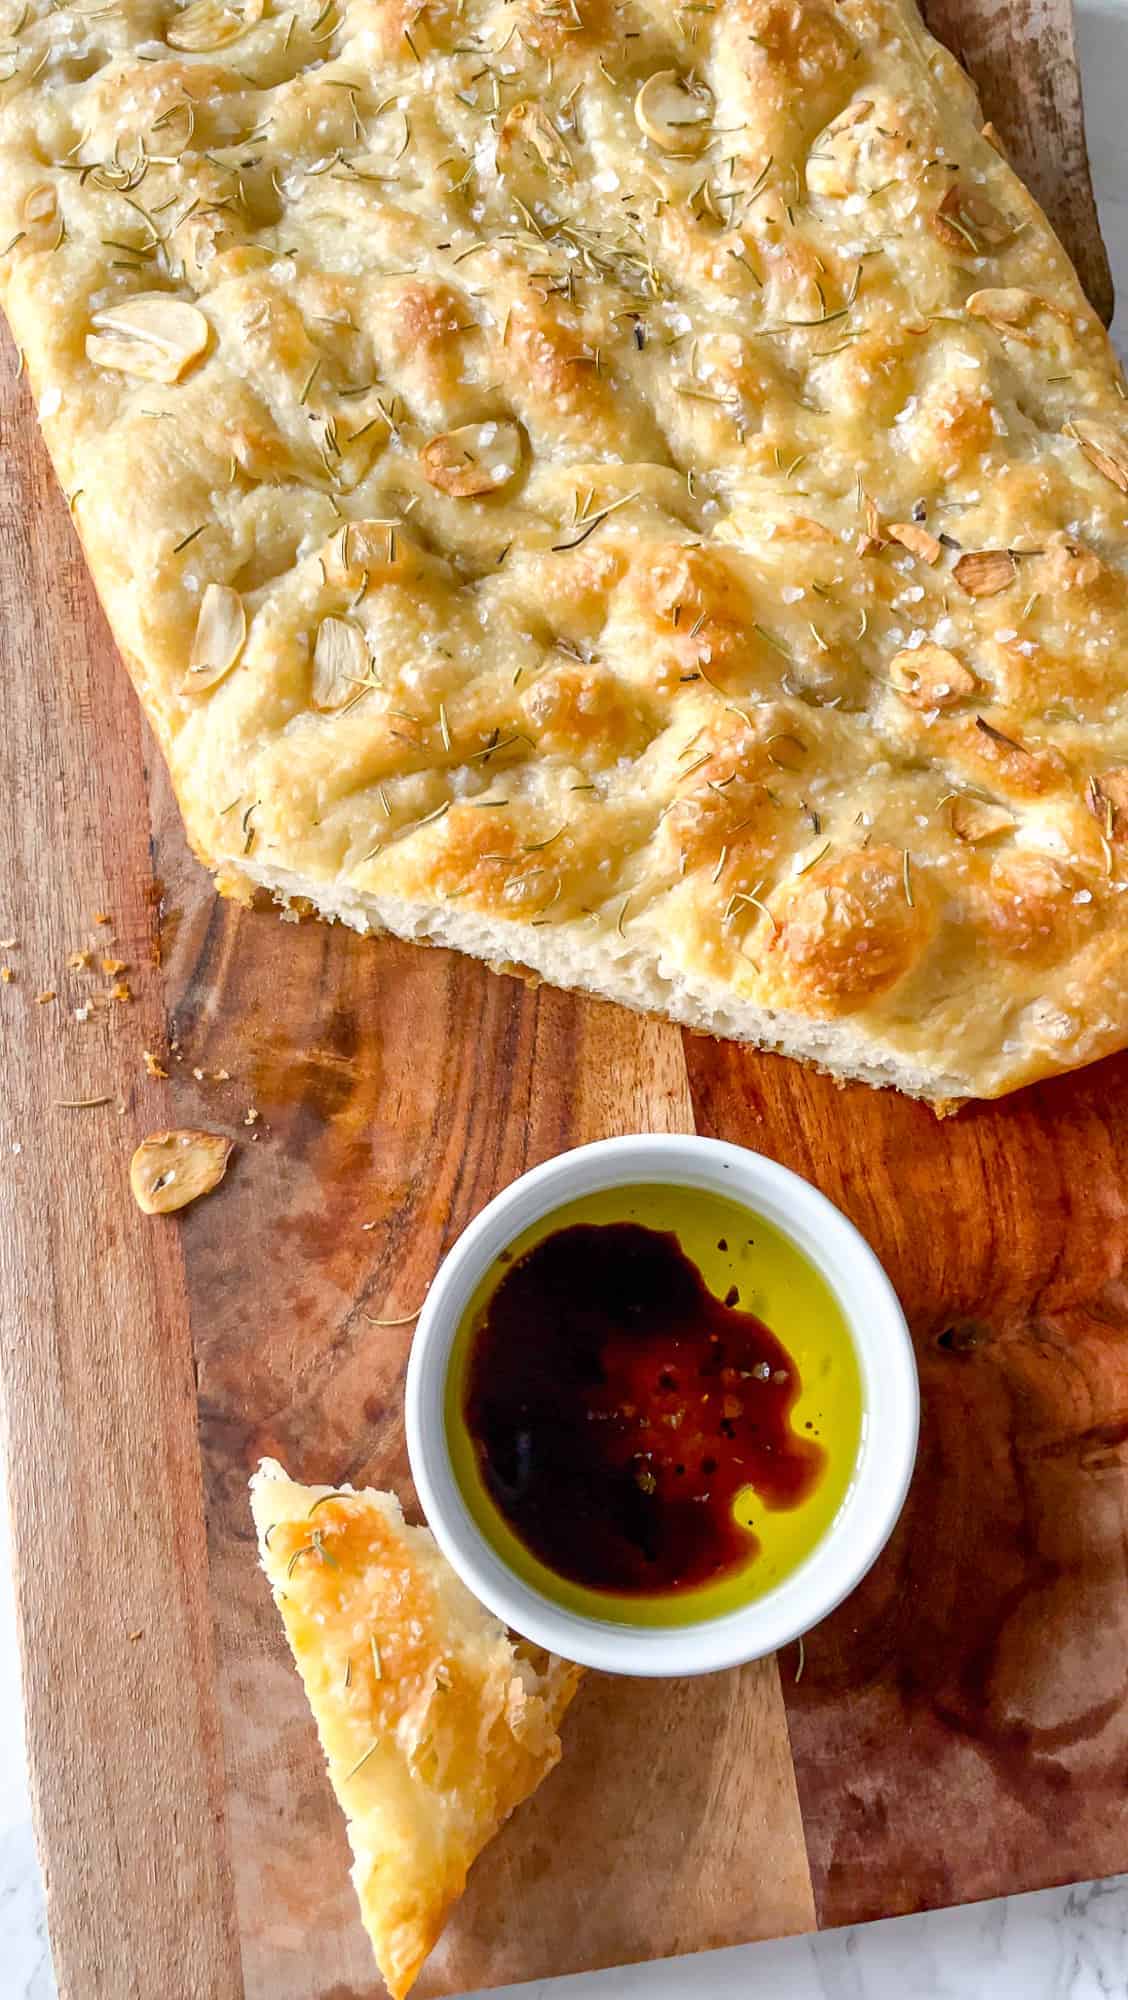
This Garlic and Rosemary Focaccia Bread is the BEST I’ve ever had! The focaccia is the perfect of crunchy & flaky on the outside and pillowy soft on the inside. Perfect for dipping in olive oil and balsamic vinegar or making a sandwich out of it.
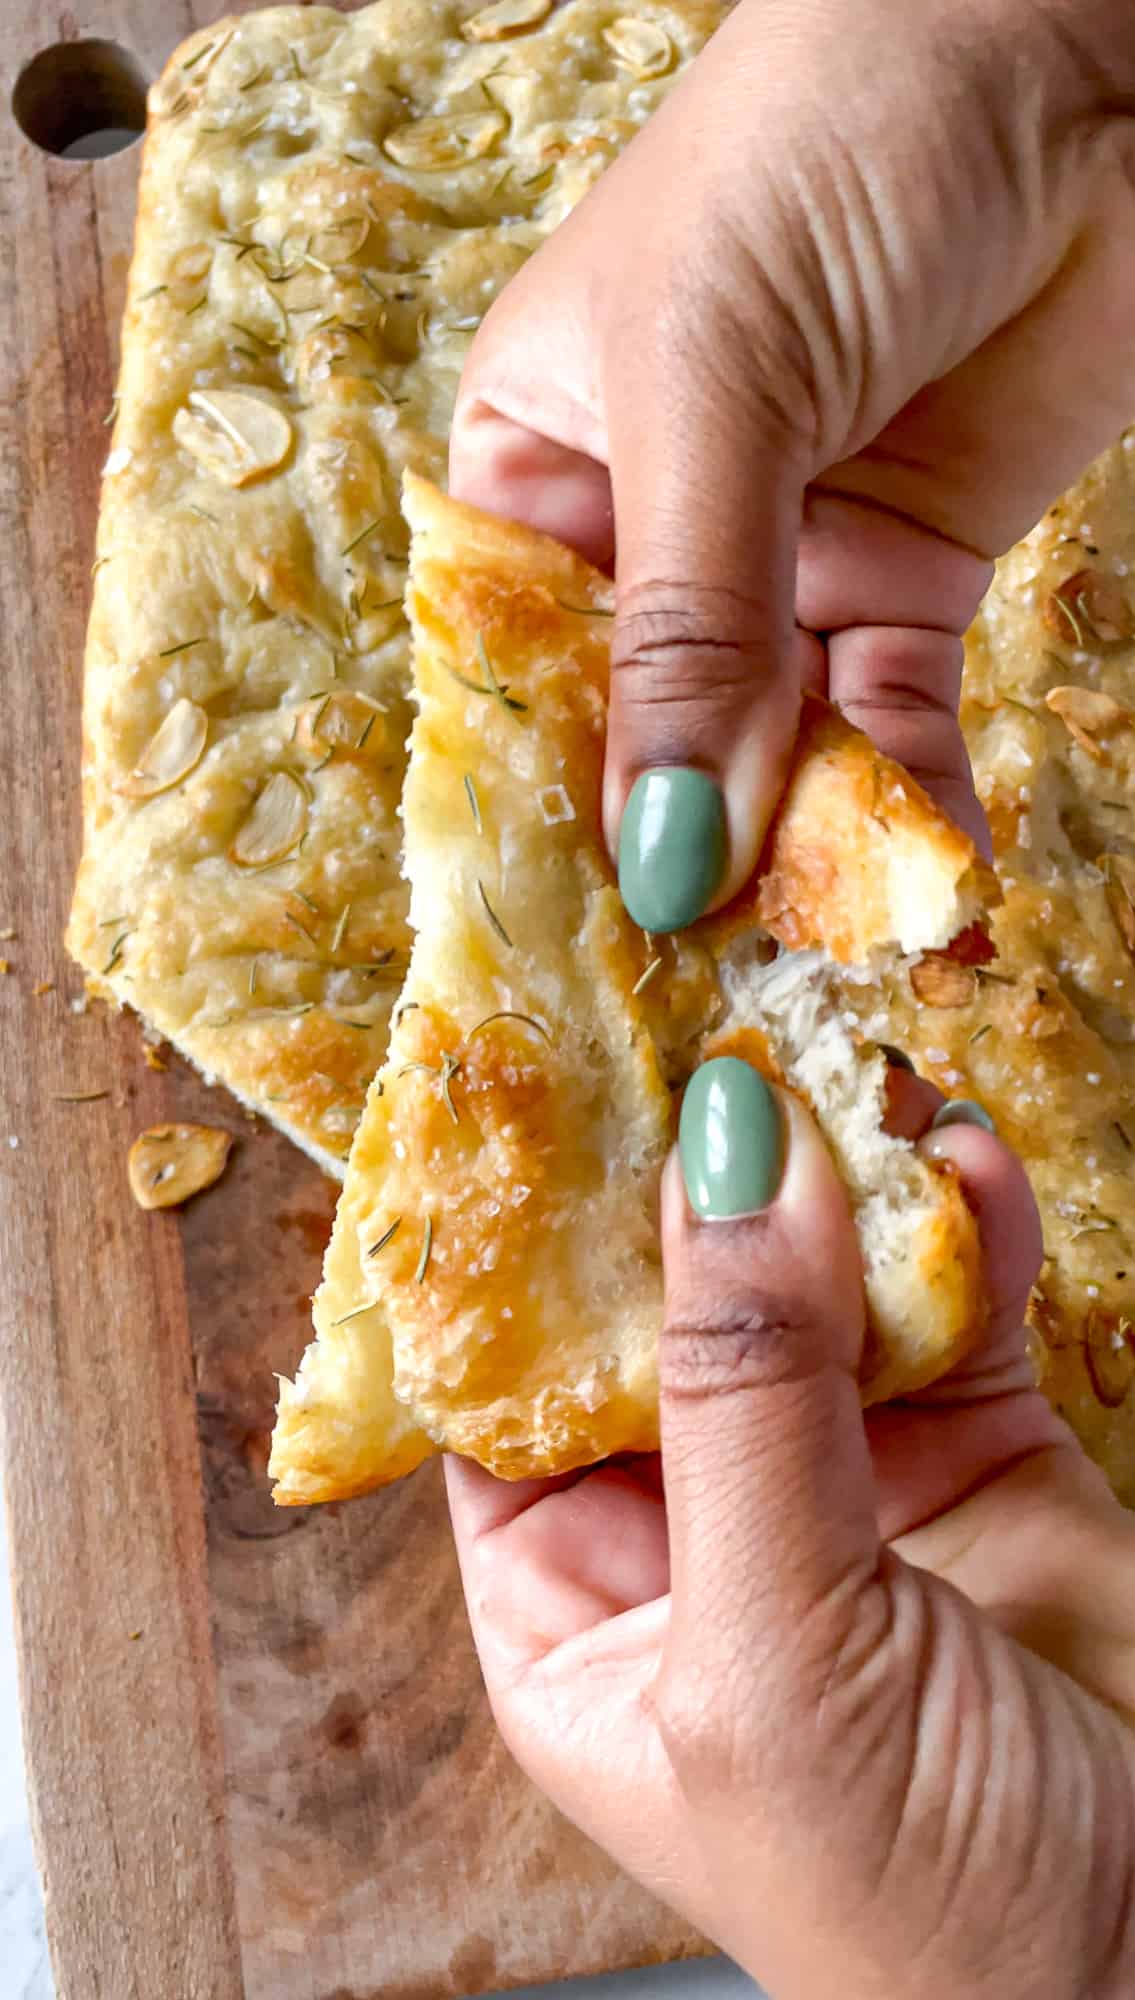
If you’re looking for an easy and satisfying bread to make at home, might I suggest focaccia? With a pillowy, chewy inside and slightly crunchy exterior, focaccia is one of the most satisfying kinds of bread to make and eat. It’s naturally vegan and there are so many delicious ways to use it.
This recipe was inspired by a garlic focaccia we used to buy all the time – until I figured out how to make it at home. Needless to say, this bread didn’t last 24 hours in my household.
UPDATE: When I first made this focaccia in 2014, I had it as a very quick rise time bread. I’ve since updated the rise time to be two rises. It still tastes amazing if you rise it for only 2 hours, but the flavor and texture develops incredibly after a 24-hour fridge rise (or 8 hours on the counter rise). I highly recommend doing it this way!
What is Focaccia?
Focaccia is a kind of flatbread from Italy. It is similar to a pizza crust and in some places is called “pizza bianca” for that reason. You can add all sorts of flavorings to your focaccia bread, then serve it alongside soup or turn it into sandwiches. You can even get creative and make focaccia art bread with fresh veggies.
What Makes This Recipe So Good?
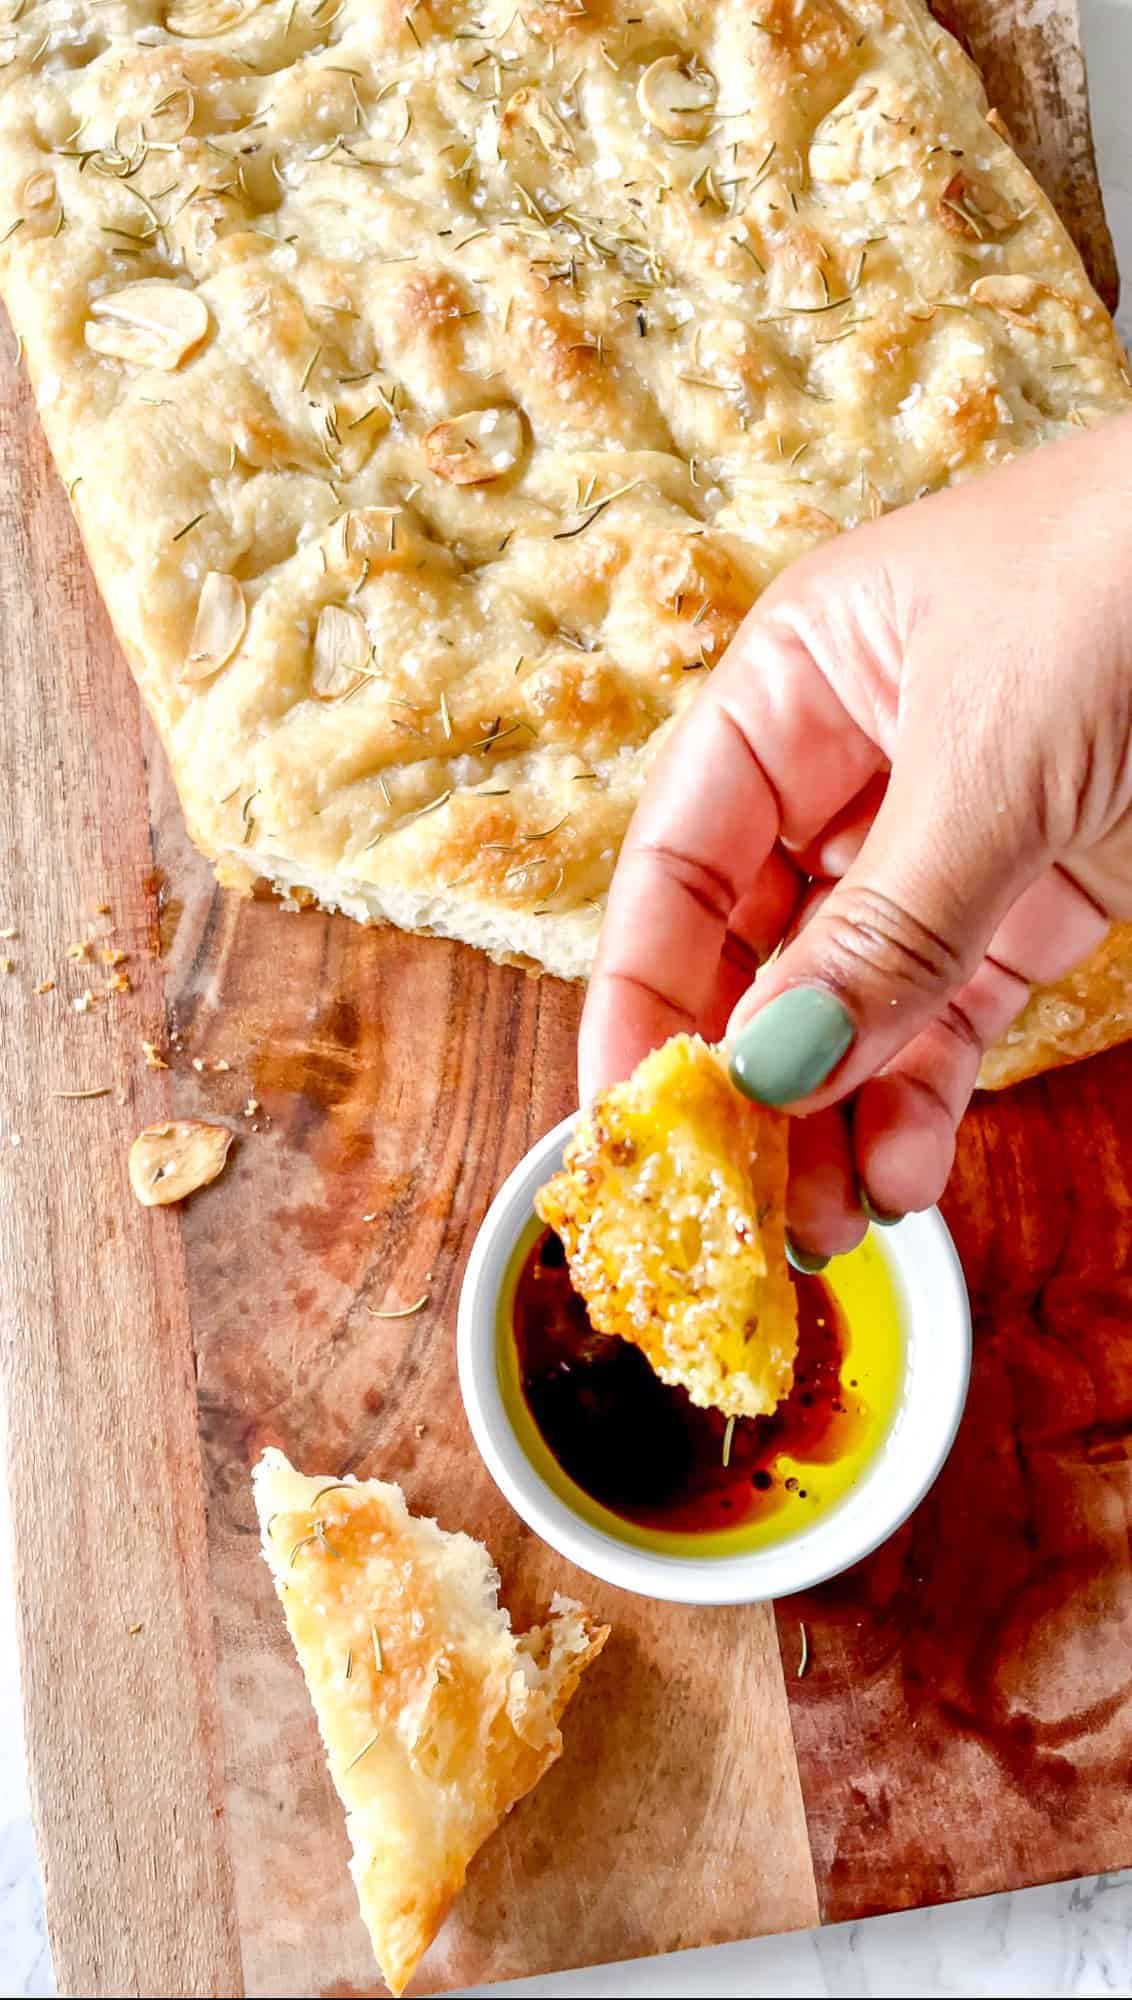
This beauty rises for 8 hours on the counter, or 24 hours in the fridge overnight. This produces a pillowy, spongy (in the BEST way) focaccia that is just waiting to be dipped in olive oil and balsamic vinegar or turned into a sandwich. The bread is brushed with olive oil before baking to maintain its moisture, then sprinkled with sea salt to add a contrasting flavor. Roasted garlic and dry rosemary round out the flavor profile. I’m telling you, this bread is so, so good!
Notes on the Ingredients
Please note that this is important information on the ingredients and instructions and the FULL recipe with amounts and details can be found DOWN BELOW (scroll to it) in the recipe card.
- Flour – I use all-purpose flour in my recipe, but you can also use bread flour.
- Instant Yeast – Ensure your yeast is fresh!
- Sugar – This is to feed the yeast (you can read more about it here) so don’t skip it! You could also use maple syrup or any kind of granulated sugar. This doesn’t make the bread sweet at all.
- Sea Salt – What’s focaccia without sea salt?!
- Water – You want to ensure your water isn’t too hot or you will kill your yeast, but not too cold not to activate it. You want it warm enough to touch but not burning (if your hand can’t handle it, neither can the yeast).
- Extra Virgin Olive Oil – This is my favourite oil for this focaccia bread. I don’t recommend cutting it down – it adds moisture, it helps to make the bread crusty and flaky too.
- Dried Italian Seasoning & Dried Rosemary
How to Make Focaccia Bread (Step by Step)
Please note that this is important information on the ingredients and instructions and the FULL recipe with amounts and details can be found DOWN BELOW (scroll to it) in the recipe card.
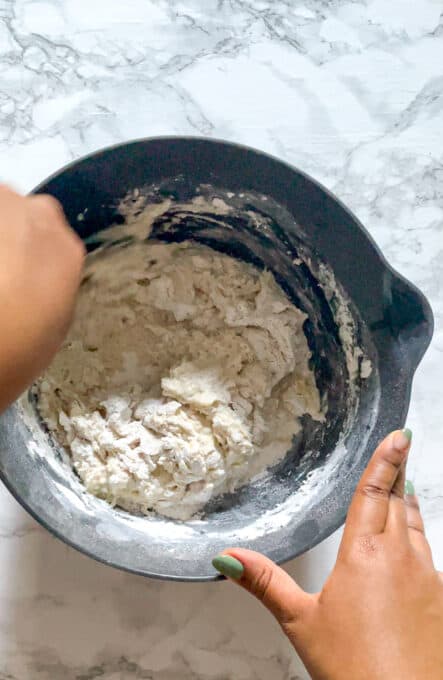
Mix the dry ingredients. Combine flour, dry yeast, sugar, and salt in a large mixing bowl and stir until blended.
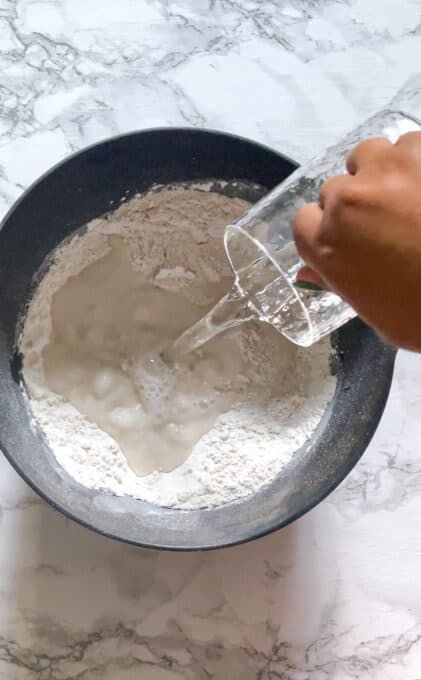
Warm the water with some of the oil. Combine water and 2 tablespoons olive oil in a 2-cup glass measuring cup OR microwave-safe bowl. Microwave on HIGH in 15-second increments until very warm but not hot to the touch (120° to 130°F).
Add the warmed water-oil mixture to the flour mixture.
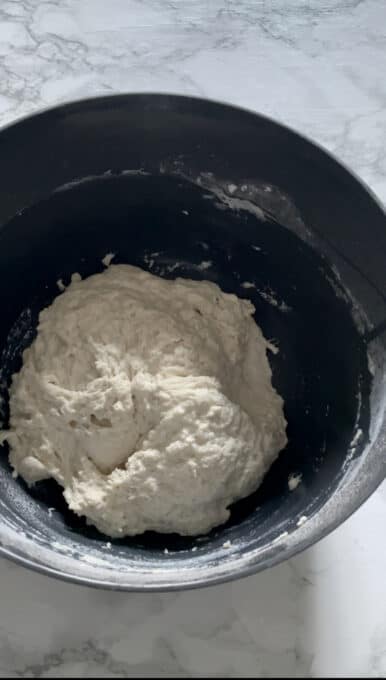
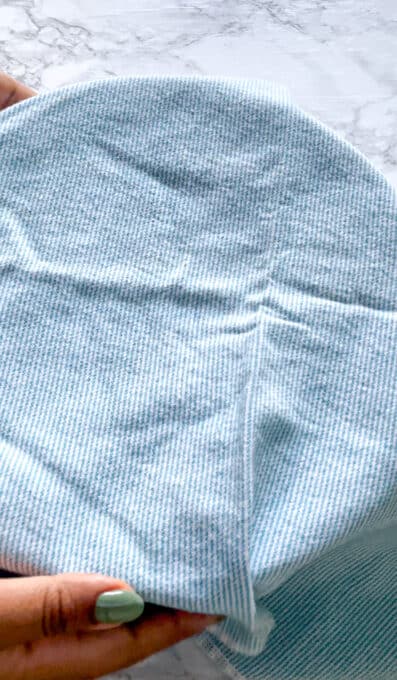
First rise. Fold over dough a few times, and then place in an oiled bowl (you can use ½ tablespoon of the olive oil) and cover. Allow it to rise 6-8 hours on the counter, over 18-24 hours overnight in the fridge.
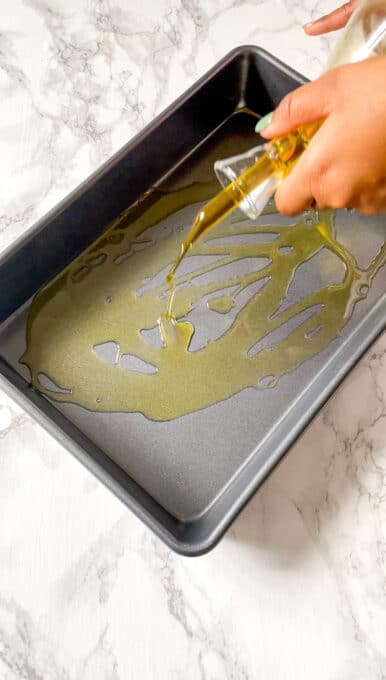
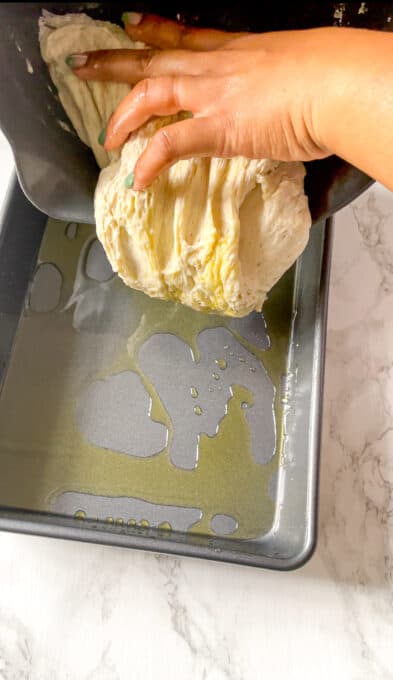
Prep your baking pan. Generously oil a 13 x 9-inch pan and then pour the dough in. (Don’t worry if the dough isn’t even or filling the corners.)
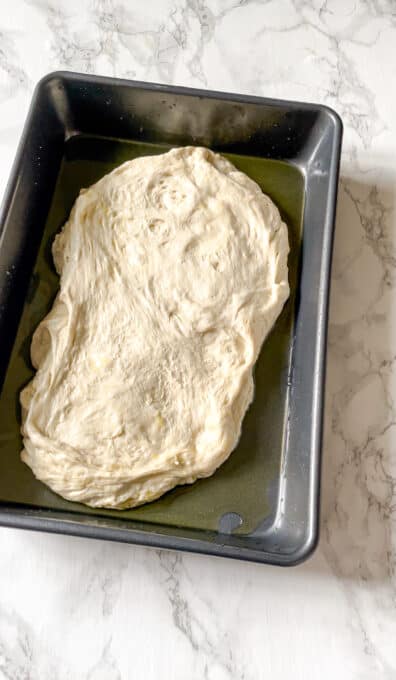
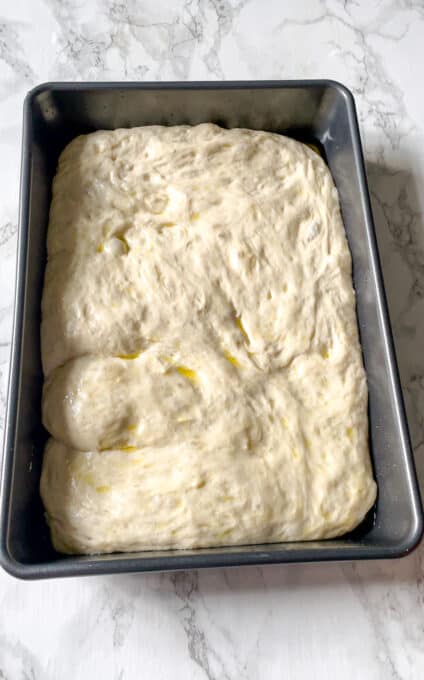
Spread the dough out into the pan. Cover with towel; let rise in a warm place until it spreads naturally and rises again, about 2 hours.
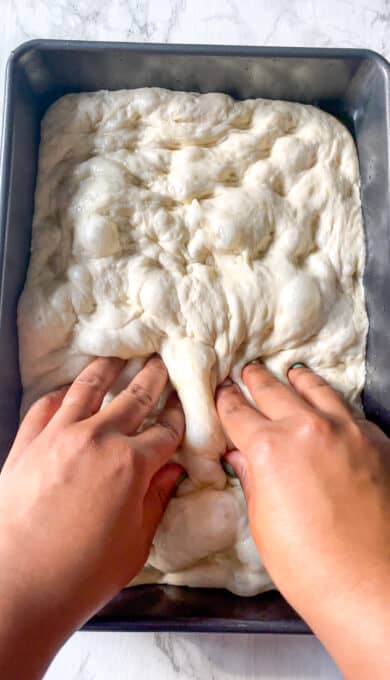
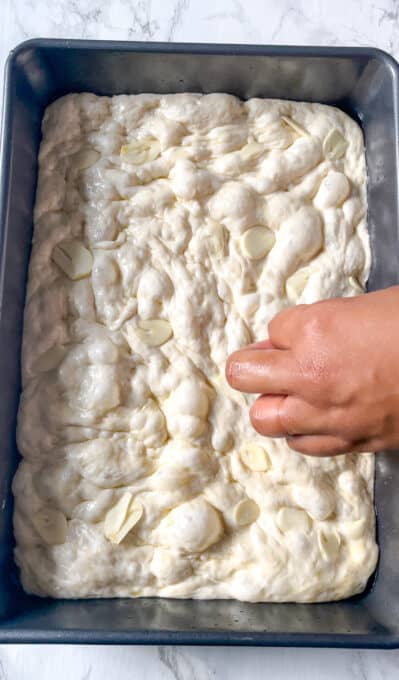
Preheat oven to 400°F/200°C.
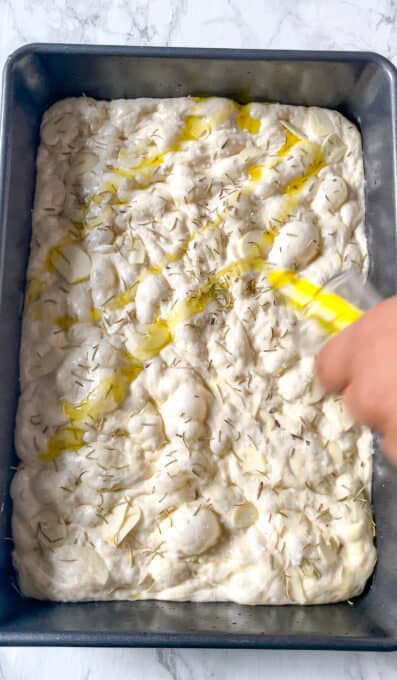
Add the divits. Using your lightly oiled finger, dimple the focaccia bread all over.
Add the seasonings. Add the garlic pieces into a few of the holes evenly all over and sprinkle the Italian seasoning and dried rosemary all over too. Drizzle the sea salt over top. Drizzle the remaining 2 tablespoons of olive oil over the dough.
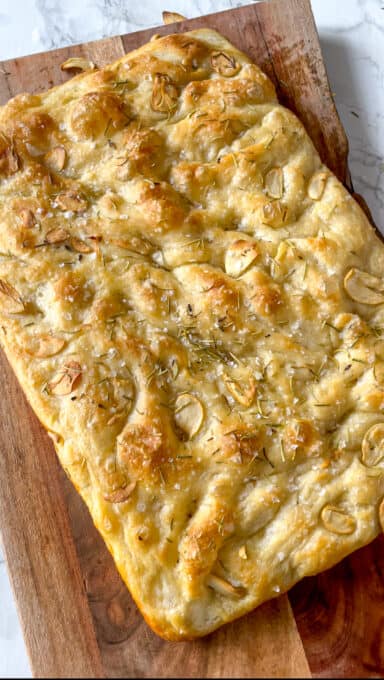
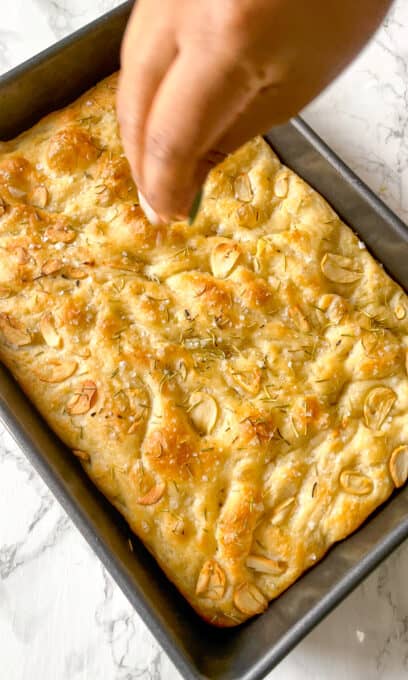
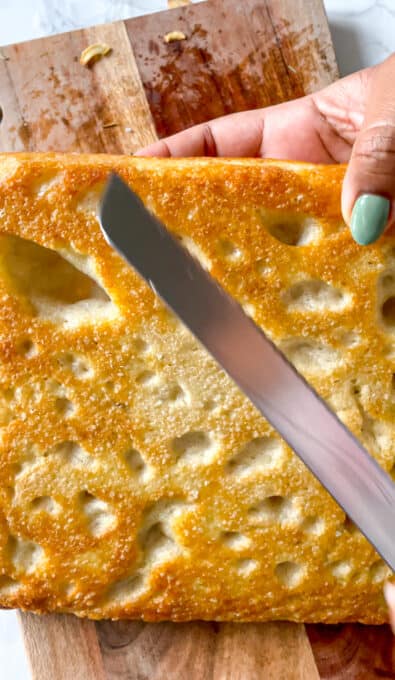
Bake for 30 minutes until golden brown on top. Remove from the oven. Cool slightly and top with more salt if desired, cut and serve with extra oil + balsamic vinegar for dipping. Enjoy!
Tips for Success
- Rise Time – I know it’s tempting to skip the rise time, but let me count the ways it makes a massive difference! You *can* reduce it to only a 2 hour rise time, and a 30 minute second rise and it’ll great
- Checking Your Yeast is Fresh – You would never want to do all of that work just for your bread not to rise! Ensure your yeast is fresh!
- Serve with a dip – If you’re like me, as amazing as this bread is by itself, you’ll want to include a olive oil and balsamic vinegar dip – equal parts, swirled together and drizzled over the bread.
- Don’t skimp on the olive oil – especially if you want that crispy bottom and that mix of crispy flaky and soft in one bite.
- Use coarse sea salt or flaky sea salt on the exterior – if you have the option, I highly recommend larger sea salt granules on the outside of the bread such as flaky sea salt or coarse larger sea salt. More bite, more flavour nuance and it’s prettier too!
How to Store
Focaccia is at its absolute best when it is fresh from the oven. If you need to store extras, you can place the cooled focaccia in an airtight container and store it on the counter for up to 2 days. If the bread gets soft while stored, you can crisp it up a bit by placing it in an oven heated to 350F for about 5 minutes.
More Bread Recipes

Garlic and Rosemary Focaccia Bread
Ingredients
- 3 ¼ cups all-purpose flour , or Gluten Free Focaccia Bread for gluten free
- 2 ¼ teaspoons instant yeast, (or 1 packet)
- 1 tablespoon sugar
- 1 teaspoon salt
- 1 ½ cups water
- 4 ½ tablespoons extra virgin olive oil, + more for greasing the pan
- 3 cloves garlic, thinly sliced
- 1 teaspoon dried italian seasoning
- ½ teaspoon dried rosemary
- ¼ teaspoon sea salt
Instructions
- Combine flour, dry yeast, sugar and salt in a large mixing bowl and stir until blended.
- Combine water and 2 tablespoons olive oil in a 2-cup glass measuring cup OR microwave-safe bowl. Microwave on HIGH in 15 second increments until very warm but not hot to the touch (120° to 130°F). Add to flour mixture.
- Fold over dough a few times, and then place in an oiled bowl (you can use ½ tablespoon of the olive oil) and cover. Allow to rise 6-8 hours on the counter, OR for 18-24 hours overnight in the fridge.
- Generously oil a 13 x 9-inch pan and then pour the dough in. (Don’t worry if the dough isn’t even or filling the corners.) Cover with towel; let rise in warm place until it spreads naturally and rises again, about 2 hours.
- Preheat oven to 400°F/200°C.
- Using your lightly oiled finger, dimple the focaccia bread all over. Add the garlic pieces into a few of the holes evenly all over and sprinkle the italian seasoning and dried rosemary all over too. Drizzle the sea salt over too. Drizzle the remaining 2 tablespoons olive oil over the dough.
- Bake for 30 minutes until golden brown on top. Remove from the oven. Cool slightly and top with more salt if desired, cut and serve with extra oil + balsamic vinegar for dipping. Enjoy!
Notes
Expert Tips & FAQ for making the Best Focaccia Bread
Rise Time – I know it’s tempting to skip the rise time, but let me count the ways it makes a massive difference! You *can* reduce it to only a 2 hour rise time, and a 30 minute second rise and it’ll great Checking Your Yeast is Fresh – You would never want to do all of that work just for your bread not to rise! Ensure your yeast is fresh! Serve with a dip – If you’re like me, as amazing as this bread is by itself, you’ll want to include a olive oil and balsamic vinegar dip – equal parts, swirled together and drizzled over the bread. Don’t skimp on the olive oil – especially if you want that crispy bottom and that mix of crispy flaky and soft in one bite. Use coarse sea salt or flaky sea salt on the exterior – if you have the option, I highly recommend larger sea salt granules on the outside of the bread such as flaky sea salt or coarse larger sea salt. More bite, more flavour nuance and it’s prettier too!Disclaimer: Although jessicainthekitchen.com attempts to provide accurate nutritional information, kindly note that these are only estimates. Nutritional information may be affected based on the product type, the brand that was purchased, and in other unforeseeable ways. Jessicainthekitchen.com will not be held liable for any loss or damage resulting for your reliance on nutritional information. If you need to follow a specific caloric regimen, please consult your doctor first.


I was definitely intimidated by the 8 hour rising time followed by a two hour second rise, but not only was this EASY, it took NO TIME! I mixed the dough in 8 minutes before I left the house for the day, came back And flipped it into the pan for the second rise, left again and came back to make it for 30min…it was AMAZING! I’ll be making this over and over and over! JESSICCCAAAA!!! Keep the bread recipes coming, girl!! This girl won’t be buying anymore $6 loaves of bread from the market!
Oh wow! Thank you so much Renee! We’re so happy that you like it!
Hi Jess, this looks delicious!!! I don’t have a microwave though, can I do the warming bit in the oven?! 😛
Hi Leanne you can heat the water in a pot. As long as you are mindful of the temperature. I hope this helps!
This was delicious! Its a little dangerous though because my family gobbled up the entire thing when it came out of the oven. We dipped in homemade tomato soup. It was perfect!!!!
Haha! Thanks so much for the positive review Meg. We’re so happy that you and your family enjoyed it!
Do you think I would I have same results swapping the flour for Bob’s Red Mill Gluten Free 1 to 1 flour???
Hi Pam,
I have a gluten free focaccia fully tested with this flour here: https://jessicainthekitchen.com/gluten-free-focaccia-bread-garlic-rosemary-tomatoes/ enjoy so much!
What is the best way to store this??
Hi Kelly thank you so much for reading. The best way is to wrap it tightly in Saran Wrap and place it in a cool dark place ( like a pantry). I hope this helps.
So easy and delicious! We absolutely devoured the bread with our lasagna. Never going back to store bought!
We’re happy that you enjoyed it Nicole! Thank you for such a nice review!
So simple and sooooooo yummy!!! We loved this and will be making again!
Thanks so much Amy! We’re happy you like it.
AMAZING AND EASY!!!! I doubled the recipe to gift a loaf to my friend, and our loaf vanished way too fast! Brushed pesto/oil mixture on one half, and original herb blend on the other half. Don’t skimp on the olive oil!!! The crunchy edges are the best!!! Thanks for an awesome recipe!
Thanks so much! We’re so happy that you like it!
It was great bread need to spread it thin to get it all crispy. I also recommend using shortening or spray oil to grease the pan, because olive oil made the bread stick to the pan.
This bread was amazing! I’ve never made any kind of bread before but the recipe worked perfectly. I made a garlic infused olive oil to impart more garlic flavor (the whole house smelled like roasting garlic but the flavor was perfect, not too overpowering). I also left out the rosemary for personal preference, and the bread turned out great (though I wasn’t confident in my abilities, I trusted the process and it paid off). It was really yummy by itself, and also as pizza bread or just dipped in marinara. It was a hit with my whole family. Thanks so much for this easy recipe!
Awesome Georgia! We’re so happy that you liked our recipe, but to hear that your whole family loved it too is amazing! Thank you for this review.